I've spent weeks looking at the issue of Cookies and History persistence now, since I was alerted to the possible issues in the first place. It's been a frustrating voyage of discovery, punctuated with epiphanies, server rebuilds and quite a few journeys straight back to the drawing board. So, I thought it would be prudent to share my findings with all and sundry, just to give you a heads-up on what potentially awaits!
This article is going to be divided into three parts. Part 1 will cover the background and my initial tests using traditional methods vs. AppSense DesktopNow methods. Part 2 will spread out further and perform testing on some of the "lite" UEM technologies to see how they measure up to this infuriating task (UPM and UE-V). Part 3 will extend the tests onto some more UEM tech (actual vendors to be confirmed).
First of all, let's get a disclaimer in. This is only based on testing in my lab on a limited set of parameters, so I'm not expecting these to be absolutely indicative of what you may observe in your own environments. In fact, the reports I am getting from others in the field suggest that you may see markedly different behaviour dependent on the nature of your web applications and users. However, I am hoping that this can provide some pointers on what to expect, in order to save others from the rollercoaster that I seem to have experienced!
I've provided configurations for the various methods I used for testing, but please edit these carefully - they are specifically designed for my lab, so you will need to pay attention when setting them up for your own environments. I'm not going to be held responsible for any production-level disasters you may cause through lack of due diligence!
Background
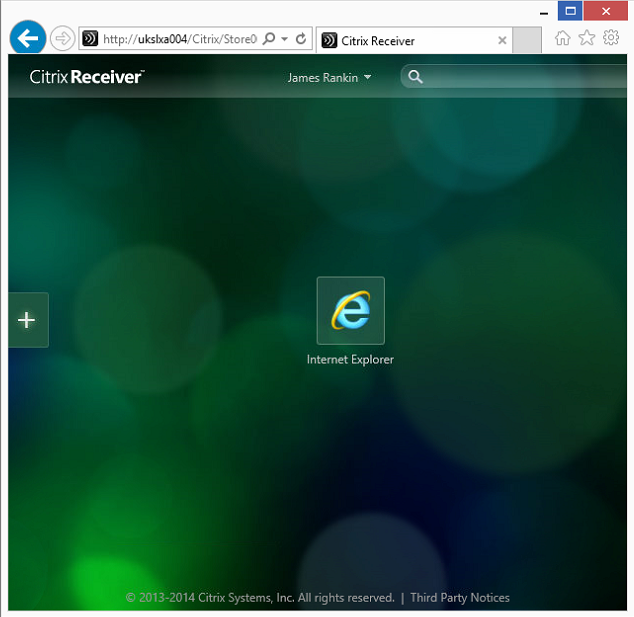
What's annoying is that Microsoft appear to have made these changes without any thought to those of us who have roaming user environments. XenApp and Terminal Server technologies have been around (in technology terms) for an absolute age. Can Microsoft really be this far behind the curve in dealing with users who want persistent settings across multiple endpoints?
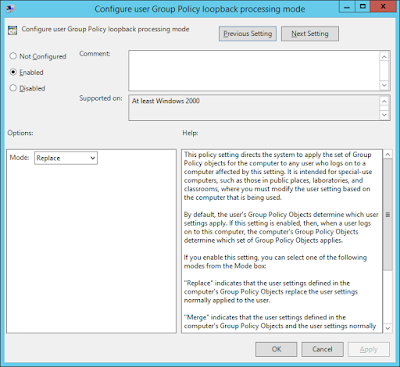
![]() |
| IE10 makes things easy? Pull the other one, Microsoft |
Folder Redirection has long been Microsoft's preferred way of dealing with issues like this - but the fact that you can't actually redirect Cookies and History using Microsoft's GPO method should be a bit of a warning. Naturally, you can do it via Group Policy Preferences just by setting the right value in HKCU\Software\Microsoft\Windows\Explorer\User Shell Folders, but this is apparently not recommended. Even if you were using a roaming profile, History would still be out of the equation (as we will soon see), because it lives in %LOCALAPPDATA%. I've seen forum posts suggesting getting around this by redirecting %LOCALAPPDATA% using symbolic links - and that just sounds like a world of application-level hurt.
I'd be interested to find out Microsoft's official position on redirecting Cookies and History - although their silence in the face of my continued complaints about this issue has been deafening (more on this further on). It seems ludicrous that in a modern age we should still be stuck with the possibility that a user can't roam some basic browser settings from device to device - and even more ludicrous that the so-called "improvements" to Cookies and History have killed this functionality where previously it was possible to get it to work (somewhat). The one article I did find offers a fantastic quote which shows how far in the dark ages Microsoft is capable of being - imagine this in a XenApp environment with siloed applications... "Restrict roaming user profiles so they work on only one computer at a time. Using a single roaming profile on multiple computers isn’t supported (via console or Remote Desktop) and can cause unpredictable results, including cookie loss."
It's also really annoying that even if you can get Cookies and History to roam, on Windows 8.x and Server 2012 this only applies to the desktop version of Internet Explorer. If you're using any of the newer Windows' versions fancy Modern bits, then you're screwed - Cookies set by the Immersive version of IE or by Windows Store apps can not be managed in a roaming profile.
And a word on redirection in general. For things like Documents, Favorites, Downloads, etc., I'm still a big fan of Folder Redirection, but for anything that involves a lot of small files or files that are closely tied to the operating system - such as History and Cookies - I'm starting to feel it should be handled differently. Certainly, I have observed my best results when I've taken Folder Redirection out of the equation. It always seems to be working, but I've never done such a protracted amount of testing on a single process before. With redirected Cookies and History, you seem to observe a lot of odd and inconsistent behaviour. Sometimes cookie warnings reappear. Occasionally cookies don't roam until your second or third logon. Some websites don't add themselves to History. You see other strange folders appearing in the root of your redirection. Lots of little niggly things happen that are difficult to reproduce, and these sorts of issues are the bane of users and support staff alike. In fact, it's possible that Favorites redirection isn't such a great idea either - see this article for some discussion of it.
Environment
In my test environment, I've prepared three distinct platforms. We have a Windows Server 2008 R2 RDS Server, a Windows 2012 R2 RDS Server, and a Windows 8.1 client. I did also want to test this on Windows 7, but Microsoft appear to have hidden the trial versions of Windows 7 so successfully, they've made testing on it no longer possible.
Platform 1
Windows Server 2008 R2 SP1 RDS, fully patched (including latest IE cumulative updates)
Citrix XenApp 7.6
Platform 2
Windows Server 2012 R2 RDS, fully patched (including latest IE cumulative updates)
RemoteApp
Platform 3
Windows 8.1 client, fully patched (including latest IE cumulative updates)
There are no other applications installed, and no antivirus. Active GPOs are Disable IE Enhanced Protected Mode, Delete cached copies of roaming profiles, Allow creation of symbolic links and Disable UAC.
When using persistence methods that leverage AppSense DesktopNow, I actually used the beta of EM 8 FR 6 (a bit silly, I know, but I was in the middle of beta testing). I'm hoping there isn't that much difference in the operation of Personalization Server and Policy from EM 8 FR 5!
On Server 2008 R2 we will test IE8, IE9, IE10 and IE11, and on the other platforms IE11 only. Each instance will have the latest cumulative IE updates applied for the required version.
Persistence methods
We've defined quite a few persistence methods. I'd expect the "normal" method that people are currently using in AppSense DesktopNow to be Method 7 (AppSense Personalization Server with Redirection). We've covered quite a few to try and get an idea of what works, and what doesn't.
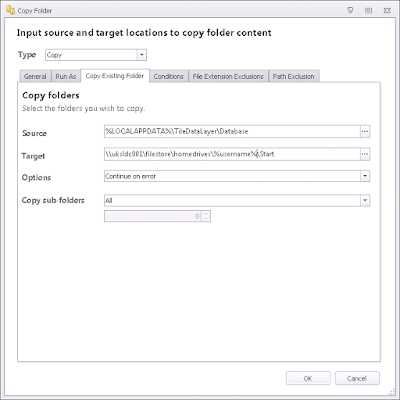
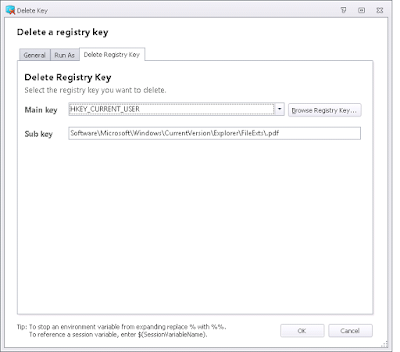
Where "Redirection" is included this means we will be redirecting the Cookies and History folder to network locations (you have to do this through Environment Manager - it isn't supported by GPO, although you could simply use Group Policy Preferences to set the required Registry value). You may notice that the AppSense EM Folder Redirection Action doesn't work for History if you're aiming at a network drive - you have to set the Registry value through a Registry Action instead. This is actually due to a limitation of the Microsoft Folder Redirection API, which can only redirect History to a local folder, so it's always been the case that you would need to use a Registry Action to push this to a UNC path (thanks to Richard Thompson for the education).
Method 1 - Local profile
Quite simple, we are using a local profile that persists on the endpoint.
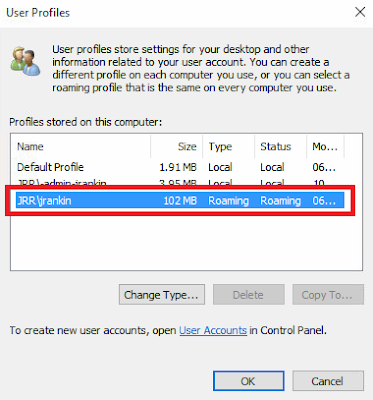
Method 2 - Roaming profile
Again, very simple, a standard Microsoft roaming profile.
Method 3 - Roaming profile with redirection
This method uses a standard Microsoft roaming profile with the Cookies and History folders redirected to the network.
Method 4 - Mandatory profile with redirection
This method uses a standard Microsoft mandatory profile with the Cookies and History folders redirected to the network.
Method 5 - AppSense full Personalization Server (with mandatory profile)
This method puts all of the data into Personalization Server, including Cookies and History. The exact settings are covered in the Details section below. When using this method with IE10 or higher, the Windows Personalization Group for IE10+ Cookies and History must also be added to the Personalization Group.
Method 6 - AppSense file and Registry hiving (with mandatory profile)
This method eschews Personalization Server and puts all Internet Explorer settings into Policy Configuration which are loaded at logon and saved at logoff. The exact settings are in the Details section.
Method 7 - AppSense Personalization Server with redirection (with mandatory profile)
This is what most AppSense admins would probably consider the "traditional" method of saving these settings - Personalization Server for the IE settings, with Cookies and History redirected to network locations. We have edited it slightly though - see the Details section.
Method 8 + 9 - Citrix User Profile Manager and Microsoft UE-V
The intention was to test two of the lighter UEM versions as part of this, but the first seven methods took so long I've had to move these across to part #2 of the article.
Details
We've made a few changes from the defaults in our persistence methods - these changes (and downloadable configs) are detailed herein.
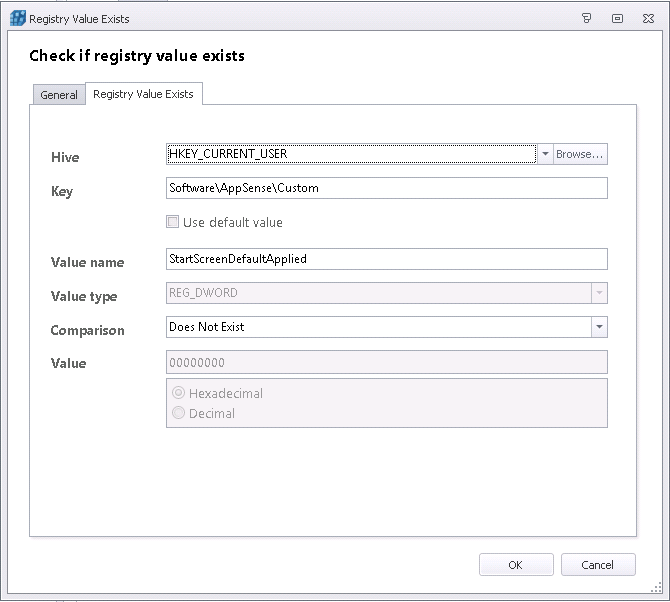
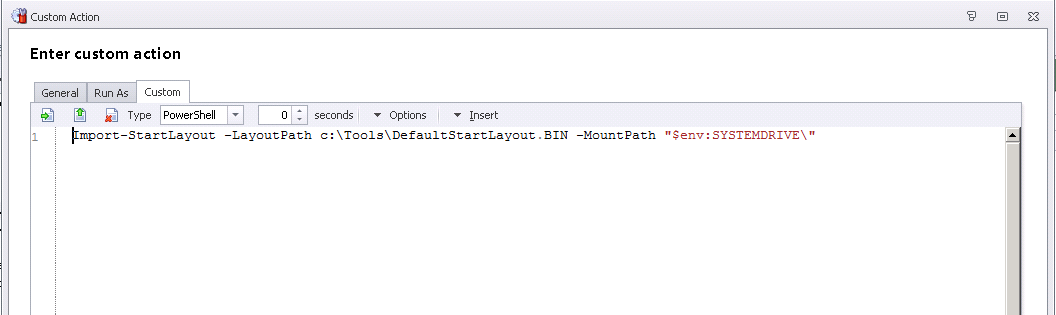
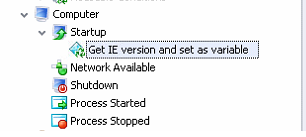
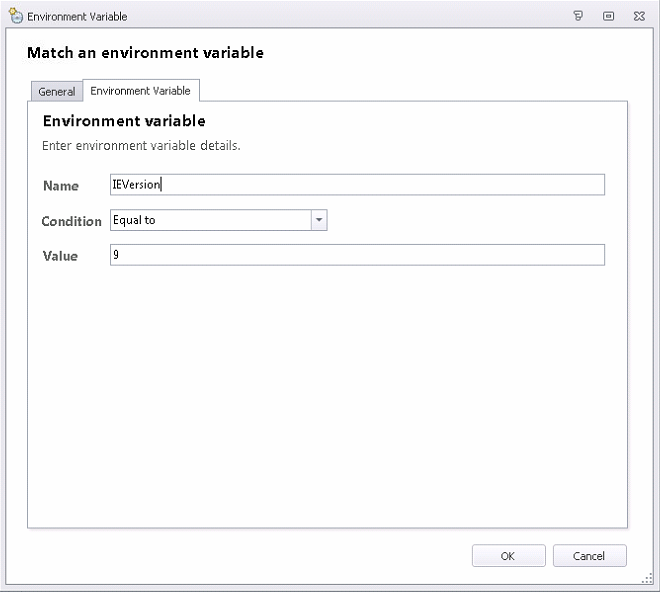
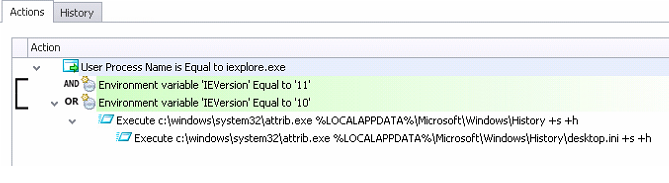
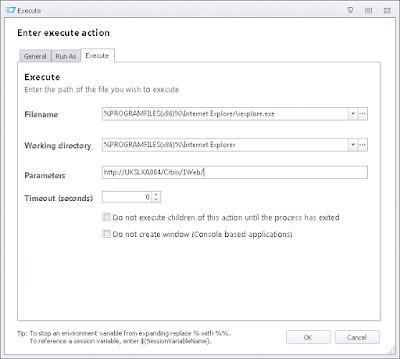
Globally, we have set a Computer Startup Action to list the Internet Explorer version as a variable (see this post for more details). This is required because versions 10 and 11 introduce some aberrant behaviour which needs to be dealt with at process launch. Dependent on how you deploy your new versions, you may or may not need something similar. The required Actions are contained in all of the configurations that are available for download here (see later).
Method 1 + 2 - local/roaming profile
No special configuration is required here, merely the presence of the profiles.
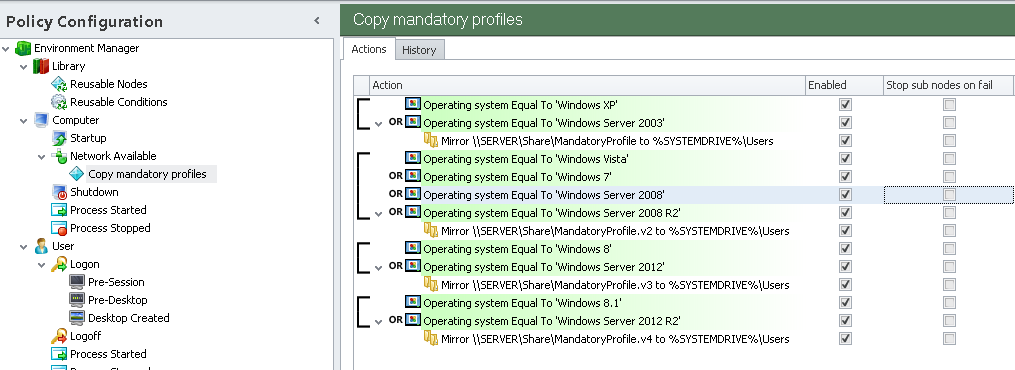
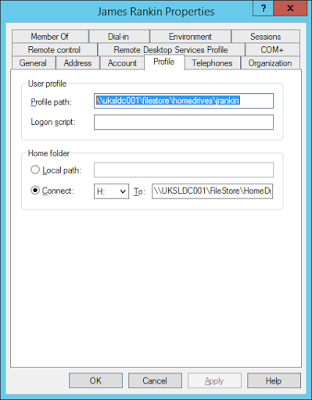
Method 3 + 4 - Roaming/mandatory profile with redirection
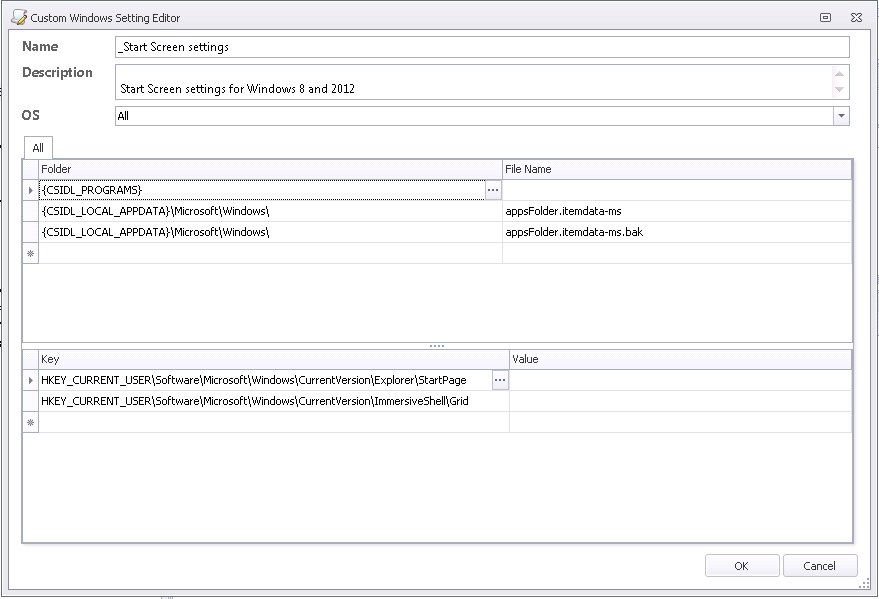
Method 5 - AppSense full Personalization Server (with mandatory profile)
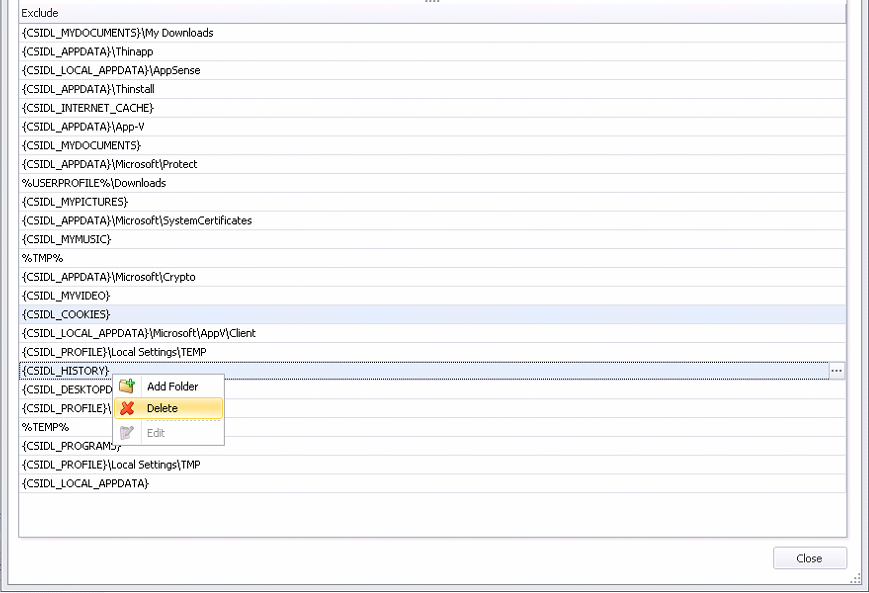
In order to set up this method, you need to make a few changes to the Personalization Server settings (well, quite a bit, actually). First, we need to take {CSIDL_COOKIES} and {CSIDL_HISTORY} out of the top-level application exclusions so that the Cookies and History data will actually be saved into Personalization Server.
![]() |
| Remove {CSIDL_COOKIES} and {CSIDL_HISTORY} from the global exclusions |
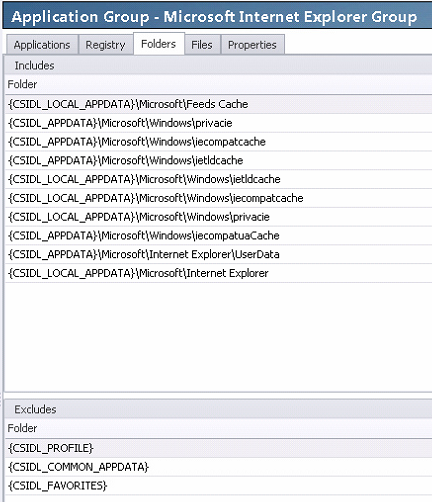
Next, we need to configure the includes and excludes for our Internet Explorer Application Group. They are slightly different from the defaults.
![]() |
| Folder Includes and Excludes for the IE Application Group |
![]() |
| Registry Includes and Excludes for the IE Application Group |
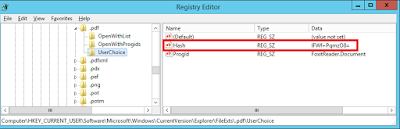
The most notable change is the addition of the key HKCU\Software\Microsoft\Windows\CurrentVersion\Internet Settings\5.0\Cache\Extensible Cache to the Registry Includes. This seems to deal specifically with History persistence.
Now you'll need to link the IE10+ Cookies and History Windows Personalization Group to the specified Personalization Group. You will need to edit the settings in this group (may be an idea to clone it first) and add this Registry key into it also
HKEY_CURRENT_USER\Software\Microsoft\Windows\CurrentVersion\Internet Settings\5.0\Cache\Extensible Cache
(Yes, that's the same one as we've already added into the Application Group, but it seems to be necessary to duplicate them!)
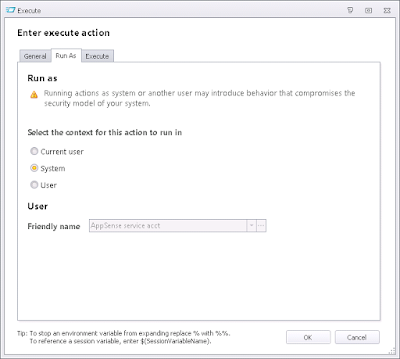
Also, if you're pre-EM 8 FR 5, remove rundll32.exe from the Default Blacklist.
Method 6 - AppSense file and Registry hiving (with mandatory profile)
This method needs all of the IE settings removing from Personalization Server (including the Windows Personalization Group, if we are on version 10 or higher). You should then apply the following configuration (very carefully change this to match your infrastructure), which should save all settings for Internet Explorer onto a network location at logoff and reimport them at logon.
It's maybe worth noting at this point that using this method for IE settings may have much more mileage in it in general. Think of how many (non-browser) applications actually use IE settings these days - for instance, where do applications get their proxy server settings from? As IE is tied so closely to the Windows operating system, it may be worth dealing with it as an OS-level setting, rather than an application in itself.
Method 7 - Personalization Server + redirection (with mandatory profile)
This is probably the method you may already be using, but we have made a few adjustments. Firstly, make sure that {CSIDL_COOKIES} and {CSIDL_HISTORY} are in the global exclusions list, rather than removed as in Method 5 above. Then, make the changes to the Internet Explorer Application Group settings in the same way (they are reproduced below again for posterity). As we're using redirection, the Windows Personalization Group for IE10+ Cookies and History should not be linked to the Personalization Group.
Testing process
We also need to clearly define our testing parameters. In the interests of trying to keep it fairly straightforward and not overly time-consuming, we set up a few simple tests for persistence of Cookies, and History. One of the more pertinent tests was the one which checks whether History still persists when the system clock was moved forward by 48 hours. In our testing, there were a lot of times History would persist, but only for a period of one day (I actually observed this on a client site over three years ago).
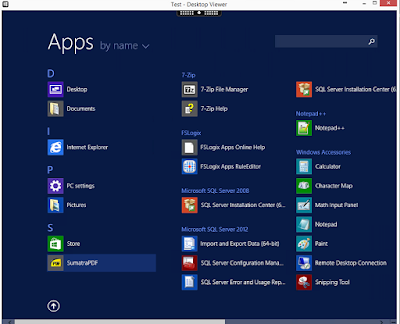
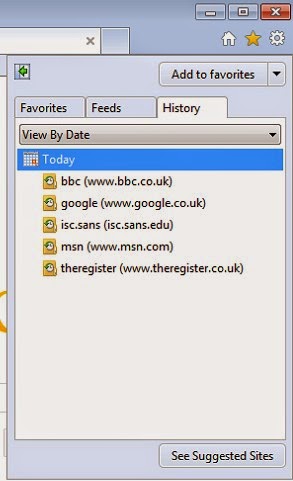
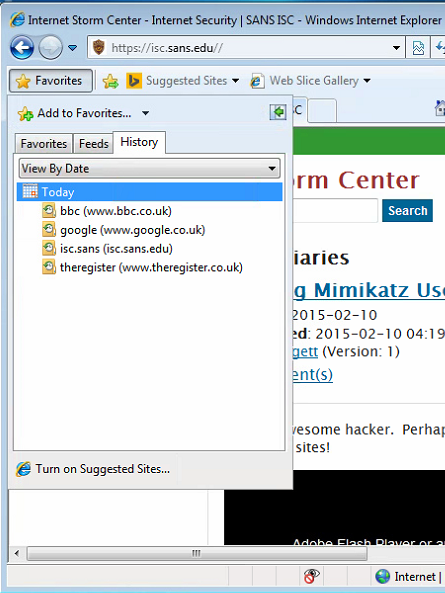
It's worth clarifying at this point what we actually mean by History (I've seen many people confuse this in the past). We all know what Cookies are (hopefully!) - let's make sure we're in agreement about History too. Some people mistake History for the record of items typed in the IE Address Bar - but just so you know, I (and Microsoft) refer to that as "TypedURL History". "History" is what you get when you click the "star" button in IE (see below), or press Ctrl-H in IE8.
Test 1
Browse to www.google.co.uk. Respond to the cookie warning. Log the session out, log back in, verify that the cookie warning no longer appears.
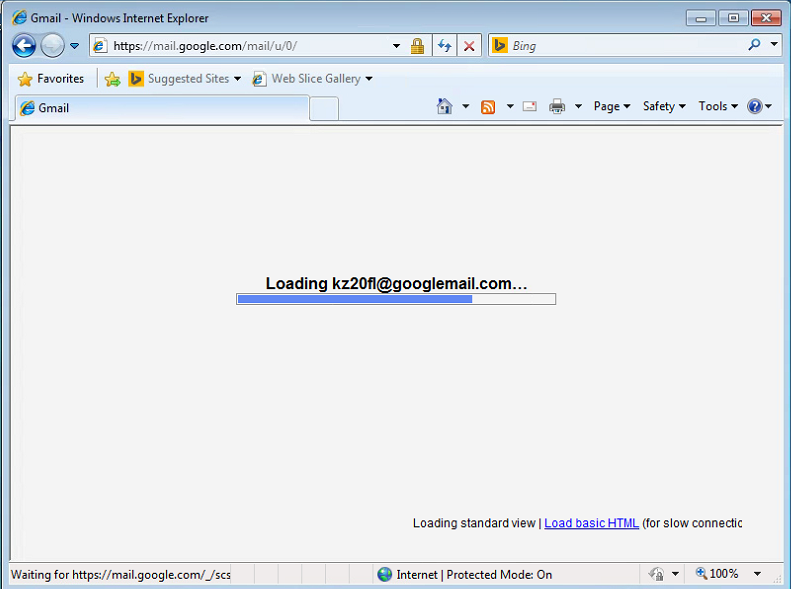
Test 2
Log in to an account at mail.google.com. Close the session. Log back in, verify that the Google Mail account logs in automatically using the cookie.
Test 3
Browse to www.bbc.co.uk/news. Respond to the cookie warning. Log the session out, log back in, verify that the cookie warning no longer appears.
Test 4
Browse to theregister.co.uk. Respond to the cookie warning. Log the session out, log back in, verify that the cookie warning no longer appears.
Test 5
Open up the History folder. Verify that the websites visited so far all appear in History. Log the session out, log back in, verify that the History is still present.
Test 6
Put the system clock forward 48 hours. Log in and verify that the History and Cookies are still persisting correctly (pay particular attention to History).
These tests will be repeated, as we specified previously, for IE8, IE9, IE10 and IE11 on Windows Server 2008 R2, and on IE11 only for Windows 2012 R2 and Windows 8.1.
Results
So, let's see just how well each of these persistence methods fared!
Internet Explorer 8 on Windows Server 2008 R2
| Test 1 | Test 2 | Test 3 | Test 4 | Test 5 | Test 6 |
| Local profile | Pass | Pass | Pass | Pass | Pass | Pass |
| Roaming profile | Pass | Pass | Pass | Pass | Fail | Fail |
| Roaming profile with redirection | Pass | Pass | Pass | Pass | Pass | Pass |
| Mandatory profile with redirection | Pass | Pass | Pass | Pass | Pass | Pass |
| AppSense (full PS) | Pass | Pass | Pass | Pass | Pass | Pass |
| AppSense (file and Registry hiving) | Pass | Pass | Pass | Pass | Pass | Pass |
| AppSense (PS with redirection) | Pass | Pass | Pass | Pass | Pass | Pass |
Nothing really to note about these findings, except that IE8 seems quite robust. As History is stored by default in %LOCALAPPDATA%, the failure on the last two tests of the roaming profile is expected.
It is interesting to note that the Google cookie warning (Test 1) didn't actually appear at all on IE8, not even the first time. Also, to get rid of the Google "Update your search engine" warning, you actually need to add google.com and google.co.uk to Compatibility View. These anomalies aside, though, everything behaved entirely as we thought it would.
Internet Explorer 9 on Windows Server 2008 R2
| Test 1 | Test 2 | Test 3 | Test 4 | Test 5 | Test 6 |
| Local profile | Pass | Pass | Pass | Pass | Pass | Pass |
| Roaming profile | Pass | Pass | Pass | Pass | Fail | Fail |
| Roaming profile with redirection | Fail | Pass | Pass | Pass | Pass | Pass |
| Mandatory profile with redirection | Fail | Pass | Pass | Pass | Pass | Fail |
| AppSense (full PS) | Pass | Pass | Pass | Pass | Pass | Pass |
| AppSense (file and Registry hiving) | Fail | Pass | Pass | Pass | Pass | Pass |
| AppSense (PS with redirection) | Fail | Pass | Pass | Pass | Pass | Pass |
It's here that my previous observations about redirection start to show up, regarding the occasional oddness displayed when using it. The fact that a mandatory profile failed Test 6 whilst a roaming profile passed is rather strange, as the folder should be redirected onto the network for both methods.
Test 1 (Google cookie warning) failed on quite a few of the persistence methods. However (as they constantly reminded me!) IE9 is no longer a browser supported by Google, so it is possible this may have been the reason for this. Also, the Compatibility View fix mentioned earlier, to get around the Google update warning, still stands.
Migration of settings from IE8 to IE9 appears flawless. The existing settings appeared without any fuss, so clearly both browser versions are using the same processes under the hood.
So, a couple of anomalous observations, but otherwise IE9 seems pretty good for persistence of user Cookies and History data.
Internet Explorer 10 on Windows Server 2008 R2
![]() |
| Shudder... |
| Test 1 | Test 2 | Test 3 | Test 4 | Test 5 | Test 6 |
| Local profile | Pass | Pass | Pass | Pass | Pass | Pass |
| Roaming profile | Fail | Pass | Pass | Pass | Fail | Fail |
| Roaming profile with redirection | Fail | Fail | Fail | Fail | Fail | Fail |
| Mandatory profile with redirection | Fail | Fail | Fail | Fail | Fail | Fail |
| AppSense (full PS) | Pass | Pass | Pass | Pass | Pass | Pass |
| AppSense (file and Registry hiving) | Pass | Pass | Pass | Pass | Pass | Pass |
| AppSense (PS with redirection) | Fail | Fail | Fail | Fail | Fail | Fail |
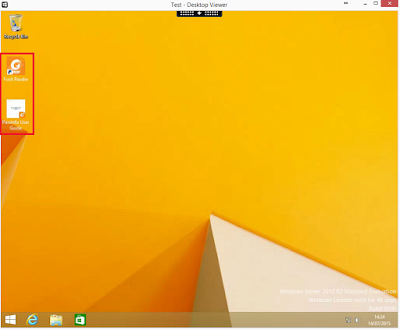
So, we can straight away see that involving redirection in this mix leads to a whole bunch of fails. All of the persistence methods that utilize redirection capitulated utterly.
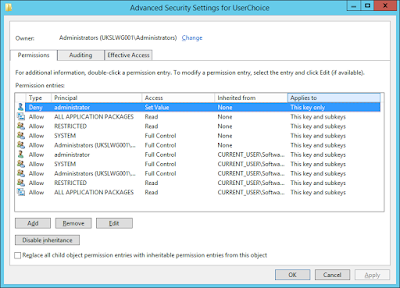
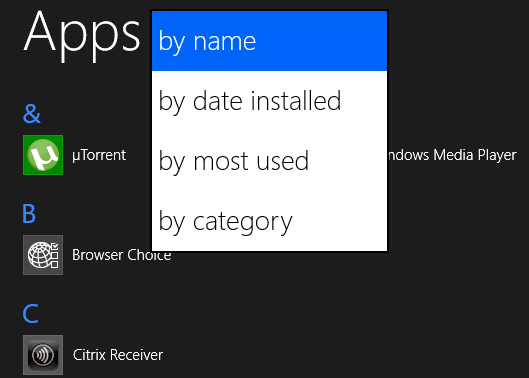
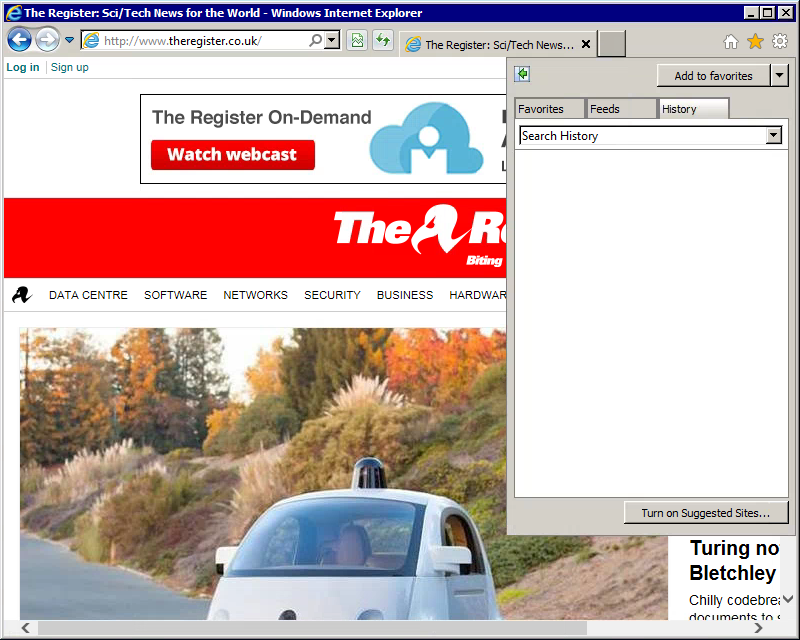
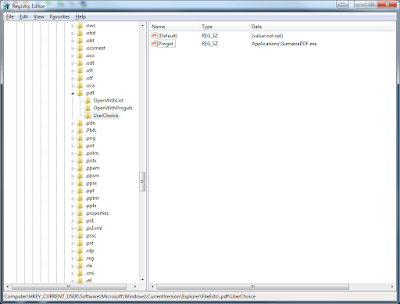
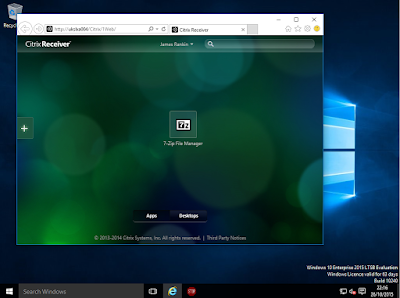
There is also an awful problem of "inaccessible History" that showed up quite a lot in Test 5. This manifests as the History folder being completely blank (see below). The History data is there (you can see it in the Address Bar on occasion), it is simply missing from the History tab. To get around it for Methods 5 and 6, we implemented a file attribute reset Action at IE Process Start via AppSense EM (included in the configurations). This didn't work for Method 7 - resetting the attributes only seems to work when the files are not redirected.
![]() |
| The "inaccessible History" issue in all its glory |
All in all, Internet Explorer 10 demonstrates that redirection of Cookies and History, which seemed to work in IE8 and IE9, is now pretty heavily broken. Glorious.
Internet Explorer 11 on Windows Server 2008 R2
| Test 1 | Test 2 | Test 3 | Test 4 | Test 5 | Test 6 |
| Local profile | Pass | Pass | Pass | Pass | Pass | Pass |
| Roaming profile | Fail | Pass | Pass | Pass | Fail | Fail |
| Roaming profile with redirection | Fail | Fail | Fail | Fail | Fail | Fail |
| Mandatory profile with redirection | Fail | Fail | Fail | Fail | Fail | Fail |
| AppSense (full PS) | Pass | Pass | Pass | Pass | Pass | Pass |
| AppSense (file and Registry hiving) | Pass | Pass | Pass | Pass | Pass | Pass |
| AppSense (PS with redirection) | Fail | Fail | Fail | Fail | Fail | Fail |
At last, some consistency! That's consistency in the sense that IE11 on Server 2008 R2 exhibits the exact same results and problems (inaccessible History) as IE10 did.
Internet Explorer 11 on Windows Server 2012 R2
| Test 1 | Test 2 | Test 3 | Test 4 | Test 5 | Test 6 |
| Local profile | Pass | Pass | Pass | Pass | Pass | Pass |
| Roaming profile | Fail | Pass | Pass | Pass | Fail | Fail |
| Roaming profile with redirection | Fail | Pass | Pass | Pass | Fail | Fail |
| Mandatory profile with redirection | Fail | Pass | Pass | Pass | Fail | Fail |
| AppSense (full PS) | Pass | Pass | Pass | Pass | Pass | Pass |
| AppSense (file and Registry hiving) | Pass | Pass | Pass | Pass | Pass | Pass |
| AppSense (PS with redirection) | Fail | Fail | Fail | Fail | Fail | Fail |
Windows Server 2012 with IE11 differs from Server 2008 R2 in one way - Cookies redirection doesn't fail when using a roaming profile. But, strangely, Method 7 is still a complete failure. History is still another matter though - only Methods 5 and 6 managing to cut it, and that's with the file attributes jiggery-pokery included.
Internet Explorer 11 on Windows 8.1
| Test 1 | Test 2 | Test 3 | Test 4 | Test 5 | Test 6 |
| Local profile | Pass | Pass | Pass | Pass | Pass | Pass |
| Roaming profile | Fail | Pass | Pass | Pass | Fail | Fail |
| Roaming profile with redirection | Fail | Pass | Pass | Pass | Fail | Fail |
| Mandatory profile with redirection | Fail | Pass | Pass | Pass | Fail | Fail |
| AppSense (full PS) | Pass | Pass | Pass | Pass | Pass | Pass |
| AppSense (file and Registry hiving) | Pass | Pass | Pass | Pass | Pass | Pass |
| AppSense (PS with redirection) | Fail | Fail | Fail | Fail | Fail | Fail |
Unsurprisingly, IE11 on Windows 8.1 displayed the exact same behaviour as Windows Server 2012 R2. Nothing new here.
FindingsWell, let's review what we've learned here.
Folder Redirection seems to work quite acceptably when using IE8 and IE9. But go to IE10 or higher, and Folder Redirection breaks dramatically. Reasons for this are possibly the WinInet Scheduled Task, dllhost.exe, and a whole host of other hooks that show up in Process Monitor. I documented some ways to get around this previously, but putting together a load of programmatical fudges to allow Folder Redirection to function as it did previously just doesn't feel right.
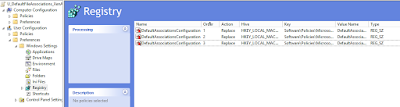
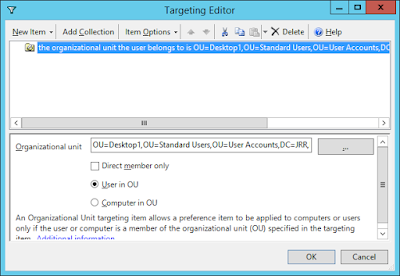
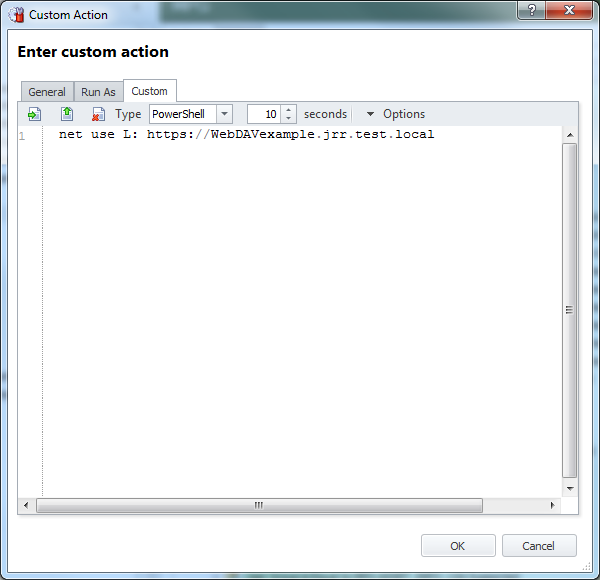
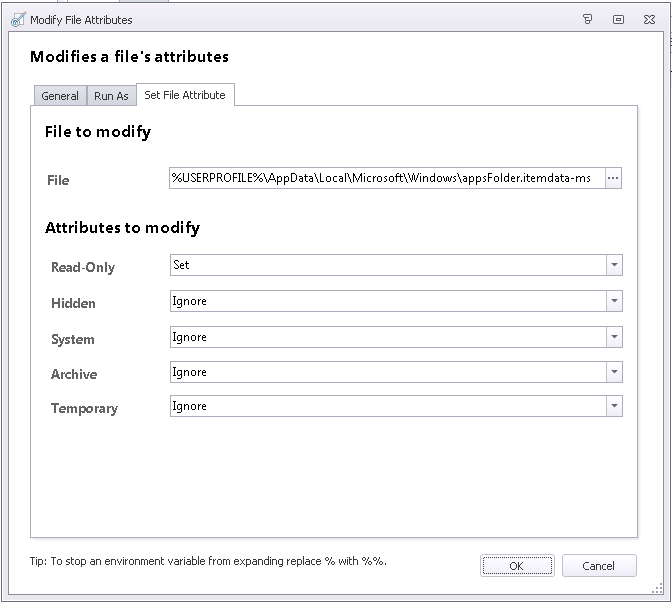
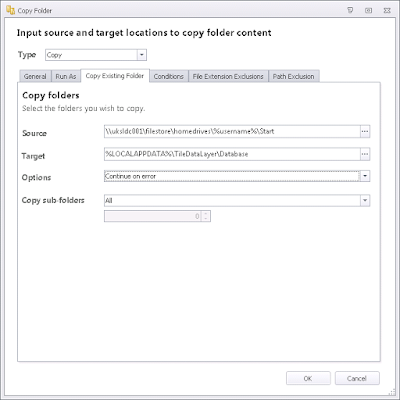
There were two persistence methods that did work consistently in my testing - the "AppSense Full Personalization Server" method and "AppSense File and Registry Hiving". We did have to do some trickery to get these to work - most notably the "reset file attributes" trick at IE Process Start - but once this was in place they both worked consistently well. Is this the way forward?
![]() |
| The "reset file attributes" trick that gets Method 5 and 6 to work with IE10+ |
Despite the fact that it worked consistently in these tests, I do have reservations about Method 5 (full Personalization Server). Putting Cookies and History into the Personalization Server database will involve dealing with lots of small files that are being written quite aggressively, and there will more than likely be a big performance hit involved over time. Add to this the fact that both the IE Application Group and the IE10+ Cookies Windows Personalization Group will both be trying to capture these sets of data (on IE10 and higher), and you've got a method that might work, but also may cause you issues further down the line.
That leaves us with Method 6 (File and Registry Hiving). This is somewhat convoluted to set up and maintain (although the supplied configuration may give you a head start), but it does seem to work reliably. Given the plethora of applications that leverage Internet Explorer settings these days, it may well be a very good idea to use this approach. There's also the fact that doing this in Policy rather than Personalization allows you to use the multi-threaded engine instead of the single-threaded one. There are drawbacks, though. The data can get big, particularly when you move to IE10+ - I've seen the database heading up towards 100MB in some cases. Multiply that by thousands of users, and you're talking a big hit, storage-wise. You also have to copy this data in at every logon, which may or may not be an issue. You also lose the rollback feature of Personalization Server - but you could replace it with something like Volume Shadow Copies. Actually, there are ways to take data like this and capture it into Personalization Server at logoff, allowing you to use the rollback facilities - but that's something we will cover in a future post, as this one is long enough already!
Some of you may be wondering if using Method 7 (Personalization Server + Redirection) would work for IE10+ if combined with the supplied Windows Personalization Group for IE10+ Cookies and History? It well might (I think this was the conclusion I drew in my previous article on Cookies), but the fact that you are both redirecting the folders and capturing the data into Personalization Server makes it a solution that is effectively working at cross-purposes, which is why I didn't consider it for this testing. It may also cause issues further down the line.
I suppose you could combine Folder Redirection with some scripted goodness to reset the attributes on the History folder to get this working on 2012 R2 or Windows 8.1, but that doesn't help you with any Server 2008 R2 instances (or Windows 7, possibly) that you may have. I'm still annoyed I couldn't do the testing on Windows 7, but I'm willing to lay money that it shows the same results as Server 2008 R2. @byteben may be able to confirm or deny this at some point - I know he's had a lot of trouble with Windows 7.
I've been through a lot of pain with this. I've tried crazy things like inserting symbolic links, redirecting %LOCALAPPDATA%, even redirecting the Internet Explorer Extensible Cache. But what I really think (and I might be about to start ranting here), is that Microsoft should fix the f*cking thing (apologies for swearing, but I'm annoyed).
Seriously, why come up with a method for storing IE Cookies and History that doesn't play well in an environment where users roam between devices and sessions? I know they dropped us a big hint that they didn't care about roaming users when Cookies and History were not able to be redirected natively through GPOs any more, but come on, Microsoft, please get a grip. Modern computing environments are agile, comprising different devices, operating systems, and application delivery platforms. But my users can't roam natively between sessions on, say, two XenApp servers and get a consistent experience in terms of the browser data? It's just insane. And what makes it worse is that after all my complaining on Twitter, I was contacted by a Microsoft employee who offered to put me in touch with someone who could help. I was very excited by the prospect of finally maybe finding a way around this that didn't involve using AppSense DesktopNow in the way we have. But despite chasing them on a number of occasions, the last I heard was "the person who can help you is at a conference". That was it - and I've heard nothing since. For a company the size of Microsoft, that's just ridiculous. And compared to people I've had dealings with at Citrix, VMware and AppSense, it's the most unhelpful I've ever known a tech company to be. Basically I've just been ignored. Microsoft, your attitude sucks. If this was a Citrix issue I bet I could've gotten help from the CTP community in a flash, a community that would raise the issue with the vendor if necessary. Microsoft themselves have been absolutely f*cking useless. Period.
Summary
Want your Cookies and History roaming on IE10+? At time of writing, your options seem to be quite limited. Either use AppSense DesktopNow in one of the ways we've described herein, or change your browser. Or maybe go back to IE9. Or you could even use a local profile, but you'll be limited in the scope of your roaming, limited as in restricted to one machine, which by definition isn't roaming at all. That's about it.
That doesn't cover the other UEM vendors out there, though. In part #2 of this article, I will run the same tests past UE-V, Citrix UPM, and any other UEM products I can get my hands on.
As I said earlier, I doubt that my lab testing will reflect absolutely what you may observe in your own environments. However, I sincerely hope that the write-up here may allow some of you out there about to cross this bridge to do so with a deal more knowledge (and forewarning!) than you had previously!Update - part #2 of this article is now available