I've never really written an article based around an AppSense upgrade - they have always been fairly straightforward for me. However, given that EM 8 FR 5 offers a few radical changes, particularly on the Personalization Server end, now might be a good time to do a quick run-through of how an upgrade is done, as many more may be considering doing an upgrade to take advantage of the new features.
This guide refers to a full upgrade of DesktopNow - all the components, including Personalization Server. If you're just doing Environment Manager, Application Manager, Management Center, Performance Manager or any combination of these components, the steps will be simplified somewhat. Performance Manager and Application Manager are mainly quite straightforward, as they normally don't involve database work. Environment Manager and Management Center invariably require database updates and updates for the Personalization/Management web services, so they're a bit more complicated. Please ensure that you know how much you are actually going to be upgrading - this runs nicely into my first point below :-)
Know your existing environment
Know your existing environment
Ensure that you've got a good overview of what your current environment holds and what is to be upgraded. You may need to pay attention to things such as:
- Are you using load balancing for Management Server/Personalization Server?
- How many Management/Personalization Servers do you have?
- What sort of authentication is used?
- Are you using the Config Assistant, Environment Manager Tools, or the EM Browser Interface?
- How many instances of the AppSense consoles are installed in your environment?
Preparation
Naturally, preparing and planning is key. What do we need to do prior to the upgrade?
1. Back up your SQL databases
Obviously the most important part - as long as you have an SQL backup you should avoid any utter disasters. However, this leads us nicely on to point #2, which is one people often forget...
2. Test the validity of your SQL backup
...does the backup actually work? You need to be sure that it's going to bail you out in your hour of need. Why not do a test restore to a separate database and then spin up a quick VM to test that it's working correctly? You can never be too paranoid in the IT world.
3. Take some snapshots of your servers
If they're VMs (and most of the world runs their servers virtualized these days, unless they're shouldering enormous loads), then there's no excuse not to give yourself server-level as well as database-level backup coverage by taking some snapshots.
4. Export agents and configuration files
You can easily save your configurations by exporting them from the Packages tab in the Management Center using the "Export Configuration" command, or even by using "Save As" or "Export configuration as MSI" options from the relevant console. AppSense support recommend doing them as MSI files rather than .a*mp files, but the choice is yours. You can also take copies of the latest agents by simply copying them from the original source files.
The reason for this is because if a configuration or agent becomes corrupted or damaged during the upgrade, you can simply re-add it from the backup files rather than initiating a complete rollback of the SQL database. Of course, there may be those who think any oddness in an upgrade process should immediately be countered with a full rollback - the choice is yours as to how you would proceed in such a situation.
5. Export Personalization Server configuration to an XML file
Next, export your Personalization Server configuration (all of it) to an XML file. Again, if we lose something specific to the Personalization Server side of things (maybe a Personalization or Application Group), then we can import it back in using the functionality provided by the XML file. Also, it can help to have a reference to check whether all of the settings (like Session Data) have been migrated successfully.
6. Disable the installation settings for your Deployment Groups
To avoid erroneously sending out updated configurations or agents before you're all set and ready, I find it prudent to set the installation schedules (for both configs and agents) to Disabled on all of your Deployment Groups at this stage. You will need to verify the process by which new agents and configs are pushed out before going "full auto", so it's sensible to do this. If you're not using Management Center to deploy agents and configs, then disable whatever method you're using (SCCM, Altiris, LANDesk, etc.)
7. Log a proactive support case
If things go heavily belly-up, you will possibly need to invoke AppSense support to help you. To this end, log a case prior to the upgrade and provide them as much detail as possible. Run the support script and upload the results, send them a PSExport (you can request this tool or download it from AppSense Exchange), provide them with information on your infrastructure topology - as much info as possible, really. If the poop comes into contact with the cooling device, then you may not want to waste time gathering information for them when they could be helping put out the fires already.
8. Check TechNotes and Release Notes
Check the AppSense KnowledgeBase on www.myappsense.com (filter by version may help here) to ensure there aren't any known issues for the version you are upgrading to. Also check the Release Notes supplied with the software. For instance, EM 8 FR 5 has a known issue with Outlook Signatures - see TechNote https://www.myappsense.com/Knowledgebase/TN-151170.aspx
Pre-requisites
Next you will need to get some other pre-requisites in place. Ensure that you run through this next list and make sure there's nothing you're unaware of.
1. Service accounts
Make sure you know the account details for all of the AppSense services (possibly a config account, comms account, maybe even a load balancing account). Ensure that the account used to actually upgrade the database has the rights to perform the update (check with your SQL DBA, if, like me, SQL is something of a dark art to you).
2. Database name and instance
This may sound stupid, but make sure you know these, too.
3. Source files
Again, possibly a bit patronizing, but make sure you've downloaded, extracted and made available the correct version of the DesktopNow software bundle.
4. Replication
You will need to disable SQL replication if it is in use prior to commencing, and reinstate it afterwards.
5. Take the Personalization Server(s) offline
It's recommended to stop users accessing the Personalization Servers whilst an upgrade is in process. Unfortunately, there's really no straightforward way of doing this, unless you decide to disconnect the network connectivity of the server whilst doing the upgrade - and even then, unless you've got an SQL instance running on the same system, you will need to turn it back on to configure the database connection. Stopping IIS will work - but it needs to be running when the Personalization Server software is installed, so it can't be left off for the duration. If anyone's got a way of doing this I've overlooked, please feel free to bang it in the comments section and I will update.
Upgrade process
Now, it's down to the nitty-gritty of the process itself. There are a lot of moving parts in an AppSense upgrade, so if you're not particularly familiar with them, they can be a little bit daunting. This is by no means an official guide - it's just a tried-and-tested way of doing them I've found that's served me well in the past. If you've got something to add - please put it in the comments.
It's important from an upgrade point of view that you understand fully the relationship between the clients, web services and databases. I know most reading this will obviously understand this correctly, but just in case there are any first-timers out there, here's a diagram showing the relationship:-

Personalization Servers
I generally start with the Personalization end because if you screw Personalization up, it's infinitely more noticeable to the end users than any failure on the Management Server. The Management Server could go offline for days and all you'd really miss would be the visibility (unless of course you wanted to update your configurations!)
If you've got multiple Personalization Servers, it doesn't really matter what order you do them in. Just do them one at a time rather than together (as the configuration utility can lock up when accessed by multiple processes).
On the first Personalization Server instance:-
- Run the MSI (and subsequently the MSP file, if you're doing an incremental SP) to upgrade the Personalization Server to the latest RTM version
- Run the Personalization Server Configuration Utility
- Upgrade the database schema
- Correct any variances identified by the Personalization Server Configuration Utility
- If you're using the EM Browser Interface, run both the MSI (and MSP file, if necessary) to upgrade the existing EM Browser Interface to the latest RTM version
- Run the EM Browser Interface Configuration Utility (note - if you're upgrading to version 8 FR 5 of Personalization Server, the EM Browser Interface configuration is done by the main Personalization SCU instead, so this step is unnecessary)
- Correct any variances identified by the EM Browser Interface Configuration Utility (again, unnecessary if going to EM 8 FR 5)
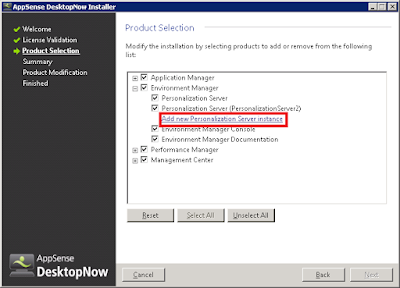
On all other Personalization Server instances:-
- Run the MSI (and subsequently the MSP file, if you're doing an incremental SP) to install Personalization Server on the additional systems
- Run the Personalization Server Configuration Utility
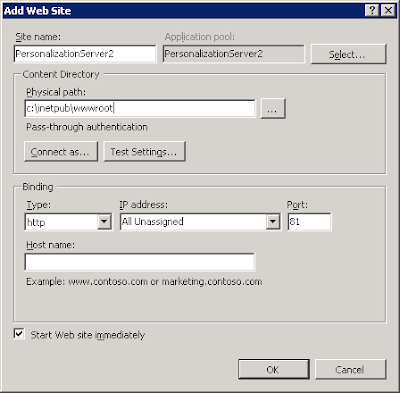
- Attach to the correct database, configure the default web site and the accounts used to connect
- Correct any variances identified by the Personalization Server Configuration Utility
- Run both the MSI (and MSP file, if necessary) to install the EM Browser Interface on the additional systems
- Run the EM Browser Interface Configuration Utility (see caveat about EM 8 FR 5 above)
- Correct any variances identified by the EM Browser Interface Configuration Utility (see caveat about EM 8 FR 5 above)
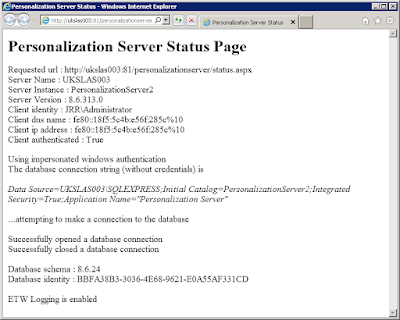
Once you've done this, verify that you can connect to the Personalization Server instance by browsing to http(s)://PersonalizationServerName/PersonalizationServer/status.aspx. If you're using a load-balanced solution, obviously test through the load balanced address.
Management Server
As with Personalization, it doesn't matter what order you do your Management Servers in, as long as you do them one at a time.
On the first Management Server:
- Run the MSI and (if necessary) MSP files to upgrade the Management Server to the latest RTM version
- Run the Management Server Configuration Utility
- Upgrade the database schema
- Correct any variances identified by the Management Server Configuration Utility
On the other Management Servers:
- Run the MSI and (if necessary) MSP files to upgrade the additional Management Servers to the latest RTM version
- Run the Management Server Configuration Utility
- Connect to the correct database
- Correct any variances identified by the Management Server Configuration Utility
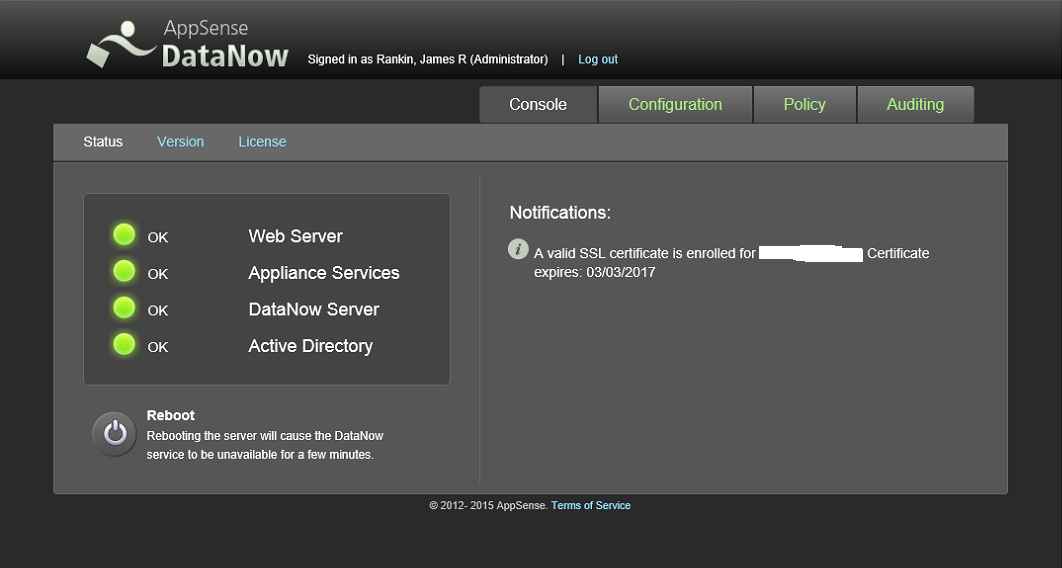
Verify that you can connect to the Management Server by browsing to the following address:
http(s)://ManagementServerName/managementserver/deployment/manifest.aspx. Again, if you're using a load balancer, test by going to the load balanced address.
Consoles
Next, you need to make sure all other instances of your various AppSense consoles (EM, PM, AM and Management Center) are upgraded. The server-end consoles will be done automatically during the upgrade, so it's just any other client-end ones.
You can upgrade the consoles by browsing to http(s)://ManagementServerName/ManagementServer and clicking on the links, by browsing directly to the AppSense source files, or by software deployment tools. All you need to remember is if it is an incremental SP update, run the MSP patch file after you have run the initial MSI file.
Agents
Once the upgrade is done, updated agents will be available in the Management Console for assignment to Deployment Groups. If you've done an incremental MSP update, you may need to import the new agents via the Packages tab in the Management Console to make them available for deployment. If you're using a software deployment tool instead, you will need to grab the source files for the agents and create new packages as required.
At this stage I usually find it prudent to provision some test machines and try a manual installation of the new agents. Start with the Client Communications Agent so that you can verify whether the pre-requisites are installing correctly, then drop all other required agents on there. If this works successfully, move on to deploying the new agents automatically onto a test machine and ensure this process works as expected (e.g. you may want to ensure users aren't confronted by interruptions or multiple restarts).
At this stage, you can start re-enabling the deployment settings that were disabled as part of the upgrade preparation.
Once the new agents are successfully deployed, your clients should be able to function as previously, even if they are still using an older version of the configuration. However, upgrading the configuration is usually done as part of the upgrade process to take advantage of new features and performance enhancements. If you're not upgrading the configuration at this point, you may want to keep an older version of the required consoles available so you can edit the configuration, if necessary.
Configurations
The first time you open an older configuration in a newer console, it will be upgraded to the latest version.

Once it has been upgraded, it can now be assigned to Deployment Groups or software distribution packages as required. When it is upgraded, it must be saved under a new name - this ensures that you can always revert to the last version of the older one if anything stops working or goes wrong. As in the agents section, you may want to test with a manual install first to ensure that everything is working correctly.
Other tasks
Dependent on your environment, you may also need to upgrade and test the following utilities:
Environment Manager Configuration Assistant
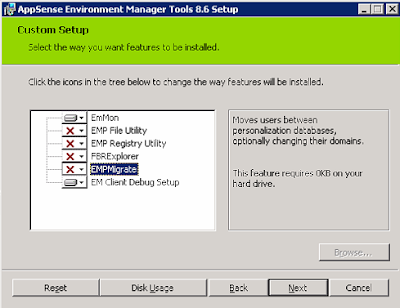
Environment Manager Tools
At this point, it would also make sense to apply any fixes or workarounds that have arisen from any known issues you may be aware of from the Preparation stage!
Testing
Testing is, of course, crucial. Every environment is different, as we all have our own application sets and particular requirements that users need to be fulfilled. If you need somewhere to start, here's a quick checklist of things you should be verifying:
- Logging on without issue or unexpected delays
- Receiving all expected shortcuts and settings
- Verify that common applications work OK (Outlook, IE, Adobe Reader, etc.)
- Verify that common applications have prior Personalization settings (Outlook signatures, Word custom dictionaries, IE Favorites, etc.)
- Change Personalization settings in common applications, log out and back in, verify that changes to settings are persisting
There will always be something that gets overlooked - that's just life - but being as thorough as possible with the testing phase can ensure that you reduce the pain as much as possible, for both yourself and your users!
Summary
Hopefully this guide should help out those who are doing AppSense upgrades, especially people who are finding that they are doing them for the first time. You should also refer to the AppSense Install and Upgrade guides that come with the source files to ensure that nothing gets missed.
If things do go wrong - and sometimes they do - it's always worth touching base with AppSense support to see if the problems can be rectified before heading for a rollback. Naturally there will be a pressure of time, but it's sometimes handy to see if the upgrade can be salvaged rather than wasting the entire change window. Of course, if you're in any doubt about the integrity of your environment post-upgrade, then a rollback is the only sensible step.
Have fun!