Quantcast
Channel: HTG
Viewing all 178 articles
Browse latest View live

IE10 and IE11 Cookies and History persistence in roaming/Citrix situations, a deep dive, part #3

$
0
0
You may recall I did a couple of articles a while ago talking about how IE10+ Cookies and History behaved for roaming users - mainly those on Citrix platforms, although the concepts were perfectly applicable to other roaming situations as well. You may recall that Microsoft had shunted these settings out to a Jet Blue database - a typical modus operandi for them these days, Windows 10's basic profile comes with three of them as standard - and it was very difficult to roam these settings because of various OS hooks.

As far as the investigation got, we found mainly that using Folder Redirection for Cookies or History, in any situation, tended to break rather dramatically, and the only way to reliably roam them was by using AppSense or Citrix UPM with Folder Redirection for these particular folders disabled. Other UEM products may also have worked - sadly, due to pressures of time and work, I didn't get to test any more. However, Microsoft apparently released an update that dealt with the roaming issues - see here for an article that describes this very problem. Essentially, the solution simply creates pairs of .dat files and then imports them into the dreaded webcachev01.dat file at logon. Unfortunately, though, this fix is only implemented when you are using a Microsoft roaming profile - local, mandatory, super-mandatory profiles don't benefit from it.

Meanwhile, Satya Nadella's new agile "mobile first, cloud first" Microsoft have slashed IE support and announced that as of January 12 2016, the only supported IE version will be Internet Explorer 11. Ignoring the fact that they've gone against their initial promise to support a browser for as long as the OS capable of running it (they've lopped a year of support from IE7, four years from IE8 and IE9, and seven years from IE10), this means that we're again stuck in the rush to make sure that all of our sites and web apps are compatible with a new version of IE.

And also, I've noticed that out-of-the-box, IE History seems to be the most part broken for roaming users since IE11 came along.

So, as you can see there are currently a few major drivers for a revisiting of the Cookies and History subject - I promised a part #3, so in view of all these happenings, let's waste no time and get to it!

Testing parameters

We're going to perform the same tests as we did previously, and see how Cookies and History fare in roaming situations for a variety of different types. We're going to test one system only - XenApp 7.6 FP3 on Server 2012 R2 running IE11, with all patches applied. 

We haven't tested on Windows 10 IE11 for a few small(!) reasons:-

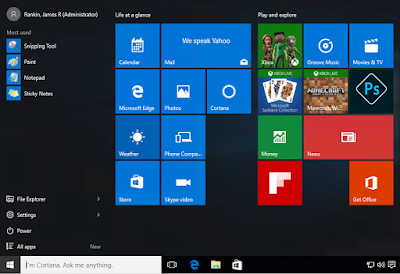
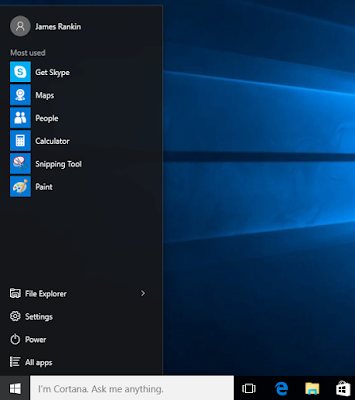
  • Windows 10 Start Menu breaks when you use a mandatory profile
  • Windows 10 Start Menu breaks when you use Citrix User Profile Manager
  • Windows 10 fails to purge profiles correctly when they're mandatory or temporary

Microsoft have earmarked a November release of Windows 10 updates to, allegedly, provide fixes for all the roaming issues I've blogged about so far, which means there will (against all my instincts!) be a part #4 coming hopefully next month some time.

So on our XenApp 2012 R2 IE11 roaming instance, we're going to test these methods of persistence

  • Standard Microsoft roaming profile
  • Standard Microsoft roaming profile with Folder Redirection
  • AppSense DesktopNow with mandatory profile and Personalization Server
  • AppSense DesktopNow with mandatory profile and Folder Redirection
  • Citrix User Profile Manager
  • Citrix User Profile Manager with Folder Redirection

and we're going to run these tests for Cookies and History persistence (lifted from previous articles)

Hopefully, the solutions we come up with should be portable to any UEM technology or persistence method - but I'm not going to make any promises around that :-)

Test 1

Browse to www.google.co.uk. Respond to the cookie warning. Log the session out, log back in, verify that the cookie warning no longer appears.

Test 2

Log in to an account at mail.google.com. Close the session. Log back in, verify that the Google Mail account logs in automatically using the cookie.


Test 3

Browse to www.bbc.co.uk/news. Respond to the cookie warning. Log the session out, log back in, verify that the cookie warning no longer appears.


Test 4

Browse to theregister.co.uk. Respond to the cookie warning. Log the session out, log back in, verify that the cookie warning no longer appears.


Test 5

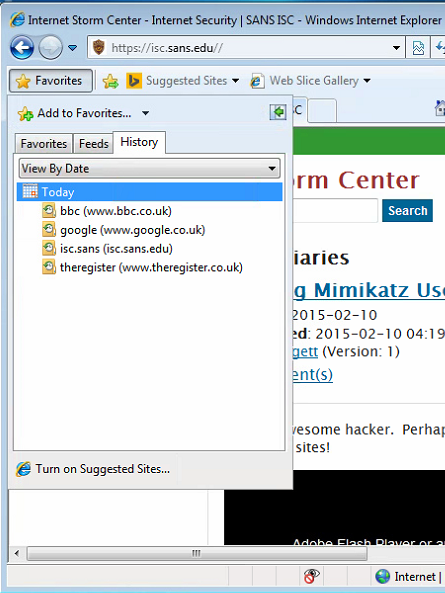
Open up the History folder. Verify that the websites visited so far all appear in History. Log the session out, log back in, verify that the History is still present.


Test 6

Put the system clock forward 48 hours. Log in and verify that the History and Cookies are still persisting correctly (pay particular attention to History).


Information and required settings

Cookie path changes

Firstly, the default path to your Cookies folder appears to have changed. The folder is now called INetCookies instead of Cookies. For all non-redirected users, the path is set in the Registry to %LOCALAPPDATA%\Microsoft\Windows\INetCookies, but as soon as a roaming user launches IE, Cookies are populated to %APPDATA%\Microsoft\Windows\INetCookies instead. If you're a non-roaming user, Cookies just write to the folder in %LOCALAPPDATA%.

This little "trick" of Microsoft's has me wondering about the reliability of Folder Redirection, because essentially they seem to be letting roaming users override the folder location set in the Registry. Interesting!

Profile spoofing

So really, to get Microsoft's patch to work and allow us to roam the Cookies correctly, we really should spoof a roaming profile when we're not using one. AppSense DesktopNow has a built-in engineering setting for spoofing a roaming profile - with other tech (like UPM), we may have to resort to trickery. I've found that the easiest way to emulate a roaming profile is to set the DWORD State value in HKLM\Software\Microsoft\Windows NT\CurrentVersion\ProfileList\[USERSID] to 20 (decimal) at logon. You can additionally flip it to 5 (decimal) at logoff to purge the profile also. Pulling the user's SID, and elevating the context of your commands, are the real tricks for this part and that's where advanced UEM solutions come into their own - but it is possible with a bit of scripting, which we've done below.

If you're not using a UEM solution with this sort of capability, PowerShell startup, logon and logoff scripts will do (execution policy shouldn't matter - GPO PS scripts automatically run as Bypass). Run the script below as a GPO Startup Script to allow users to write to the ProfileList key (AppSense and other products seem to bypass this through some form of voodoo, possibly using SYSTEM to impersonate the user). Bear in mind that this will involve opening up this key in HKLM to all users for Write access - if this is an issue, you could apply custom permissions to the key and subkeys.

$acl = Get-Acl"HKLM:\Software\Microsoft\Windows NT\CurrentVersion\ProfileList"
$inherit = [system.security.accesscontrol.InheritanceFlags]"ContainerInherit, ObjectInherit"
$propagation = [system.security.accesscontrol.PropagationFlags]"None"
$rule = New-ObjectSystem.Security.AccessControl.RegistryAccessRule ("DOMAIN\Group","FullControl",$inherit,$propagation,"Allow")
$acl.SetAccessRule($rule)
$acl |Set-Acl-Path"HKLM:\Software\Microsoft\Windows NT\CurrentVersion\ProfileList"

and then at logon, run this script to pull the SID and then spoof the roaming profile type - but be aware of this gotcha too:-

If you're using 2012 R2 DCs, make sure you're aware that now, by default, logon scripts actually run five minutes after user logon has finished (which kind of makes them an after-logon script). If you want them to actually run as logon scripts (i.e. at logon!), you need to define the following GPO and set it to 0 - Computer Config | Admin Templates | System | Group Policy | Configure Logon Script Delay. Thanks to MVP Darren Mar-Elia for pointing that out - took me the better part of two days to get to the bottom of it!

Anyway, here's the logon script you'll need

$USERSID = ([Security.Principal.WindowsIdentity]::GetCurrent()).User.Value
$regpath = "HKLM:\Software\Microsoft\Windows NT\CurrentVersion\ProfileList\$USERSID"
$name = "State"
Set-ItemProperty-Path$regpath-Name$name-Value"20"

and at logoff, run this one to reset the profile to a non-roaming one (5 indicates mandatory) so that it doesn't try to write the profile up to a share and (if you want it to) purges it


$USERSID = ([Security.Principal.WindowsIdentity]::GetCurrent()).User.Value
$regpath = "HKLM:\Software\Microsoft\Windows NT\CurrentVersion\ProfileList\$USERSID"
$name = "State"
Set-ItemProperty-Path$regpath-Name$name-Value"5"

Citrix User Profile Management

Citrix User Profile Management, where utilized, is done with the following settings deployed via GPO


Folder Redirection

All Folder Redirection for Cookies and History is achieved by setting the Registry values in HKCU\Software\Microsoft\Windows\CurrentVersion\Explorer\User Shell Folders to the required network locations. Microsoft no longer support allow you to do this via GPO (although you can do it with Group Policy Preferences)

Attributes on History folder and files

I'm also certain now that getting History working depends on the attributes being set on the %LOCALAPPDATA%\Microsoft\Windows\History folder and the desktop.ini file in that folder, as well as the desktop.ini file being present and correct. Sometimes, the folders are created without the relevant desktop.ini file or the attributes and this seems to break History completely. I'd hope this has actually been raised with Microsoft as a bug, because it seems very prevalent in my testing (not holding my breath though, especially now that I've seen people resorting to petitions on change.org to get Microsoft to take notice of things). To have a chance of History working, you need to make sure the following criteria are fulfilled (use your tool or script of choice to achieve it)

%LOCALAPPDATA%\Microsoft\Windows\History needs to exist
%LOCALAPPDATA%\Microsoft\Windows\History\desktop.ini needs to exist and have the following content

[.ShellClassInfo]
ConfirmFileOp=0
CLSID={FF393560-C2A7-11CF-BFF4-444553540000}
UICLSID={7BD29E00-76C1-11CF-9DD0-00A0C9034933}

%LOCALAPPDATA%\Microsoft\Windows\History and the desktop.ini file within need to have the following file attributes set - System and Hidden (command lines to set are below)

attrib +s +h %LOCALAPPDATA%\Microsoft\Windows\History
attrib +s +h %LOCALAPPDATA%\Microsoft\Windows\History\desktop.ini


Extra Registry settings

Finally, if you're using a tool like AppSense or other high-end UEM solution, make sure this Registry key is saved with your Personalization settings. You don't need this with UPM in the config we've done as it should save the entire HKCU hive.

HKEY_CURRENT_USER\Software\Microsoft\Windows\CurrentVersion\Internet Settings\5.0\Cache\Extensible Cache 

It doesn't appear in the AppSense EM group by default, but I'm pretty sure it's necessary for History roaming to work correctly.

Testing results

So, how did each set of tests work out this time? Let's have a look...


Test1Test2Test3Test4Test5Test6
MS roaming profilePassPassPassPassFailFail
MS roaming profile with RedirectionPassPassPassPassFailFail
AppSense with mandatory profile and PSPassPassPassPassPassPass
AppSense with mandatory profile and RedirectionPassPassPassPassFailFail
Citrix UPMPassPassPassPassPassFail
Citrix UPM with RedirectionPassPassPassPassFailFail


AppSense DesktopNow, with Personalization Server enabled, comes out of this smelling of roses again, successfully roaming everything. Citrix UPM comes close, failing to roam History after 48 hours, for a reason I can't quite quantify. But as long as you use or spoof a roaming profile, Cookies seems to work right across the board, which is progress - of a sort. Cookies can roam OK - as long as you have a roaming profile set or spoofed. History seems to only work with a UEM solution and a bit of file attributes jiggery-pokery. But again, Folder Redirection really seems to screw the pooch in most situations. I think it may be time to close the door completely on Folder Redirection as a solution for roaming Cookies and History.

Summary

For anyone who feels this article is a bit TL:DR, what are the important points to take away?
  • To successfully roam Cookies, you need to spoof or set a roaming profile type - to spoof, either use a UEM solution or the scripts I put together in the article
  • To successfully roam History, you need to ensure that the desktop.ini file exists with the right content in the History folder, and the attributes for the file and folder are set as documented in the article
  • History writes to %LOCALAPPDATA%, so a standard roaming profile simply won't cut it - UEM appears to be a requirement at some level to make it roam
  • Don't use Folder Redirection for Cookies and History, especially given that Microsoft are essentially bypassing it for their roaming "fix"
  • Windows 10 still breaks quite regularly when you apply any tried-and-tested roaming techniques to it
  • Not really relevant to the subject, but Microsoft have turned logon scripts into "post-logon scripts" in the default settings for Server 2012 R2 - if you're using logon scripts, you may want to set the GPO to 0

It's still not where we want it, but the fix Microsoft have applied has given us *some* wiggle room with this. As long as you set the profile type correctly, either through tools like AppSense or scripting, you can roam Cookies fairly reliably. That's better than we had.

With regard to History, still not great, but a lot of users rely on the TypedURLs history from the Registry rather than the History function per se - but not something to stake the farm on. If you desperately need History to roam, you may need to go down the UEM route. I only tested AppSense DesktopNow, which managed it without any issues, but I assume other high-end vendors like RES should also cope just fine.

Microsoft have announced a raft of Windows 10 updates for next month to address roaming issues and Start Menu problems (I sincerely hope they are telling the truth!), so I will revisit these tests at the end of next month with a Windows 10 slant.

But for now - it's slightly better. We're now a bit of the way back towards where we were with Windows 7 and 2008 R2 :-)

QuickPost: How to automatically mute the volume on XenDesktop sessions

$
0
0
Recently I was deploying a few XenDesktop instances into thin clients on open-access (library) areas. One of the requirements was to automatically mute the volume on these Windows 10 machines so people couldn't disturb their neighbours.

Naturally the first suggestion was to simply disable or stop the Windows Audio Service, but we wanted users to be able to use headphones and the like, not prevent them from having sound altogether. The idea was that the default setting would always be muted - users could then turn the mute setting off manually when they plugged in their headphones or headsets.

We could have set the volume to muted in the default profile on the images also, but given that we were using local profiles if the user changed the mute settings this would then have persisted, so it was also not an option.

As to how to achieve this programatically, well of course a bit of PowerShell would do. This is what I used (not my own code, this was unearthed by the power of Google-fu) - lines may wrap:

Add-Type-TypeDefinition@'
using System.Runtime.InteropServices;

[Guid("5CDF2C82-841E-4546-9722-0CF74078229A"), InterfaceType(ComInterfaceType.InterfaceIsIUnknown)]
interface IAudioEndpointVolume {
  int f(); int g(); int h(); int i();
  int SetMasterVolumeLevelScalar(float fLevel, System.Guid pguidEventContext);
  int j();
  int GetMasterVolumeLevelScalar(out float pfLevel);
  int k(); int l(); int m(); int n();
  int SetMute([MarshalAs(UnmanagedType.Bool)] bool bMute, System.Guid pguidEventContext);
  int GetMute(out bool pbMute);
}
[Guid("D666063F-1587-4E43-81F1-B948E807363F"), InterfaceType(ComInterfaceType.InterfaceIsIUnknown)]
interface IMMDevice {
  int Activate(ref System.Guid id, int clsCtx, int activationParams, out IAudioEndpointVolume aev);
}
[Guid("A95664D2-9614-4F35-A746-DE8DB63617E6"), InterfaceType(ComInterfaceType.InterfaceIsIUnknown)]
interface IMMDeviceEnumerator {
  int f(); // Unused
  int GetDefaultAudioEndpoint(int dataFlow, int role, out IMMDevice endpoint);
}
[ComImport, Guid("BCDE0395-E52F-467C-8E3D-C4579291692E")] class MMDeviceEnumeratorComObject { }

public class Audio {
  static IAudioEndpointVolume Vol() {
    var enumerator = new MMDeviceEnumeratorComObject() as IMMDeviceEnumerator;
    IMMDevice dev = null;
    Marshal.ThrowExceptionForHR(enumerator.GetDefaultAudioEndpoint(/*eRender*/ 0, /*eMultimedia*/ 1, out dev));
    IAudioEndpointVolume epv = null;
    var epvid = typeof(IAudioEndpointVolume).GUID;
    Marshal.ThrowExceptionForHR(dev.Activate(ref epvid, /*CLSCTX_ALL*/ 23, 0, out epv));
    return epv;
  }
  public static float Volume {
    get {float v = -1; Marshal.ThrowExceptionForHR(Vol().GetMasterVolumeLevelScalar(out v)); return v;}
    set {Marshal.ThrowExceptionForHR(Vol().SetMasterVolumeLevelScalar(value, System.Guid.Empty));}
  }
  public static bool Mute {
    get { bool mute; Marshal.ThrowExceptionForHR(Vol().GetMute(out mute)); return mute; }
    set { Marshal.ThrowExceptionForHR(Vol().SetMute(value, System.Guid.Empty)); }
  }
}
'@

[Audio]::Mute =$true

I put this together in an AppSense Desktop Created Action, but as usual, you can deploy this any way you should so desire.

When the users logged in to their XenDesktop sessions next, the volume was automatically muted and their neighbours could continue to work in peace :-)

Windows 10 part #4 - secure your privacy with AppSense DesktopNow

$
0
0
Unless you've been living under a rock for the past year or so, I'm sure you've encountered the general hubbub about Windows 10 and how it uses advanced "telemetry" (one of the most wonderful euphemisms for "logging" or "monitoring" I've ever heard). Now we all know there's no such thing as a free lunch (unless you're at a Citrix User Group), and with Windows 10 being a free download, it was always to be expected that they'd use a tried-and-tested monetization model to make it worth their while to deliver a new operating system free of charge. Ever since I started my current deployment of Windows 10 (which is running across a mix of physical desktops and XenDesktop 7.6 thin clients), privacy, telemetry and compliance are words I've been hearing in focus meetings more and more often.

How you want to manage Windows 10's telemetry settings depends on a number of factors. What sort of industry you work in (those with strict compliance rules, like finance and healthcare, are particularly pertinent here), how users are managing their data (in-house or synchronized out to some form of cloud-based solution), and your general level of tinfoil-hattery.


I've found a number of methods to cut down on Windows 10's talkativeness and ability to contact the mother-ship, however many of these you utilize depends on just how insanely suspicious you are capable of being. Bear in mind, though, that cutting off some of these functions - particularly the ones in the "Batshit Paranoid" section - may prevent certain aspects of the Windows 10 operating system from functioning correctly, so as usual, a big amount of checking and testing is required. Microsoft are also quite capable of shovelling updates down your throats under the disguise of some innocuous blurb to reverse any mitigation you may put in place, and this sort of cloak-and-dagger routine is, in my humble opinion, the single worst facet of Windows 10 as an operating system. Understanding what updates are going to change is vital for home users as much as systems administrators, and I've found an increasing number of users who are switching off Windows 10 Automatic Updates in view of this, undoing over a decade's work from Microsoft which convinced users that updating automatically was a good idea. Increasing the attack surface of Internet-exposed machines is simply the last thing we want to be encouraging, yet here we are. More on my opinion around Windows 10 in general in an article later this week, hopefully.

I had to use AppSense for the tooling because of the requirement for a delay after logon before importing the settings, so traditional Group Policy/scripted methods will probably be unsuitable here, although the more skilled scripters among you should be able to adapt. Ideally, though, to enforce these privacy settings and save yourselves from having your policies overwritten by the default profile, a high-end UEM solution of some sort is required.

Spaying your Windows 10 instance

1.  Universal Apps

First step is to ensure that your Windows 10 is as unintrusive as is humanly possible, by removing apps and features that you don't require.


Given how bad the feedback on Universal Apps has been so far, I'd be in the mood to remove all of them (except Edge maybe - my users seem happy about that, although given they're coming from IE7 most anything is an improvement). If you're on LTSB most of the Universal Apps are removed anyway, but any other servicing branch and you'll have all of the horrid guff hanging from your Start Menu. They also love to talk back to Microsoft!

Get rid of most of these (with the exceptions of the annoying Contact Support and Windows Feedback) by getting down-and-dirty with this bit of handy PowerShell (you will need to run it with admin privileges)

Get-AppxPackage -AllUsers | Remove-AppxPackage

and you should see something like this (you can ignore all of the errors - they're just stuff that, for whatever reason, can't be removed)


You can also use this command

Get-AppXProvisionedPackage -online | Remove-AppxProvisionedPackage -online

if you want to remove applications in the image rather than after the operating system has been loaded.

Cortana should be removed as part of this process also.

2.  Web search from desktop

You can get rid of web search and avoid routing everything you search for through Bing by using some Group Policy Objects. Rather annoyingly (and not very surprisingly these days), they are computer GPOs rather than user ones. Configure the settings in Computer Configuration | Admin Templates | Windows Components | Search as below (these settings are included in my example configuration)


3.  Telemetry

If you're using the Enterprise version of Windows 10, you can disable Telemetry through GPO as well. If you're not on Enterprise - well, you can reduce it somewhat, but not kill it. With this in mind, I'd recommend everyone use Enterprise where possible and setting the policy to Off(shown below - also included in the example configuration)


If you're not on Enterprise all you can do is go for Basic as the setting. The differences between Basic, Enhanced and Fullare known only to Microsoft (Off is supposed to send nothing at all, but I don't believe that for a second), but they do insinuate that Off or Basic will "degrade certain experiences on the device". It may well degrade the experience of being spied on and monitored, but I haven't noticed anything keel over and die since I deployed this to my users in Off mode.

Apparently (though I can't confirm), if you're not on Enterprise you can trick Windows into disabling telemetry by creating the following Registry value

HKEY_LOCAL_MACHINE\SOFTWARE\Policies\Microsoft\Windows\DataCollection
DWORD AllowTelemetry Value 0

although I'm fairly sure if this works, Microsoft will plug the hole as soon as possible. 

4.  Detailed privacy settings

At build time there's a bunch of stuff you can do to turn off most of the nosier features of Windows 10. You can also do this post-build, but controlling them centrally is a little more challenging. I've put together a set of policy objects and preferences (available in  AppSense Environment Manager format), which will need to be imported onto a Windows 10 machine with a copy of the Windows 10 ADMX files running the required EM Console.

You will need to check and test these to ensure that they aren't conflicting with existing policies. A lot of them I've put in as Computer GPOs because they are restricted to that scope, but there may be a few available as User settings as well. The Registry values, for settings that don't have policies attached, are all set in the user context.

For the Contacts settings, the Registry key contains a SID - S-1-15-2-155514346-2573954481-755741238-1654018636-1233331829-3075935687-2861478708 - which does not resolve to anything on my test domain or test machines. You actually need to use this SID hard-coded as part of the Registry path to get the Contacts settings successfully blocked. Not sure where this has come from.

There is also a distressing tendency for the default profile creation to overwrite a lot of the Registry settings we have configured here (well, no-one said it was going to be easy!) To get around this, we will have to resurrect the Post-Logon Trigger that was supposed to be replaced by Desktop Created in AppSense (not the first time we've done this in the post-Windows 7 world), to import our settings in after Microsoft's default profile has done its damage. Big feature request to AppSense - give us a native "Delayed Trigger", customizable to a specific time frame after logon (Scense, one of your competitors, can do this natively), or even something like a "Refresh Trigger" (again, Scense has it) that runs at a pre-determined interval. Since Windows 8 and 10 came along the Desktop Created trigger runs too early to head off some of Microsoft's more questionable programming choices - please save us from using the PowerShell method and make it native in a new release!

The Environment Manager config is available here, and contains the necessary settings for the Post-Logon Trigger as well. What you will notice is there are some fabulous names for the Registry values we're using, and they make a little bit of a mockery of Microsoft's benign intentions for your data - HarvestContacts and RestrictImplicitTextCollection being my personal favourites.

You may actually need to tweak the delay in the Post-Logon Trigger dependent on your profile, I had to increase from 2000ms to 8000ms in one case. In the PowerShell that creates the .cs file (see the attached config), increase the sleep timeout as necessary to get it to work.

Once you've exported these in, take a Windows 10 machine with all of the default, intrusive settings turned on, as shown in the example screenshot below where the Camera is allowed to access your location


and then import in the settings we've configured, and then have a look at the same settings again once you've logged out and back in again


You should find that all of the settings are now turned off, and that privacy is now as God intended :-)

Finally, if you're not using OneDrive, then it would be a good idea to disable it as in this previous article

5.  System services

If you're slightly more paranoid, you can actually wax a couple of system services to help with privacy.

The services we're concerned with are shown in the diagram below, both these should ideally be Disabled (although test thoroughly before you deploy)


In my experience, there's nothing that has broken when disabling these services, but don't be tempted just to take my word for it!

Update 22 Nov 2015 - the sneaky little gits at Microsoft have, via update 1511 for Windows 10, renamed the Diagnostics Tracking Service to the much-less-nasty-sounding Connected User Experiences and Telemetry Service. So disable this service too. Nothing like using Windows Update as a new point to enable data slurping, eh?

6.  Hosts file blocking (more tinfoil)

Now we're starting to descend into the section for those of you with considerably larger pieces of tinfoil headwear. Many have been out Wiresharking their Windows 10 installations, and there are a whole host of Microsoft web addresses that (apparently) the operating system likes to talk to. You can use a hosts file in %WINDIR%\system32\drivers\etc to block access to these web addresses, if you're so inclined. The list of addresses is below, along with the IP addresses to blackhole them


0.0.0.0 vortex.data.microsoft.com
0.0.0.0 telecommand.telemetry.microsoft.com
0.0.0.0 telecommand.telemetry.microsoft.com.nsatc.net
0.0.0.0 oca.telemetry.microsoft.com
0..0.0.0 oca.telemetry.microsoft.com.nsatc.net
0.0.0.0 sqm.telemetry.microsoft.com
0.0.0.0 sqm.telemetry.microsoft.com.nsatc.net
0.0.0.0 watson.telemetry.microsoft.com
0.0.0.0 watson.telemetry.microsoft.com.nsatc.net
0.0.0.0 redir.metaservices.microsoft.com
0.0.0.0 choice.microsoft.com
0.0.0.0 choice.microsoft.com.nsatc.net
0.0.0.0 df.telemetry.microsoft.com
0.0.0.0 reports.wes.df.telemetry.microsoft.com
0.0.0.0 wes.df.telemetry.microsoft.com
0.0.0.0 services.wes.df.telemetry.microsoft.com
0.0.0.0 sqm.df.telemetry.microsoft.com
0.0.0.0 telemetry.microsoft.com
0.0.0.0 watson.ppe.telemetry.microsoft.com
0.0.0.0 telemetry.appex.bing.net
0.0.0.0 telemetry.urs.microsoft.com
0.0.0.0 telemetry.appex.bing.net:443
0.0.0.0 settings-sandbox.data.microsoft.com
0.0.0.0 vortex-sandbox.data.microsoft.com
0.0.0.0 survey.watson.microsoft.com
0.0.0.0 watson.live.com
0.0.0.0 watson.microsoft.com
0.0.0.0 statsfe2.ws.microsoft.com
0.0.0.0 corpext.msitadfs.glbdns2.microsoft.com
0.0.0.0 compatexchange.cloudapp.net
0.0.0.0 cs1.wpc.v0cdn.net
0.0.0.0 a-0001.a-msedge.net
0.0.0.0 statsfe2.update.microsoft.com.akadns.net
0.0.0.0 diagnostics.support.microsoft.com
0.0.0.0 corp.sts.microsoft.com
0.0.0.0 statsfe1.ws.microsoft.com
0.0.0.0 pre.footprintpredict.com
0.0.0.0 i1.services.social.microsoft.com
0.0.0.0 i1.services.social.microsoft.com.nsatc.net
0.0.0.0 feedback.windows.com
0.0.0.0 feedback.microsoft-hohm.com
0.0.0.0 feedback.search.microsoft.com
0.0.0.0 bingads.microsoft.com
127.0.0.1 apps.microsoft.com

I think that you'd have to be very careful with this, particularly in an environment where you have any reliance on Office365, Azure or any other Microsoft online services. Personally I wouldn't go this far, but the choice is yours :-)

7.  Firewall blocks (for the batshit paranoid)

If you are really out there with the conspiracy theorists, there are (allegedly) a couple of Microsoft web addresses that use a dll in the operating system (%WINDIR%\system32\dnsapi.dll, apparently) to bypass the Windows hosts file and communicate directly. 

There are a number of sites that will report various addresses for this behaviour, but your only choice would be to block them at the firewall. You'd have to investigate them yourselves if you wanted to do this, but most of them tend to be of the format

*.vortex-win.data.microsoft.com

Again, loving the choice of words - vortex sums up a lot of my thoughts on Windows 10 data mining pretty well.

Summary

Test thoroughly, but if you use the settings from the first five sections we covered, I think you should be quite OK. Disabling the services is quite reasonable in an enterprise environment - but the use of thehosts file and the firewall blocking is probably a bit much, in my opinion. However - whatever you use, make sure you test it!

More on my thoughts on Windows 10 and what it means for UEM in general later this week. In the meantime - happy privacy! :-) 

Windows 10 part #5 - have Microsoft declared war on the UEM sector?

$
0
0
I know I come across as a rabid Microsoft basher sometimes, what with the fun we had with IE10+ Cookies and the like, but I am prepared to give any tech company a good tongue-lashing should I feel they deserve it. However, in light of early testing with Windows 10 in roaming enterprise environments, and some of the things I'm hearing on the grapevine, I am starting to feel more pressing concerns regarding Microsoft's latest entry into the operating system market.

From all my early testing, which is corroborated by peers in the EUC sector, it looks to all intents and purposes that Windows 10 appears intentionally difficult to adapt for roaming environments. There's a whole ecosystem of software products surrounding the adaptation and management of Windows-based platforms and applications for the enterprise. Let's think about software like Unidesk, AppVolumes, FSLogix, AppSense, RES, Immidio, Scense, ProfileUnity, FlexApp, Citrix UPM, and many others in this space. Now I will admit I've only done some testing based around AppSense, UPM and FSLogix currently (and also around Microsoft's own roaming profile solution), but it looks already as if it is comparably more difficult to get roaming working properly. This follows on from the IE10 Cookie issue that we saw, where it appeared that Microsoft had made it tremendously hard for users to roam their Cookies from machine to machine in traditional ways. Rory de Leur did an excellent blog post on this, and an interesting statement he made on this was to conclude that "...we agreed, Microsoft is trying to kill the Zero Profile". Zero Profiling is a RES term, but refers to the way that vendors like RES and AppSense provide a user with his personalized settings independent of the traditional Windows profile mechanisms. Tech like RES and AppSense removes the need for a Windows profile at all - in fact, if you could log on to a Windows machine without a profile (which you can't), those using UEM tech like RES and AppSense wouldn't need a profile for their users at all.

But Windows 10 appears to go further - not just aimed at the advanced UEM vendors but at layering technologies as well. There are rumours flying about - and I have to go on the level and explain that these are just things I am hearing from trusted contacts in the sector - that Microsoft are advising large enterprises to avoid solutions that utilize filter drivers and/or layering technology because something has architecturally changed in Windows 10 that will make it much harder for these sorts of solutions to function correctly.

Now this could all be FUD - but my preliminary testing, and that of others, seems to indicate that there are changes in Windows 10 that will make our lives as EUC staff a hell of a lot harder if we're leveraging any of the third-party solutions that exist within the UEM ecosystem.

Microsoft's world


Let's not forget Windows is Microsoft's environment and they own it. But over the last fifteen years or so, a whole industry has sprung up around providing advanced management features to this world. Solutions have gone to market based around making your life easier to manage users, applications and the environment that they work in.

Why shouldn't Microsoft try to bring all this into their new vision for Windows 10?

The Windows 10 movement

The problem is, Windows 10 represents an evolution - or maybe even a revolution - from Microsoft's thinking about how the PC should be utilized. The default assumption seems to be that it's their computer, not yours - a PC only in name now, personal no more.

With Windows 7, the computer was undeniably yours. You could do what you wanted with it. Even if you wanted to delete the entire HKLM hive in the Registry - I've seen it done, and it's undeniably stupid, but hey, if that's what you wanted then that's what you could do. But now it's moving back the other way - centralized, nannying, parental. Updates being enforced, logging of every move you make, user access control, download inspection, and all of the other wonderful things that Windows 10 has now pushed onto us. To be fair Microsoft are only following the lead of the other tech titans, Apple and Google, but it's an uneasy path to tread for those who've been used to not only controlling what we could do ourselves but also what our users could do. And some of us are bound by compliance regulation - think of industries under the gaze of such entities as the FDA, as an example. This new "control removed" regime spells trouble for those of us who work in such tightly-regulated environments - or indeed any environment where there's a reliance on testing and release management to keep applications running. I've already seen users and administrators forcibly disabling Windows Updates on Windows 10 systems - undoing over a decade of hard work to get people to accept regular patching as a defence against malware and worms. The patching system was sacrosanct, and Microsoft's use - well, let's pull no punches, it's not use, it's abuse - of the Windows Update mechanism to push advertising, unwanted OS upgrades and make patches that were manually declined reappear is nothing short of criminal. Shovelling out updates that cut directly through the corporate configuration we've specifically defined is ridiculous.

Microsoft's defense is that this is their vision for the evolution of the PC. But they're looking at this purely from the perspective of consumers and home users. We in the corporate world want to be able to, for instance, remove XBox from the Start Menus. We want to be able to customize the Start Menu and Start Tiles for our corporate environments. We want to use roaming profiles that look and feel the same no matter where the user logs in from. We want to be able to say - "look, a new operating system, let's see how we can use this to better enable our users!" But instead we get an upgraded set of handcuffs with increased "telemetry" (spying, monitoring, tracking, whatever you want to call it).

The roaming issue

As I mentioned at the start, it seems - to me, anyway - that Microsoft have pretty much deliberately tried to hobble the roaming capabilities of Windows 10. In Windows 7 and 2008 R2, the Start Menu was a flat filesystem, as were most of the other pertinent parts of the user profile (Cookies, Favourites, etc.). It was easy to customize and maintain, and Group Policy Objects could be used to manage this, with the option of UEM solutions if you needed anything more advanced.

From Windows 8, and even more so in Windows 10, parts of the user profile are locked up in Jet Blue databases that are very difficult to roam. The Start Menu Tiles, Internet Explorer Cookies and the Notification Center now all sit in databases and roaming these presents great difficulty, being locked by system services and having user- and device-specific information written to them. The Start Menu itself is no longer manageable in the way it used to be - you can't rename or delete the folders in there - and it will only display one folder-level deep if you copy a custom filesystem into %PROGRAMDATA%. Again, it feels like roaming capabilities have been intentionally curtailed.

This also fits in with what I'm hearing on the industry grapevine about Microsoft's intentions. There are rumours that Windows 10 compatibility with UEM solutions and any software that uses filter drivers is "not on the roadmap" for Microsoft at this time. The November 2015 update was supposed to address a lot of the problems with roaming and Start Menus - yet as far as I can tell it hasn't (although the Enterprise version of the 1511 update has only just been released, to be fair). With this in mind, it's quite worrying for anyone who relies on UEM solutions to enable their roaming users, or for anyone who wants to deploy Windows 10 with full enterprise capability.

Embrace, extend, extinguish


It's quite possible that Microsoft have designs on the UEM market for themselves. They have a product called UE-V, and combining UE-V with Azure integration would be a big way for Microsoft to take back a market that has essentially grown out of providing solutions for problems that couldn't be addressed with Microsoft's native tools. A combination of Azure AD, UE-V and Group Policy may be Microsoft's way to attack the entire UEM sector and bring all of this market in-house for themselves, possibly sold under the MDOP license. Windows Store for Business and the rumoured Project Centennial - bringing desktop Windows apps to the Store as App-V packages - would also fit nicely into this area. Given the architecture of Windows 10, and the aggressive marketing behind it, I'd say this could be a distinct possibility. There are also unconfirmed reports of something in the pipeline called "Oxygen Services" which represents the Windows 10 personalization piece. I've been meaning to do some testing around UE-V to see what it currently offers in the Windows 10 department - more on this soon, hopefully, and with it confirmation of whether Microsoft are serious about roaming capability.

What does this mean for us?

A lot of this is speculation based around what I've seen in Windows 10. But it's clear it isn't very roaming-friendly - at least at the moment. A lot of the GPOs from Windows 8 and up only support device-centric deployments. Given how excellent Windows 7 was in this department, I can only conclude that the change in focus is deliberate - they could easily have lifted-and-shifted from the existing settings. Hearing tell of quotes attributed to Microsoft staff such as "roaming is dead" only serves to pour fuel onto this particular fire, and there are some enormous roaming enterprises I know of that would be horrified at the prospect of Microsoft treating them like a relic of the distant past.

I think the UEM vendors should be concerned, and so should those of us that rely on them for our existing solutions, and as tools that solve specific problems. Microsoft may well produce a solution that they suggest we use in place of our existing UEM vendors, but using the results of their foray into antivirus as a yardstick - another software market that sprung into being to service the base needs of Windows systems - it may be that whatever they produce simply doesn't meet the standards of functionality required, at least not for the moment. It's also entirely possible that this neglect of roaming enterprise functionality may force Windows 7 and 2008 R2 to become the Windows XP and Server 2003 of the next generation - a situation I would have thought Microsoft were desperate to avoid a repeat of (apart from the revenue potential of paying for extensions to support, I guess).

In the EU, though, there is also the consideration of the EU and their dim view of Microsoft monopolizing any particular market. Remember the (admittedly annoying) "Browser Choice" update (which incidentally, seems to have disappeared in Windows 10)? Maybe Microsoft might get forced into a similar thing for UEM - although it might still be within reason for them to restrict their competitors' capabilities by manipulating the various databases they're now using for user settings.

But I think, for the moment, prudency dictates we should wait until June of 2016, when Server 2016 and the promised "Redstone" update for Windows 10 arrive to provide us with "full enterprise functionality". If the profile is still filled with databases, and the roaming capabilites are still neutered, then we can conclude at that point that this is the path Microsoft are heading inexorably down, and start to make plans from there. We might even end up (finally!) with the year of Linux on the desktop :-)

QuickPost: Customizing Office and Outlook 2016 using AppSense DesktopNow

$
0
0
As well as being dumped unceremoniously with Windows 10 for deployment recently (regular readers may have noticed), I'm doubly on the bleeding edge because we're also pushing out Office 2016. I've had to personalize this using AppSense Environment Manager Personalization Server, so here are my notes on getting this up and running.

Firstly, I actually bit the bullet and used the Current Branch for Business (CBB) version of Windows 10 for this test. The Long-Term Servicing Branch (LTSB) appears to have significantly more bugs in it than the CBB version (effectively, LTSB is a whole different operating system, and one Microsoft seem pretty keen to steer people away from, so I'm not surprised they're neglecting it). I guess this is bad news if you're in one of those regulated environments where you can't be certain of deploying all available patches within a six-month period, but I'm sure Microsoft will notice you kicking and screaming eventually, along with all of those people who've gotten quite used to the idea of roaming.

The latest version of EM (v8 FR 6 SP2 at time of writing) doesn't actually have a template for Office 2016 yet (unless I'm blind), but I've put one together based on both my own experiences and some test templates provided by the ever-helpful Tom Scase over at AppSense. I've tested it on two separate Windows 10/Office 2016 infrastructures and it seems to be working OK so far.


The key bit to know about Office 2016 (and I believe this applied to 2013 as well) is that the Registry key that holds Outlook profiles has moved to a more sensible area. Pre-2013, it sat in HKCU\Software\Microsoft\Windows NT\CurrentVersion\Windows Messaging Subsystem. You may recall (if you used earlier versions of AppSense) having to capture this into the old Session Data area.

Now, the profiles sit in HKEY_CURRENT_USER\Microsoft\Office\version\Outlook\Profiles. Far more sensible! However, as this Registry key can be accessed by operating system processes outside of the Office group (think Mail in Control Panel), it still needs to be managed separately from the Application Group. This is where the "Mail Profile and Signatures" Windows Personalization Group comes in - specifically the "MAPI Profile" Windows Settings Group that is contained inside the Personalization Group. This needs to be set up for Office 2016 also in order for Outlook to personalize correctly.

You can download the settings for our new Application Group and for the Windows Personalization Group here. Note that because we can't edit the built-in Windows Settings Groups, we've created a new one called "_MAPI Profile" and added that to the "Mail Profile and Signatures" Windows Personalization Group, replacing the original which was called "MAPI Profile" (minus the underscore).

To test that this all works swimmingly, we've stood up a couple of new Windows 10 instances and configured them to use Personalization Server. We've installed Office 2016, so now let's open Outlook and Word and make a few customizations, namely:-

Change the colour scheme to dark
Switch off the Reading Pane in Outlook
Set up a signature in Outlook
Turn off compact navigation in Outlook
Add some Quick Access Toolbar shortcuts in Word
Change the Word editing language to English (Ireland)


Now, we shall shunt ourselves over to a new, fresh Windows 10 client with no profile or settings on there and log in....

...and we find that everything looks wonderful - all the personalization we put in place roamed successfully.

One thing to note is that to get Outlook to work successfully we had to personalize the value forHKCU\Software\Microsoft\Office\16.0\Outlook\DefaultProfile, otherwise we got a prompt to select the profile at every Outlook launch. But otherwise, Office 2016 seemed to work quite well in this (admittedly limited!) set of tests.

This doesn't actually cover anything where you may want to sign in to Office Online and persist the credentials between sessions. We will cover that hopefully later this week when I can do some more testing around it.

If you're using the provided configuration in a production environment, the usual disclaimers apply. Test, check, test, check and then test some more, and don't come throwing sueballs in my direction if you don't. I would be interested in hearing if there are any parts of the applications that don't roam correctly though - please feel free to contact me via comments or email or Twitter.

And one final note - as of the date of writing (02 December 2015), I've seen occasional issues with Office 2016 apps crashing with a PVC.dll error when Data Collection is enabled for the Personalization Group. However, this is already under investigation by the AppSense dev team and they should have a fix in place soon (although I'm not in a position to speculate on their timeframes or schedules, to be honest!) If you do try to personalize Office 2016 and you get instances of crashes, simply disable Data Collection for the Personalization Group in question as a workaround until a fix is available.

Custom triggers in AppSense DesktopNow Environment Manager - user-initiated and auto-refresh (and fun with Scheduled Tasks)

$
0
0
Let's get back to some AppSense content for a change. You may have noticed I've been trying to broaden the scope of this blog (despite the name!) and concentrate a bit more broadly on the EUC sector. However, it's time we paid some attention back to the core subject for our first post of 2016.

AppSense, as you're probably aware, has a few different triggers. Triggers are points during the operation of an endpoint device that are used for initiating sets of context-based Actions. In the latest DesktopNow versions, we have these triggers:-
  • Computer Startup - initiated when the computer boots up
  • Computer Network Available - initiated when the computer connects to a network prior to the user logging on
  • Computer Process Started - initiated when a system process starts
  • Computer Process Stopped - initiated when a system process stops
  • User Pre-Session - after the user logs on, but before Terminal Services starts. This is useful for setting environment and session variables, and certain Group Policy Objects. Particularly useful is setting the Personalization Server here, as Personalization actually starts during the logon (for Windows Settings Groups), and this is a convenient way of making sure the preferred server is set prior to it commencing synchronization.
  • User Pre-Desktop - this is what we'd traditionally consider the "logon" point, the actual delay between entering credentials and seeing the shell as the user environment is created
  • User Desktop Created - this occurs once the shell has started, and is useful for running long or complex routines that could otherwise delay the actual logon process
  • User Process Started - initiated when a user process starts
  • User Process Stopped - initiated when a user process stops
  • User Session Locked - initiated when the session is locked by the user
  • User Session Unlocked - initiated when the session is unlocked by the user
  • User Network Connected - initiated when the user connects to a new network
  • User Network Disconnected - initiated when the user disconnects from all networks
  • User Session Disconnected - initiated when the user disconnects from an RDP session
  • User Session Reconnected - initiated when the user reconnects to an RDP session
  • User Logoff - initiated when the user logs off from a session

In previous articles, we've discussed adding a single custom trigger which I christened the "offload trigger". Basically, it involved creating an executable that did nothing except run for a pre-determined length of time (usually 5-10 seconds) and then exited. By running this at logon, and using a Process Stopped node, we were able to run sets of Actions "offloaded" by a certain amount of time after logon had finished.

This custom trigger was quite popular until EM8 FR5 came along and introduced the "Desktop Created" trigger which did away with the need for this. At least, until Windows 8.1 and 10 hit the streets. These Windows versions have a nasty habit of setting up certain user settings (such as the Start Screen, and privacy settings) after the Desktop Created trigger has already run, and therefore reintroducing the need for the Offload Trigger. In my Windows 10 deployments, I find myself using the Offload Trigger quite extensively, normally with about a 6 second delay configured.

The setup of an Offload Trigger is detailed in this article and is all still perfectly valid. So now we have the following custom Trigger added to the list above:-

  • User Offload Trigger - initiated a pre-determined amount of time after user logon has completed

However, as I'm sure some of you are quite aware and have probably implemented yourselves, we can extend the functionality of this blank executable a little further and create a couple more custom triggers. We're going to create a "User-Initiated Trigger" and an "Auto-Refresh Trigger".

User-initiated Trigger

This is the simple one and something I've seen people deploying in a number of situations. Basically, we just use the blank executable from a shortcut to allow users to trigger certain groups of Actions. In fact, we already discussed this in a previous article without really referring to much of the potential reuse of the concept. Common uses are re-running printer or drive mapping routines in case either of them don't complete correctly. I've also seen them being used for things like aborting shutdowns and stopping Personalization. The beauty of using AppSense for this is that it is trivial to set up elevation, so you can allow a user to run a routine with admin access should it be required.

Create a blank executable as discussed in the setup article, but set the timer quite low (you could do 1 millisecond, but normally I go for 500). Copy this down to your endpoints using whatever method you find convenient.

Next, use AppSense Environment Manager to set up some shortcuts for the user (either on desktop or Start Menu or other location - the choice is yours). For this example, we will set up two different shortcuts for the user - one to remap drives, and one to restart the print spooler. I know you could allow access to the Print Spooler restart through Application Manager System Controls but a) not everyone has Application Manager, and b) using a shortcut is easier for the user than accessing the Services applet or command prompt.

Each shortcut will point to our custom executable (called UserTrigger.exe) but will have a different parameter configured.

Shortcut for the drive mappings routine
Shortcut for the spooler restart routine

The only difference between each shortcut is that the parameters passed are different (and the icon, obviously).

What you can now configure is either a Process Started or Process Stopped Action to match these shortcuts. It doesn't matter which - the only difference is the Process Stopped Action will only start after the executable exits (which means there will be a negligible delay). Remember to configure them to match the parameters you set up in the shortcuts

Process Started/Stopped node for remapping drives routine
Process Started/Stopped node for restart spooler routine

Once this is done, you now have two Triggers which will be initiated when the user double-clicks the relevant shortcut you've set up. Simple! Now you can hang the required Actions off the Process Started/Stopped nodes as necessary.

For remapping drives, we've simply linked our Reusable Node for drive mappings. So if a user is missing any drives, before calling the support desk, he can attempt a remap of his configured drives just by launching the shortcut.


For restarting the Spooler, we will link up a couple of Execute Actions to the Process Started/Stopped node as shown below

Stop the Spooler...
...and start it again

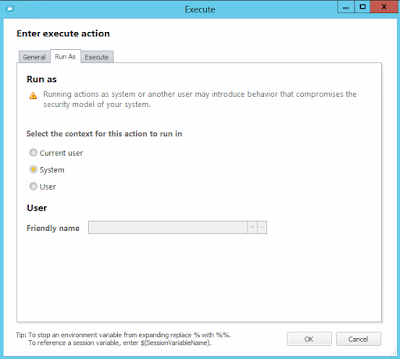
Just don't forget that each of these Actions will need to be elevated to run as SYSTEM

Give the user the rights to actually restart the service

So now we have a nice easy way to allow the user to trigger sets of Actions that may be useful to them for troubleshooting or administrative purposes, with a handy tick-box method of elevation attached. To summarize, we can use this to add the following trigger:-

  • User-Initiated Trigger - allows a trigger to run based around the user executing a managed shortcut from somewhere on the endpoint

Auto-refresh trigger

Next, we will use one of these custom executables to initiate a Trigger based around a specific in-session refresh interval. Ideally, we want to do this without putting any extra overhead on the machine (so running processes or scripts for inordinate amounts of time is not an answer!)

Of course, many will say "well that's just effectively replicating Group Policy". Indeed it is, but in a lot of deployments the idea is often to use Group Policy for machine management and AppSense EM for the user side. Having to backtrack on this model for specific use cases is often rather annoying, so I've tried to come up with a reliable way to replicate it in EM. There's always the chance that you may be looking to use features of AppSense EM that Group Policy Preferences doesn't offer (and version 10 of EM will increase this), or to trigger a complicated script that isn't supported by the options available via Group Policy refresh cycles, so there are definitely some use cases where this custom trigger is applicable.

Group Policy refresh interval also has an offset, so it would be nice if we could run our refresh trigger based around a specific time with a random offset.

To leverage standard Windows processes to do this, we've decided to use the Task Scheduler to achieve this.

You can import Scheduled Tasks onto a computer by using an XML file from the command line, assuming that you've already created the Scheduled Task and exported it. So our first job is to create a file and set up a Scheduled Task to run it at a pre-determined interval.

We will use the same executable (with the 500ms delay before exit) and simply rename it to RefreshTrigger.exe


If you want to use a pre-created XML file and save yourself the process of creating and exporting the Scheduled Task, use this one I created. However bear in mind this was created on Windows 10 and may not be suitable for use on other operating systems, so please check.

Also, users need the Log On As A Batch Job user right to be able to create Scheduled Tasks, so define this in Group Policy as required.


If you need to create the task yourself, first open the Task Scheduler interface (taskschd.msc) and navigate to Task Scheduler Library, before right-clicking and choosing New Task. Create the Task with the following properties (assuming you replace all the instances of jrankin with the creating username, and your OS as necessary)


We need to create it on a Schedule, rather than At Log On. This is so we can take advantage of the Random Delay setting which will provide our offset. This setting is not available when set up At Log On. This will mean that the task will run when there is no user logged in - however, as we are going to set it to run in the context of the logged-on user, it should have no effect at all. The timing of the repeat and the delay are entirely up to you - we've simply used one hour for both.

Finally, export the Task you have created which will generate an XML file.


When a user sets up a task, it is saved to %WINDIR%\system32\Tasks with access to the file granted to only the creating user. Changing the user details in the XML file will allow us to get around this. If you look at the XML file, you will see the DOMAIN\USERNAME and the user's SID referenced. Either use the file that I created, or open up the XML file you've exported and replace the user domain and username with USERDOMAIN\USERNAME, and replace the user's SID with USERSID. Also, replace the title with a generic one - this will be overwritten by the command we use in any case.

Now it's time to utilize AppSense to configure this XML file dynamically. Create a node in Pre-Desktop and call it something like Create user scheduled task

Firstly, let's put in a Condition to check to see if the Scheduled Task already exists or not - no sense in redoing it at every logon if the user has a persistent profile.


If the file doesn't exist, we need to create it. So firstly, copy the edited XML file to a central share and set up an AppSense File Copy Action to bring it down onto the endpoint at logon.


Next, use the AppSense Text File Update Action to replace the USERDOMAIN\USERNAME string with the user's correct details.


And then use the same Action to replace USERSID with the user's SID. If you're on 8.5 or up this is easy - earlier than that and you will be resorting to a bit of scripting.


Finally, we need to execute the command that will create a Scheduled Task from the XML file we have just manipulated.


Just to be clear, the whole node that runs this Scheduled Task creation routine should look like this


So if all of this works correctly, you should be able to log on to a fresh build machine and see a Scheduled Task created with the user's name appended to the end of the Task name (this is to make sure it doesn't get duplicated on multi-user systems). It should also have a run time an hour in the future, offset by up to an hour.


There it is - we've effectively recreated an "auto-refresh" interval by creating a Scheduled Task and offsetting it. It will run every hour, offset by up to an hour, to avoid loading from whatever Actions you choose to put next to it.

All you need to do is create a Process Started/Stopped node for RefreshTrigger.exe


And put any Actions in it you require! I've seen clients using this to replace desktop shortcuts - as using Self-Heal makes EM a lot more chatty, effectively checking a host of files and Registry keys every three seconds. Personally, I find using a refresh trigger a lot more efficient - and there are many other routines you could put in here, it's up to you.

Just for posterity, we've now added a final custom trigger that is:-

  • User Auto-Refresh Trigger - initiated by a Scheduled Task that runs during the user session with a pre-configured delay and random offset

Summary

So that's how we can use those "blank" executables to extend the reach of our Triggers in Environment Manager and create some (hopefully useful!) customized ones. As in all cases, test thoroughly before you deploy, and if you have any questions or alterations please feel free to reach out via comments, email or Twitter.

QuickPost: AppSense Personalization Server synchronization failures when using Google Chrome

$
0
0
I came across an issue over the last few weeks regarding regular Personalization failures for users who were browsing via Google Chrome. With help from AppSense support, and Ollie and Hiten from APS, we got this narrowed down to a known issue on the IIS end, so I'm going to quickly write it up so I don't forget about it!

Chrome is quite a popular browser these days, but it is one of these applications that insists on writing quite aggressively to the %LOCALAPPDATA% areas of the user profile. The reason we suffered so badly from this issue was that I didn't do my application analysis properly, and incorrectly assumed that Chrome usage would be fairly niche and limited in scope. However, if I'd studied the existing environment in the correct detail (or had been given the software to do this for me, another story sadly), I would have realized that it was quite possibly the most popular browser in the client environment. Unfortunately, I simply quickly cobbled a Google Chrome Application Group together from some templates on the AppSense forums and handed it off to the person who had requested it.

This was then refined by the requesting user, particularly by implementing the Google Chrome ADMX files which have a setting called "Set user data directory". By using this, the Chrome data directory can be redirected to "${ROAMING_APP_DATA}\Google\Chrome\User Data", effectively storing the Chrome settings in the traditional roaming folder rather than the local one. This is useful for ensuring compatibility with roaming profiles but not perhaps if you're using AppSense, but thought it was worth mentioning as it offers a way to ensure that the Chrome settings are written to a more familiar area.


All seemed well and good at first - users reported that Chrome settings such as logons, extensions and history were persisting as expected. Unfortunately at this point I simply ticked it off the list of items and went on to other issues that needed my attention.

Fast forward a few weeks and we had all sorts of odd issues that seemed to centre specifically around users who were also using Chrome. Settings disappearing - but never in their entirety. Little niggly things like the auto-start for Skype and Outlook colour schemes would reset themselves, sometimes in the middle of the user's session. Whilst not "show-stoppers", they were the sort of issues that not only frustrated the users but also decreased confidence in the solution we were putting together.

First remedial action we took was to turn on silent PersInfo logging for the affected users. Using PersInfo in this way is really one of the most valuable tools in the AppSense administrator's armoury when it comes to Personalization issues. We immediately started reviewing the logs and were surprised to see a whole host of synchronization failures. The pertinent entries are highlighted in bold below in the log snippet:-

16/03/2016 09:57:55,ConfigLoaded,"Personalization configuration loaded for user 'gklp76'\n\r\n\rUser Group is: Test\n\r\n\rThere are 17 Application(s) and 5 Application Group(s) whitelisted in this configuration"
16/03/2016 09:58:01,Information,"Personalization server is online\n\r\n\rActive Site:http://zzzzzzzz"
16/03/2016 10:32:20,SyncDownInProgress,"'Remote Desktop Client' is being synchronized with the client..."
16/03/2016 10:32:21,Information,"mstsc.exe (PID 4768) is being virtualized\n\rManaged as 'Remote Desktop Client (mstsc.exe)' [Grouped as 'Remote Desktop Client']"
16/03/2016 10:32:22,SyncDownComplete,"'Remote Desktop Client' was synchronized to the client\n\r\n\rTransferred 8.91 KB in 0.0 secs at a rate of 1.5 MB/sec"
16/03/2016 10:49:06,SyncUpInProgress,"'Microsoft Office 2016 / 365 Group' is being synchronized to the server..."
16/03/2016 10:49:07,SyncUpComplete,"'Microsoft Office 2016 / 365 Group' was synchronized to the server\n\r\n\rTransferred 90.49 KB in 0.1 secs at a rate of 1.5 MB/sec"
16/03/2016 10:50:39,ErrorOrFailure,"'Remote Desktop Client' failed to synchronize to the server..."
16/03/2016 10:50:39,SyncUpInProgress,"'Remote Desktop Client' is being synchronized to the server..."
16/03/2016 10:50:42,ConfigDownloaded,"Environment Manager has downloaded a new personalization configuration"
16/03/2016 10:52:38,SyncUpInProgress,"'Windows Settings' is being synchronized to the server..."
16/03/2016 10:53:17,ErrorOrFailure,"'Windows Settings' failed to synchronize to the server..."
16/03/2016 10:53:19,ErrorOrFailure,"The Personalization Server could not be reached. Link state is now offline.\n\r\n\rFailed to upload Windows Settings to the server\n\r\n\rRetrying at 10:54:34"
16/03/2016 10:54:07,SyncDownInProgress,"'Microsoft Office 2016 / 365 Group' is being synchronized with the client..."
16/03/2016 10:54:07,ErrorOrFailure,"'Microsoft Office 2016 0x2F; 365 Group' failed to synchronize to the client because the link state is currently offline..."
16/03/2016 10:54:08,Information,"OUTLOOK.EXE (PID 9084) is being virtualized\n\rManaged as 'Microsoft Office Outlook 2016' [Grouped as 'Microsoft Office 2016 / 365 Group']"
16/03/2016 10:54:35,Information,"Personalization server is now online\n\r\n\rActive Site: http://zzzzzzzzz"
16/03/2016 10:54:48,SyncUpInProgress,"'Microsoft Office 2016 / 365 Group' is being synchronized to the server..."
16/03/2016 10:54:50,SyncUpComplete,"'Microsoft Office 2016 / 365 Group' was synchronized to the server\n\r\n\rTransferred 104.69 KB in 0.0 secs at a rate of 2.2 MB/sec"
16/03/2016 10:54:54,SyncDownInProgress,"'Microsoft Office 2016 / 365 Group' is being synchronized with the client..."
16/03/2016 10:54:55,SyncDownComplete,"'Microsoft Office 2016 / 365 Group' was synchronized to the client\n\r\n\rTransferred 65.44 KB in 0.0 secs at a rate of 2.2 MB/sec"
16/03/2016 10:54:55,Information,"OUTLOOK.EXE (PID 3368) is being virtualized\n\rManaged as 'Microsoft Office Outlook 2016' [Grouped as 'Microsoft Office 2016 / 365 Group']"
16/03/2016 10:55:36,ErrorOrFailure,"The Personalization Server could not be reached. Link state is now offline.\n\r\n\rFailed to upload Windows Settings to the server\n\r\n\rRetrying at 10:56:51"

This was quite concerning on a number of levels, both for the amount of failures and the resulting loss of settings. It quickly became clear that certain settings would fail to save but then these settings would be overwritten with older data from the Personalization Server at next logon, giving the appearance of "disappearing" config items.

The next stage was to gather some debug logs, which allowed us to see that the users with Chrome were saving quite large volumes of data (up to 80 or 90MB, in some cases).


What the guys from AppSense support and APS mentioned was that there was an arbitrary limit, both on file sizes and file numbers, within IIS. Upload of a file larger than 30MB or a number of files exceeding 1000 would hit this limit, which was put in by design to reduce the potential for denial-of-service attacks upon IIS systems. Debug logs seemed to indicate that the Chrome users were saving data that exceeded both of these limits.

So to address this, we moved twofold - firstly, to increase the available limits, and secondly, to streamline the Chrome settings so that they would avoid saving datasets of this size and volume.

To increase the file upload size limit, we performed the following steps (also summarized in an AppSense TechNote):-

  • Launch IIS (Start | Run | inetmgr)
  • Select the Personalization Server Website (or the Default Website, if your Personalization Server is the only website configured on the IIS host) 
  • Select the 'Request Filtering' feature from the list
  • From the actions pane on the right, select 'Edit Feature Settings'
  • Change the 'Maximum Allowed Content Length) value to a more suitable number (in this case, we simply doubled it to 60MB - see image below)
  • Restart IIS (run iisreset from an elevated command prompt on the IIS server)


Increasing the amount of files is slightly different, requiring an edit of the web.config file. Again, this is summarized in an AppSense TechNote.

  • Run an elevated instance of Notepad
  • Open the file  %PROGRAMFILES%\AppSense\Environment Manager\Personalization Server\web.config (you may have to change the filetype setting in the Open dialog to All)
  • Add the following text to the <appSettings> section -     <add key="aspnet:MaxHttpCollectionKeys" value="1200" /> (see image below)
  • Save the file
  • Restart IIS (run iisreset from an elevated command prompt on the IIS server)

You can set the number to any size you require, I've just used 1200 as a good starting point over the initial limit of 1000.
  
The next step was to review the PersInfo logs and see if they had changed. As you can see from the excerpt below, they look far healthier:-

16/03/2016 13:03:16,ConfigLoaded,"Personalization configuration loaded for user 'gklp76'\n\r\n\rUser Group is: Test\n\r\n\rThere are 18 Application(s) and 6 Application Group(s) whitelisted in this configuration"
16/03/2016 13:03:24,Information,"Personalization server is online\n\r\n\rActive Site: http://cisvirappvir06.mds.ad.dur.ac.uk/PersonalizationServer"
16/03/2016 13:03:49,SyncDownInProgress,"'Google Chrome Group' is being synchronized with the client..."
16/03/2016 13:03:49,SyncDownComplete,"'Google Chrome Group' was synchronized to the client\n\r\n\rTransferred 442.09 KB in 0.2 secs at a rate of 5.9 MB/sec"
16/03/2016 13:04:03,Information,"chrome.exe (PID 9488) is being virtualized\n\rManaged as 'Google Chrome' [Grouped as 'Google Chrome Group']"
16/03/2016 13:04:46,SyncUpInProgress,"'Google Chrome Group' is being synchronized to the server..."
16/03/2016 13:04:50,SyncUpComplete,"'Google Chrome Group' was synchronized to the server\n\r\n\rTransferred 2.32 MB in 1 secs at a rate of 2.2 MB/sec"
16/03/2016 13:06:02,SyncDownInProgress,"'Microsoft Office 2016 / 365 Group' is being synchronized with the client..."
16/03/2016 13:06:03,SyncDownComplete,"'Microsoft Office 2016 / 365 Group' was synchronized to the client\n\r\n\rTransferred 124.16 KB in 0.1 secs at a rate of 2.1 MB/sec"
16/03/2016 13:06:06,Information,"OUTLOOK.EXE (PID 9468) is being virtualized\n\rManaged as 'Microsoft Office Outlook 2016' [Grouped as 'Microsoft Office 2016 / 365 Group']"
16/03/2016 13:07:57,SyncUpInProgress,"'Windows Settings' is being synchronized to the server..."
16/03/2016 13:07:58,SyncUpComplete,"'Windows Settings' was synchronized to the server\n\r\n\rTransferred 1.78 MB in 0.3 secs at a rate of 2.9 MB/sec"
16/03/2016 13:09:16,SyncDownInProgress,"'Google Chrome Group' is being synchronized with the client..."
16/03/2016 13:09:17,Information,"chrome.exe (PID 2904) is being virtualized\n\rManaged as 'Google Chrome' [Grouped as 'Google Chrome Group']"
16/03/2016 13:09:18,SyncDownComplete,"'Google Chrome Group' was synchronized to the client\n\r\n\rTransferred 1.19 MB in 0.3 secs at a rate of 3.2 MB/sec"
16/03/2016 13:11:18,SyncUpInProgress,"'Google Chrome Group' is being synchronized to the server..."
16/03/2016 13:11:21,SyncUpComplete,"'Google Chrome Group' was synchronized to the server\n\r\n\rTransferred 2.09 MB in 0.9 secs at a rate of 3.3 MB/sec"
16/03/2016 13:11:28,SyncDownInProgress,"'Google Chrome Group' is being synchronized with the client..."
16/03/2016 13:11:30,Information,"chrome.exe (PID 9264) is being virtualized\n\rManaged as 'Google Chrome' [Grouped as 'Google Chrome Group']"
16/03/2016 13:11:31,SyncDownComplete,"'Google Chrome Group' was synchronized to the client\n\r\n\rTransferred 1.24 MB in 0.2 secs at a rate of 3.8 MB/sec"
16/03/2016 13:11:52,SyncUpInProgress,"'Google Chrome Group' is being synchronized to the server..."
16/03/2016 13:11:54,SyncUpComplete,"'Google Chrome Group' was synchronized to the server\n\r\n\rTransferred 2.03 MB in 0.3 secs at a rate of 4.0 MB/sec"
16/03/2016 13:11:59,SyncDownInProgress,"'Google Chrome Group' is being synchronized with the client..."
16/03/2016 13:12:00,Information,"chrome.exe (PID 4756) is being virtualized\n\rManaged as 'Google Chrome' [Grouped as 'Google Chrome Group']"
16/03/2016 13:12:01,SyncDownComplete,"'Google Chrome Group' was synchronized to the client\n\r\n\rTransferred 1.24 MB in 0.3 secs at a rate of 4.1 MB/sec"
16/03/2016 13:12:17,SyncUpInProgress,"'Google Chrome Group' is being synchronized to the server..."
16/03/2016 13:12:19,SyncUpComplete,"'Google Chrome Group' was synchronized to the server\n\r\n\rTransferred 1.99 MB in 0.4 secs at a rate of 5.7 MB/sec"
16/03/2016 13:14:59,SyncUpInProgress,"'Windows Settings' is being synchronized to the server..."
16/03/2016 13:15:02,SyncUpComplete,"'Windows Settings' was synchronized to the server\n\r\n\rTransferred 1.70 MB in 0.6 secs at a rate of 4.8 MB/sec"

With this looking so much improved, we finally changed the Chrome settings to a more suitable configuration so that the mass of data would not be accumulated in future (thanks to Hiten for the template):-

Registry includes

HKEY_CURRENT_USER\Software\Google
HKEY_CURRENT_USER\Software\MozillaPlugins

Registry excludes

HKEY_CURRENT_USER\Software

Folder includes

{CSIDL_APPDATA}\Google\Chrome\User Data\Default\Storage
{CSIDL_APPDATA}\Google\Chrome\User Data\Default\GCM Store
{CSIDL_APPDATA}\Google\Chrome\User Data\Default\Sync Data
{CSIDL_APPDATA}\Google\Chrome\User Data\Default\Local Extension Settings
{CSIDL_APPDATA}\Google\Chrome\User Data\Default\Extensions
{CSIDL_APPDATA}\Google\Chrome\User Data\Default\Session Storage
{CSIDL_APPDATA}\Google\Chrome\User Data\Default\Sync Extension Settings

Folder excludes

{CSIDL_PROFILE}

File includes

{CSIDL_APPDATA}\Google\Chrome\User Data\Default\Shortcuts
{CSIDL_APPDATA}\Google\Chrome\User Data\Default\Login Data-journal
{CSIDL_APPDATA}\Google\Chrome\User Data\Default\History-journal
{CSIDL_APPDATA}\Google\Chrome\User Data\First Run
{CSIDL_APPDATA}\Google\Chrome\User Data\Default\Favicons-journal
{CSIDL_APPDATA}\Google\Chrome\User Data\Default\Login Data
{CSIDL_APPDATA}\Google\Chrome\User Data\Default\Last Session
{CSIDL_APPDATA}\Google\Chrome\User Data\Default\Cookies
{CSIDL_APPDATA}\Google\Chrome\User Data\Default\History
{CSIDL_APPDATA}\Google\Chrome\User Data\Default\Top Sites
{CSIDL_APPDATA}\Google\Chrome\User Data\Default\Last Tabs
{CSIDL_APPDATA}\Google\Chrome\User Data\Default\Favicons
{CSIDL_APPDATA}\Google\Chrome\User Data\Default\Origin Bound Certs
{CSIDL_APPDATA}\Google\Chrome\User Data\Local State
{CSIDL_APPDATA}\Google\Chrome\User Data\Default\Web Data
{CSIDL_APPDATA}\Google\Chrome\User Data\Default\Web Data-journal
{CSIDL_APPDATA}\Google\Chrome\User Data\Default\Bookmarks
{CSIDL_APPDATA}\Google\Chrome\User Data\Default\Current Tabs
{CSIDL_APPDATA}\Google\Chrome\User Data\Default\Origin Bound Certs-journal
{CSIDL_APPDATA}\Google\Chrome\User Data\Default\Top Sites-journal
{CSIDL_APPDATA}\Google\Chrome\User Data\Default\Preferences
{CSIDL_APPDATA}\Google\Chrome\User Data\Default\Current Session
{CSIDL_APPDATA}\Google\Chrome\User Data\Default\Cookies-journal
{CSIDL_APPDATA}\Google\Chrome\User Data\Default\Archived History
{CSIDL_APPDATA}\Google\Chrome\User Data\Default\Shortcuts-journal

Note that we have used {CSIDL_APPDATA} in all the file and folder includes because of the Chrome ADMX we configured to switch the user data directory. In a "normal" Chrome installation, all of the references to {CSIDL_APPDATA} would need to be changed to {CSIDL_LOCAL_APPDATA}.

As you can see from the screenshot below, the amount of Chrome data has significantly decreased straight away


And so far, we seem to have eliminated a lot of the niggly issues!

So some lessons to be learned:-
  • Understand your environment - I made a fatal assumption by postulating that Chrome use would be quite limited
  • Don't rely on config templates you grab from forums to be suitable for your environment
  • Always monitor the size of your profiles (this problem would have been spotted much earlier had we been doing this)
  • PersInfo is an excellent tool for proactively monitoring Personalization status
  • Go and have a look on the AppSense support site (the TechNotes were there describing these exact issues)
  • The AppSense support and APS guys are always helpful and can always teach you something new!

Finally, a quick note - I'm very busy with conference stuff and technical articles at the minute so apologies for the dearth of content recently. I've got stuff in the pipeline regarding Modern Apps, Start Tiles, more Windows 10 and hopefully some network stuff, so please bear with me while I try to clear my (virtual) desk :-)

Windows 10 part #6 - roaming the Windows 10 Start Tile settings using AppSense (an alternative way) without locking the tiles!

$
0
0
I wrote a post some time ago detailing how to save the Windows 10 Start Tile settings and roam them through AppSense Environment Manager. However, it wasn't 100% reliable - intermittently, I would see what I've come to call the Windows 10 "dead man click", when the Start Menu simply stops functioning because we've inadvertently corrupted the database that runs it. In fact, I'd hazard a guess that the database they use is composed of the electronic equivalent of crisps, because it's very fragile and gloriously easy to break.

Update 22/03/2016 - I've now found a less intrusive and more reliable way of handling this, it is documented in this article

With this in mind, I've been trying to find a better way of achieving this for some time. However, I'm quite aware that Microsoft may well introduce a method of doing this natively at any given moment (although given some of their recent decisions, I wouldn't be putting any money on it).

It was thinking back to how we managed to roam the Windows 8.1 Start Screen that gave me an idea. Windows 8.1, and Windows 10, have PowerShell cmdlets that allow you to export the Start Layout to a file. Couldn't we do this with Windows 10 and the Start Tiles?

Firstly, let's look at the Microsoft default Start Tile settings. We've done all of this testing on Windows 10 Enterprise Current Branch for Business, fully patched at time of writing.

  
It never fails to make me cringe every time I see this screen (and this one appears to have some of the worse cruft, like Candy f**king Crush Soda Saga, removed). It's like a great big advertising hoarding has been splattered across what was previously a slick, unintrusive and reliable applications launcher.

Let's tidy it up a bit and get it the way we want it, as well as putting some custom names on the Start Tile groups.


That looks much better!

Now, Microsoft offer a couple of ways to set the Start Tiles to a specific layout. What you do is, use a PowerShell cmdlet to export the current settings out to an XML file, and then a Group Policy Object to import them back in. If we could run the export at logoff, we could then generate a user-specific file to import back in at logon, no?

Unsurprisingly, I first tried to do the export command via AppSense Environment Manager. However, for some reason calling the Export-StartLayout cmdlet in the AppSense EM Logoff trigger doesn't seem to work, and I haven't yet had time to work out why this is the case. So to achieve this, we fell back on an old-fashioned Group Policy Logoff Script.

The command we need to run is this, so this will need to be put into a .ps1 file

Export-StartLayout-Path\\UKSLDC003\FileStore\HomeDrives\$env:USERNAME\StartTiles.xml

All we need to add is the -Path parameter, which we have pointed to the user's homedrive location. It's important to use a home drive or dedicated user-specific shared area, because each user will spit out their own export files.

It's quite easy to then configure a logoff script and point it to the PowerShell script that we've saved


We've also configured a WMI filter for the GPO to ensure it only runs on Windows 10. The filter is shown below. WMI filters can make group policy processing less efficient, but in this case it makes sense as a) we are only running a single logoff script, and b) we don't want it running on other operating systems.


Once the Group Policy is in place, we log off the user with the customized Start Tiles, and we can see an XML file with the right timestamps is written to our homedrive location.


Now, we need to set the Group Policy which will import this file into our user's profile next time he logs on, even if it is on to a different machine which he/she has no profile defined on. The GPO we are looking for is in User Configuration | Admin Templates | Start Menu and Taskbar. It's only available on the Enterprise and Education editions of Windows 10 (rather annoyingly)


A cautionary note - make sure you set this Group Policy Object from a Windows 10 machine, whether you do it via AppSense or standard GPMC! Windows 2012 R2 has a GPO with the same name which is for Start Screen settings on Windows 8.1/2012 R2. If you configure this from a server you will very likely end up using the wrong GPO. You could import and use the templates on your server, but because they both have the same name it can get very confusing. Best practice is to install either the Group Policy Management console or AppSense Environment Manager console onto a Windows 10 workstation and configure them from there.

Now here's where it starts getting murky.

One of the problems with using this GPO to do this is that it locks the Start Tiles. It's right there in the description of the GPO - "users cannot customize their Start Screen layout while this policy is enabled". Why this is the case is utterly unclear (divining Microsoft's intentions these days is beyond me, and probably God as well).

What the policy does is write a couple of Registry values to HKCU\Software\Policies\Microsoft\Windows\Explorer. The first one, StartLayoutFile, is an expandable string that points us to the required XML file. The second is a DWORD called LockedStartLayout, and this is set to 1. So surely we can just unset this to 0 and it will all be well and good?


Er, no.

There is some kind of symbiotic relationship between these two Registry values. Once the StartLayoutFile value is set, this is then applied somewhere later on in the logon process (probably at whatever point the Start Menu is created). However, if the LockedStartLayout value is not also set to 1, theStartLayoutFile value will be ignored when the Start Menu is created, and you'll be stuck with either the godawful default, or whatever is in the user's local profile (should there be one on that machine).

OK then, so maybe we just use AppSense Environment Manager to set the LockedStartLayout value to 0 after the Start Menu is created?

That does work in regards to setting the value, but the problem is, the Start Tiles are also locked at the same time the Start Menu is created. Even with LockedStartLayout now set to 0, the Start Tiles essentially need to be "refreshed" to allow the user to manipulate them.

Remember the "Tile Data Model Server" service? This is intrinsically linked to the Start Menu and the database. If you disable this service (not a trivial task - you need to go into the Registry and set the Startup type to 4), you will get an application crash or a blue screen of death every time you click on the Start Menu. So it's clearly very involved in this new left-hand corner abomination that Microsoft have saddled us with.

If we set the GPO for the Start Layout early in the logon process, allow the logon to finish and create the Start Menu, then set LockedStartLayout to 0 before stopping the Tile Data Model Server (it automatically restarts as soon as it is stopped) - will this allow us to customize the Start Tiles and roam them from device to device and session to session?

This is quite a demanding bit of tooling so I'm using AppSense Environment Manager to do it. To achieve this without a UEM product would require somehow setting the LockedStartLayout value after logon (maybe a Scheduled Task running reg.exe?) and then stopping the service (which needs elevated privileges). I'm going to have a go at doing this without UEM tools over the next week or so, so expect an update to the article pretty soon.

For the moment, let's just do it with AppSense Environment Manager.

The Desktop Created trigger runs too early (this is becoming a regular occurrence on Windows 8.1 and Windows 10), so we will need to instate a Post-Logon trigger to achieve this. In my testing I set the post-logon trigger to 3000ms, which seemed to work fine.

Once you've set up the Offload Trigger, you need to put the first part in, which is the GPO to set the Start Menu layout from the XML file in the user's home drive. This needs doing nice and early so it's an ideal use-case for the Pre-Session trigger. Set the path to the XML file you specified in the Logoff Script earlier.

  
Next, we need to put the Actions into the Post-Logon trigger, firstly, the one to set the value of LockedStartLayout

  
And after that, an Action to stop the Tile Data Model Server service

  
which naturally needs to run elevated

  
And obviously, you need to make sure that your Group Policy Logoff Script is correctly configured and pointing to the .ps1 file which will use the Export-StartLayout cmdlet.

So, does it work?

The resounding answer is YES. The Tiles roam flawlessly, whether the user has an existing local profile or no profile whatsoever. The only issue I have is that when the Tile Data Model Server service restarts a few seconds after logon has finished, if the user happens to be using the Start Menu at this precise point, the Start Menu will disappear. However, it is a very little potential niggle compared to having the rainbow-coloured vomit of the default Tiles appear every time you log in to a new device. I tested it on machines running different builds of Windows 10 (some without the 1511 update, some with, and some on the latest Insider preview build of 14279), and it still worked well. However, if you want it to move between Current Branch and Long-Term Servicing Branch this may have some issues. However, if you pin a Tile and that application is not available on the next device you log into, you will see a blank Tile rather than experience any errors or corruption, so it's not a showstopper if you have devices with different application sets and/or servicing branches.

There were a couple of other oddities noticed. If you pin a Tile to the very bottom of the menu, on a machine with a different resolution this Tile may sometimes appear across to the right rather than at the bottom. And if you make your Start Menu completely blank (see image below), this may cause it to reset to the default next time you log on (although it sometimes works fine). Aside from these niggles, though, it's a vast improvement on what we had (which was essentially nothing, or mess around with copying a database file around that was as easy to corrupt as a member of FIFA).
 

Of course, this is all done in a small lab without big layers of complexity on top. Test thoroughly before you deploy this. You may need to tweak the delay on the Post-Logon Trigger to get optimal results. Timing is everything in the Windows 10 logon process.

You could possibly save the XML file into Personalization Server, then unpack it to a local location early in the logon. This way you would get rollback, compression and integrated security around it. I will explore that in a later post, but for now I will concentrate on putting an update in that allows you to replicate this functionality using native Windows tools rather than a third-party UEM solution like AppSense or RES.

Anyway, here's hoping this may help some out there. Look out for some updates to this article coming soon!

Update #1 (21/03/16) - a few people have emailed me asking about the Import-StartLayout cmdlet and whether this can be used instead of the GPO jiggery-pokery we use to import the layout. Unfortunately, this cmdlet is intended to only import layouts to an offline WIM image. You can use it on an online OS, but it will modify only the default profile, and not the user logging in. So unfortunately, a non-starter for allowing the settings to be imported at user logon time, which is a big disappointment as the Import-StartLayout cmdlet removes the need to unlock the tiles afterwards.

Windows 10 part #7 - maintaining ALL your settings using a standard roaming profile (including the Start Tiles)

$
0
0
Windows 10 is, by its nature of constant updates, a moving target. So far I've had a couple of cracks at roaming a full Windows 10 user state between domain-joined machines. Both of them so far proved to be quite intrusive, necessitating in each case the restart of a system service to accomplish anything near to what we were after. This just doesn't sit well with me - it complicates the tooling required, for one thing - and looks messy. However, as Microsoft release updates to it, bug fixes appear to be included which are making things slightly easier.

This doesn't, though, address the glaring issue that the Start Tiles settings sit in %LOCALAPPDATA%. If you're using a standard Microsoft roaming profile, LOCALAPPDATA isn't included, and can't be without third-party tools - you can exclude directories from a roaming profile, but not add them, via GPO. Whilst I've speculated that this may be by design, with an intention to subsume all of the roaming market into Microsoft's Azure-based Enterprise Settings Sync (when it lands), it still doesn't help us out. If you're deploying Windows 10 right now, or in the near future - and bear in mind we've had the Threshold release in November 2015, and are now waiting for Redstone in June (effectively SP2) - then you still can't roam the most glaringly in-your-face part of the new Windows 10 look and feel.

To recap, here's what we've tried before, with varying degrees of success:-

  • At logoff, stop the "Tile Data model server" service
  • Copy out the %LOCALAPPDATA%\TileDataLayer\Database\* files onto the network
  • At logon, copy the files back in from the network to the local folder

This method required elevated privileges to stop the service, and was also a bit hit-and-miss. The privilege elevation could be scripted or tooled around, but reliability was not great, and when it didn't work, would invariably corrupt the Start Menu.

  • At logoff, use the Powershell Export-StartLayout cmdlet to copy the Start Tiles settings out to a file on the network
  • At logon, set a GPO that imports the XML file generated at logoff to create the Start Tiles from this
  • A short time after logon, "unlock" the Start Tiles for manipulation by resetting the Registry value that locks them, and then restart the "Tile Data model server" service to refresh the Start Tiles

This method was considerably more effective than the previous one, but still required elevated privileges to stop the service, and also needed a "delayed action" after logoff to allow the Start Tiles to be created without unlocking them. This made it more suited to using a tool like AppSense Environment Manager, although not impossible to script your way around.

But there has to be a better way, surely?

Now, there's a corresponding cmdlet in PowerShell that goes with Export-StartLayout - Import-StartLayout. However, it can only be used to either import layouts to an offline WIM image, or, if you're like Aaron Parker and just go out and run it on a live OS, you'll find out it simply works on the default profile. So no good unless you're creating a new local user profile.

Hmmm...let's dig under the hood a bit. What does Import-StartLayout actually do?

Process Monitor reveals it simply writes a file called LayoutModification.xml into the C:\Users\Default\AppData\Local\Windows\Shell folder. This file is then read during the logon process, and (I'm assuming) then used to create the Start Tiles in the newly-created local user profile. A succession of writes to the file %LOCALAPPDATA%\TileDataLayer\Database\vedatamodel.edb (that awful database that controls these Tile settings) would lead me to believe that my postulation could well indeed be accurate.

What would happen if we used Export-StartLayout to create a file at logoff in the user's homedrive called LayoutModification.xml, and then popped this into %LOCALAPPDATA%\Microsoft\Windows\Shell for a user with a roaming profile as they logged in? After all, the Start Tiles have to be created for a roaming profile user - because they don't have any in their profile.

It works :-)

However, the key is, the roaming user profile must deleted from the endpoint at logoff. This is something Windows 10 has historically had trouble with, because the damned "Tile Data model layer" service hangs on to the database (I believe this is intended to be fixed in Redstone, but don't quote me on that). Even with "Delete cached copies of roaming profiles" defined via GPO. But, in the latest preview builds (14279) the deletion of roaming profiles appears a lot more stable (although not 100%, it is a damn sight better than early builds), so I'm sure this is slated for a fix sooner rather than later.

So we can successfully deploy a roaming profile for a Windows 10 domain deployment by using the following steps:-
  • Define a roaming profile path for the target user in ADUC
  • Ensure that your clients have the "Delete cached copes of roaming profiles" GPO defined
  • Set up a GPO Logoff Script to run the command in the next line
  • Export-StartLayout -Path \\SERVER\Share\User\LayoutModification.xml
  • Set up a Group Policy Preference File Item (see image) to copy the following file to the named destination folder at user logon (or use a script, or third-party tool)
  • \\SERVER\Share\User\LayoutModification.xml --> %LOCALAPPDATA%\Microsoft\Windows\Shell


This will then create a new set of Start Tiles with the settings that you exported from your previous session when you log in to a new machine. Finally, smooth roaming without all the complicated hacks!

The key to all of this is the name of the file that you output with Export-StartLayout, and where you put it. Call it LayoutModification.xml, and drop it back in the required folder when the user logs back in, and it will generate a set of Start Tiles based on the layout you exported from.

But the best thing is, it doesn't lock the Start Tiles in place - the user can edit them to their heart's content without any of the jiggery-pokery we had to do in Method 2 above. Glorious, no?

Unfortunately, now it's time for the bad news.

Running Export-StartLayout at logoff (no matter how you trigger it) has problems in some builds of Windows 10. Which means dependent on the build you're on, the actual export function may or may not work. It works fine when run interactively during the session - it's only when triggered at logoff that you get the failure. If it doesn't work, it throws an error like this


This is a major PITA. It appears to be related to some combination of updates why this occurs, because I have 10240 builds that don't get this error and 10586 builds that do. One thing I have noticed though is 14279 builds - all of them - don'tsuffer from the error. So whatever is causing it is slated to be fixed in Redstone. Windows 10's awful documentation of bug fixes - many builds shipped just with this one sentence "bug fixes and improvements" - mean I have no idea where the fix came in or what possibly causes it to manifest on some builds and not others.

You can tell pretty much straight away if you're affected by this, because when you log off the LayoutModification.xml file won't be updated. Running the PowerShell from within the user session will update it fine.

If you're on one of the affected builds, you have two choices:-
  • Wait for the Redstone release in June (deploying preview builds to live machines is probably not an option)
  • Set up a Scheduled Task to run the PowerShell Export-StartLayout cmdlet that starts when the user logs on, and continues every few minutes until they log out

Doing it via a Scheduled Task makes the whole routine feel rather "hacky" again, but if you're suffering from this issue, it's the only way that you can do it short of waiting for the Redstone release. The interval you need to configure depends on your preference, and how your users behave. You may also need to configure your task to run the PowerShell window with the windowstyle -Hidden parameter.

I covered setting up a Scheduled Task using AppSense Environment Manager in a previous post. However, if you're not in an AppSense environment, you should be able to do it through Group Policy Preferences, or create it in the Task Scheduler and export it out to other machines using an XML file.

An example XML file to import a Scheduled Task is shown here. This points to \\UKSLDC003\FileStore\ExportStartLayout2.ps1 and runs in the context of the user JRR\jrankin, should you choose to edit for your own use

<?xml version="1.0" encoding="UTF-16"?>
<Task version="1.4" xmlns="http://schemas.microsoft.com/windows/2004/02/mit/task">
  <RegistrationInfo>
    <Date>2016-03-22T19:06:45.4275818</Date>
    <Author>JRR\jrankin</Author>
    <URI>\ESL</URI>
  </RegistrationInfo>
  <Triggers>
    <TimeTrigger>
      <Repetition>
        <Interval>PT1M</Interval>
        <Duration>P1D</Duration>
        <StopAtDurationEnd>false</StopAtDurationEnd>
      </Repetition>
      <StartBoundary>2016-03-22T00:00:00</StartBoundary>
      <Enabled>true</Enabled>
    </TimeTrigger>
  </Triggers>
  <Principals>
    <Principal id="Author">
      <UserId>S-1-5-21-2950944927-1203068717-1704750700-1114</UserId>
      <LogonType>InteractiveToken</LogonType>
      <RunLevel>LeastPrivilege</RunLevel>
    </Principal>
  </Principals>
  <Settings>
    <MultipleInstancesPolicy>IgnoreNew</MultipleInstancesPolicy>
    <DisallowStartIfOnBatteries>true</DisallowStartIfOnBatteries>
    <StopIfGoingOnBatteries>true</StopIfGoingOnBatteries>
    <AllowHardTerminate>true</AllowHardTerminate>
    <StartWhenAvailable>false</StartWhenAvailable>
    <RunOnlyIfNetworkAvailable>false</RunOnlyIfNetworkAvailable>
    <IdleSettings>
      <StopOnIdleEnd>true</StopOnIdleEnd>
      <RestartOnIdle>false</RestartOnIdle>
    </IdleSettings>
    <AllowStartOnDemand>true</AllowStartOnDemand>
    <Enabled>true</Enabled>
    <Hidden>false</Hidden>
    <RunOnlyIfIdle>false</RunOnlyIfIdle>
    <DisallowStartOnRemoteAppSession>false</DisallowStartOnRemoteAppSession>
    <UseUnifiedSchedulingEngine>true</UseUnifiedSchedulingEngine>
    <WakeToRun>false</WakeToRun>
    <ExecutionTimeLimit>PT72H</ExecutionTimeLimit>
    <Priority>7</Priority>
  </Settings>
  <Actions Context="Author">
    <Exec>
      <Command>powershell.exe</Command>
      <Arguments>.\ExportStartLayout2.ps1</Arguments>
      <WorkingDirectory>\\UKSLDC003\FileStore</WorkingDirectory>
    </Exec>
  </Actions>
</Task>

And after all of this, I spotted one more thing. A profile version increment? Interesting...

When you log on with a roaming profile from a machine running build 14279 of Windows 10 and upwards there is an increment to the profile version. That's right, Windows 10 shipped with a .v5 profile but on version 14279 the profile becomes a .v6. Which means that potentially roaming profiles from pre-14279 builds are incompatible with those on the Redstone build. And what's more, historically, profile version increments have only occurred on operating system upgrades. Does this mean that June's update will see us being moved to what is effectively Windows 10.1?


Personally, if I was on one of the builds that can't manage to run the export command at logoff, I'd be tempted to wait for the Redstone update, unless this was an absolute deal-breaker. The very fact that the profile type has changed leads me to believe that Redstone will provide full roaming profile functionality such as we had in Windows 7 - a year too late maybe, but there nevertheless.

Anyway, I'veput together a quick video which should hopefully show you this theory in action...hopefully this may help some of you out there!

Windows 10 part #8 - speeding up the first logon process

$
0
0
I sent out some Tweets recently regarding knocking around 66% off the first logon time of a Windows 10 machine. Whilst people are not overly concerned about the actual first logon time (as long as the subsequent ones are speedy enough), there are environments where users will quite often be exposed to "first logons". As an example, we have in current engagement a selection of "open access" machines, where due to their very nature, local copies of profiles are not maintained. This in essence means that every time a user logs on, they are experiencing the long and drawn-out "first logon" process.

There are various ways you can mitigate against this which I've been exploring for some period of time. However, it's worth bearing in mind that as Windows 10 is under the flag of "continuous development" - build 14295 just released has some interesting changes, such as the presence of App-V logs, indicating that the client will soon be natively available - any tricks and tips I've put together here may not necessarily work in the same way once newer builds make it to general release. For now, though, I've had success with them, and headed off some of the user dissatisfaction from the long logon times in open access areas.

We also studied the logon process using Lakeside SysTrack, and found that the biggest cause of slowdowns and alerts on our Windows 10 deployments was due to huge disk I/O, normally around the logon period but also within the user session itself. From this we've extrapolated the conclusion that Windows 10 is optimized for SSDs, and if possible, you should deploy it on systems where the OS drive is solid state. This tallies with what I've been hearing, that Microsoft based their operating system development around three large customers from the US who have been using SSDs as standard for four or five years now.

Anyway, I actually documented my conclusions on an article over at 4SysOps. You can read the article via the link below - there's also a link to my YouTube video demonstrating my findings, if you can understand my north-eastern accent :-) 


I will also be doing a presentation on all things Windows 10 at BriForum London this year.

Windows 10 part #9 - removing Modern Apps from your image

$
0
0
One of Windows 10's most noticeable changes is the integration of Microsoft's new "Modern" or "Universal" apps. They're intended to offer a new method of delivering and creating applications that sit right alongside your old, familiar desktop applications. The idea is that Modern Apps offer a unified experience across desktop, laptop, phone and console - assuming you use Windows on your PCs, Windows Phone on your phone, and XBox on your console. At the same time, they give a single API core layer for development and a single distribution point through the Windows Store (or Windows Store for Business, when it arrives). So if you're sucking up the Microsoft kool-aid, it all sounds good, no?

Unfortunately there are a few problems with this.

Firstly, most of us have vast swathes of "legacy" desktop applications that we need to deliver to our users, and the primary need is to provision access to these. Modern Apps simply aren't popular enough at the moment to warrant our attention.

Secondly, some of the Modern Apps are quite good at clashing with our desktop application estates. OneNote, for instance, arrives as both a Modern App and also as part of the wider Office suite, and it can be confusing for the users to see both.

Thirdly, Modern Apps are quite good at aggressively resetting file type associations. If you've used Windows 10 for any length of time, there's a good chance you've seen a pop-up message like this


It's not just limited to things like AVI files - one of the most annoying is when it decides to reset your PDF association to Edge, or JPG association to Pictures. There is a Registry hack to get around this - see this article - but I'd sooner do something more permanent.

Fourth, there are some really weird apps in the Modern Apps list that I'd rather not see. Contact Support is the worst - my users are constantly thinking it is a way to get help from the IT department, but it's not. Microsoft missed a trick here by not making this application customizable, so I just want to get rid of it. They also made Calculator one of the Modern Apps, so if we can find a way to get rid of some, that's also one we want to keep!

Now, you can get around this problem of Modern Apps - mostly - by running your Windows 10 systems on the Long-Term Servicing Branch (LTSB). However, this puts you on what is essentially a different operating system that doesn't get feature upgrades (and therefore looks pretty dated very quickly). It's also something Microsoft would rather you didn't use, and besides, the Contact Support app I mentioned earlier still appears even though everything else - even Edge - is removed. I'd much rather be able to run on the Current Branch for Business (CBB) servicing branch, and just get rid of the Modern Apps.

Of course, some are probably saying, there are PowerShell cmdlets that let you remove Modern Apps from the base OS, aren't there? This is true. You can use the following command

Remove-AppXProvisionedPackage-Online-PackageName xxxx

where xxxx is the package name you want to remove. However, there are some limitations with this. Certain Modern Apps are listed as "part of the operating system" and cannot be removed. This is really annoying when, for instance, you might want to remove Microsoft Edge or the Contact Support app. It's also even more annoying when you realize that they've managed to remove Edge in LTSB but you can't do it in CBB in this fashion.

So how do we do it? We just want a CBB version of Windows 10 we can deploy without most of the useless and confusing Modern Apps. How difficult can that be?

In order to facilitate this, we need to understand how Windows 10 actually provisions a user's access to these Modern Apps.

You may have noticed, either if you're a Windows 10 user or a reader of this blog, that Windows 10 has a big logon delay when you first sign in. Most of this process is taken up by the creation of the Start Menu, the Start Tiles and the Modern Apps. The Start Menu isn't a filesystem any more like it was in Windows 7 and earlier. It's partly a filesystem - the "legacy" applications on the Start Menu are still pulled in from %PROGRAMDATA%\Microsoft\Windows\Start Menu\Programs - but the Modern App shortcuts are created on-the-fly at the user's first logon. This is also the reason that it's very difficult to roam the Start Menu or the Start Tiles or indeed many of the Modern App settings (Modern App settings are something for a later article) - they are compiled and expanded and tied up in a set of databases which make them very different from the way we're used to managing these things.

How do we stop this expansion/creation from happening, and also from being so intensive?

First we need to understand how it works under the hood.

When a user logs in to Windows 10 for the first time, the operating system looks in a few different places to get the information it needs to compile the Start Menu and the Start Tiles. Not all of them are listed here, but the main ones are:-

%WINDIR%\SystemApps
%PROGRAMFILES%\WindowsApps

These two folders are combined and dump out the user's version of all the associated apps to %LOCALAPPDATA%\Packages and other parts of the user's profile.

The SystemApps folder contains those Modern Apps that can't be removed via PowerShell. These include things like Contact Support and Edge. This folder can be accessed through Explorer:-


The WindowsApps folder, conversely, can't be accessed unless you take ownership of the folder and then modify the NTFS permissions. DON'T do this, though, as the very act of even slightly modifying the permissions on this folder stops ALL of your Modern Apps from working. With the benefit of snapshots and VMs, I have a screenshot of some of the folder contents below:-


This isn't all of them - there are 80+ Modern App folders here, which coupled with those from SystemApps, start to give you an idea of why a Windows 10 first logon takes so long. Given that Server 2016 looks like it will work with the same underlying operating system principles, I can only imagine that XenApp server logons are about to become horrendous in the extreme, as soon as a supported XenApp version for Server 2016 makes it out of the door.

Once this process is completed, this is what gives you your default Windows Start Menu and Tiles as seen below


I can't speak for everyone, but the consumer focus of this default Menu, coupled with the patronising names for the groups - "Play and explore"...gimme a break - makes me cringe every time. The time the user has waited for all this stuff to be created that they probably won't even use winds me up even more.

The trick to disabling most of these Modern Apps is simply to rename the folders that they expand from. What we're going to do is prefix the apps folders we don't want with BLOCKED_, which means that we can easily revert the changes we make in the event there's an issue.

For the folders in %WINDIR%\SystemApps, this is fairly straightforward, because we can see them through the GUI. Log on as an administrator and run the following commands (lines may wrap):-

c:
cd "Windows\SystemApps"

ren ContactSupport_cw5n1h2txyewy BLOCKED_ContactSupport_cw5n1h2txyewy
ren Microsoft.MicrosoftEdge_8wekyb3d8bbwe BLOCKED_Microsoft.MicrosoftEdge_8wekyb3d8bbwe
ren Microsoft.XboxGameCallableUI_cw5n1h2txyewy BLOCKED_Microsoft.XboxGameCallableUI_cw5n1h2txyewy
ren Microsoft.XboxIdentityProvider_cw5n1h2txyewy BLOCKED_Microsoft.XboxIdentityProvider_cw5n1h2txyewy
ren WindowsFeedback_cw5n1h2txyewy BLOCKED_WindowsFeedback_cw5n1h2txyewy

This is cut down to just remove the Windows Feedback, XBox, Contact Support and Edge applications. If you want to keep some (like Edge), or disable some more of the system-level apps, simply add or remove lines as appropriate, inserting the folder names that you can view in Explorer.

Now, doing the same for the WindowsApps folder is a deal more tricky. For starters, you can't even see what's in it, even if you're logged on as an admin.

What you can do is download psexec.exe (part of the PSTools suite from Microsoft) and use it to run a command prompt as SYSTEM. Simply fire up a command prompt as an administrator and run the following command (assuming psexec is accessible):-

psexec -i -s cmd.exe

You should now have a command window that is running with SYSTEM privileges. From here, you can list the directories in c:\Program Files\WindowsApps without any issue.

As of today (April 18 2016), this was the list of folders in this directory:-

9E2F88E3.Twitter_5.0.1.0_x86__wgeqdkkx372wm

king.com.CandyCrushSodaSaga_1.62.900.0_x86__kgqvnymyfvs32

Microsoft.3DBuilder_10.9.50.0_neutral_~_8wekyb3d8bbwe

Microsoft.3DBuilder_10.9.50.0_x64__8wekyb3d8bbwe

Microsoft.Appconnector_1.3.3.0_neutral__8wekyb3d8bbwe

Microsoft.Appconnector_2015.707.550.0_neutral_~_8wekyb3d8bbwe

Microsoft.BingFinance_4.6.169.0_neutral_~_8wekyb3d8bbwe

Microsoft.BingFinance_4.6.169.0_x86__8wekyb3d8bbwe

Microsoft.BingNews_4.6.169.0_neutral_~_8wekyb3d8bbwe

Microsoft.BingNews_4.6.169.0_x86__8wekyb3d8bbwe

Microsoft.BingSports_4.6.169.0_neutral_~_8wekyb3d8bbwe

Microsoft.BingSports_4.6.169.0_x86__8wekyb3d8bbwe

Microsoft.BingWeather_4.6.169.0_neutral_~_8wekyb3d8bbwe

Microsoft.BingWeather_4.6.169.0_x86__8wekyb3d8bbwe

Microsoft.CommsPhone_1.10.15000.0_neutral_split.scale-100_8wekyb3d8bbwe

Microsoft.CommsPhone_1.10.15000.0_neutral_~_8wekyb3d8bbwe

Microsoft.CommsPhone_1.10.15000.0_x64__8wekyb3d8bbwe

Microsoft.ConnectivityStore_1.1509.1.0_neutral_~_8wekyb3d8bbwe

Microsoft.ConnectivityStore_1.1509.1.0_x64__8wekyb3d8bbwe

Microsoft.Getstarted_2.3.7.0_neutral_~_8wekyb3d8bbwe

Microsoft.Getstarted_2.3.7.0_x64__8wekyb3d8bbwe

Microsoft.Messaging_1.10.22012.0_neutral_split.scale-150_8wekyb3d8bbwe

Microsoft.Messaging_1.10.22012.0_neutral_~_8wekyb3d8bbwe

Microsoft.Messaging_1.10.22012.0_x86__8wekyb3d8bbwe

Microsoft.MicrosoftOfficeHub_17.6306.23501.0_x64__8wekyb3d8bbwe

Microsoft.MicrosoftOfficeHub_2015.6306.23501.0_neutral_~_8wekyb3d8bbwe

Microsoft.MicrosoftSolitaireCollection_3.3.9211.0_neutral_split.scale-100_8wekyb3d8bbwe

Microsoft.MicrosoftSolitaireCollection_3.3.9211.0_neutral_~_8wekyb3d8bbwe

Microsoft.MicrosoftSolitaireCollection_3.3.9211.0_x64__8wekyb3d8bbwe

Microsoft.NET.Native.Framework.1.0_1.0.22929.0_x64__8wekyb3d8bbwe

Microsoft.NET.Native.Framework.1.0_1.0.22929.0_x86__8wekyb3d8bbwe

Microsoft.NET.Native.Framework.1.1_1.0.23115.0_x64__8wekyb3d8bbwe

Microsoft.NET.Native.Framework.1.1_1.0.23115.0_x86__8wekyb3d8bbwe

Microsoft.NET.Native.Framework.1.2_1.2.23231.0_x64__8wekyb3d8bbwe

Microsoft.NET.Native.Framework.1.2_1.2.23231.0_x86__8wekyb3d8bbwe

Microsoft.NET.Native.Runtime.1.0_1.0.22929.0_x64__8wekyb3d8bbwe

Microsoft.NET.Native.Runtime.1.0_1.0.22929.0_x86__8wekyb3d8bbwe

Microsoft.NET.Native.Runtime.1.1_1.1.23118.0_x64__8wekyb3d8bbwe

Microsoft.NET.Native.Runtime.1.1_1.1.23118.0_x86__8wekyb3d8bbwe

Microsoft.NET.Native.Runtime.1.1_1.1.23406.0_x64__8wekyb3d8bbwe

Microsoft.NET.Native.Runtime.1.1_1.1.23406.0_x86__8wekyb3d8bbwe

Microsoft.Office.OneNote_17.6131.10051.0_x64__8wekyb3d8bbwe

Microsoft.Office.OneNote_2015.6131.10051.0_neutral_~_8wekyb3d8bbwe

Microsoft.Office.Sway_17.6216.20251.0_x64__8wekyb3d8bbwe

Microsoft.Office.Sway_2015.6216.20251.0_neutral_~_8wekyb3d8bbwe

Microsoft.People_10.0.2840.0_neutral_split.scale-100_8wekyb3d8bbwe

Microsoft.People_10.0.2840.0_x64__8wekyb3d8bbwe

Microsoft.People_2015.1012.106.0_neutral_~_8wekyb3d8bbwe

Microsoft.SkypeApp_3.2.1.0_neutral_~_kzf8qxf38zg5c

Microsoft.SkypeApp_3.2.1.0_x86__kzf8qxf38zg5c

Microsoft.VCLibs.120.00_12.0.21005.1_x64__8wekyb3d8bbwe

Microsoft.VCLibs.120.00_12.0.21005.1_x86__8wekyb3d8bbwe

Microsoft.VCLibs.140.00_14.0.22929.0_x64__8wekyb3d8bbwe

Microsoft.VCLibs.140.00_14.0.22929.0_x86__8wekyb3d8bbwe

Microsoft.VCLibs.140.00_14.0.23816.0_x64__8wekyb3d8bbwe

Microsoft.VCLibs.140.00_14.0.23816.0_x86__8wekyb3d8bbwe

Microsoft.Windows.Photos_15.1001.16470.0_neutral_split.scale-100_8wekyb3d8bbwe

Microsoft.Windows.Photos_15.1001.16470.0_x64__8wekyb3d8bbwe

Microsoft.Windows.Photos_2015.1001.17200.0_neutral_~_8wekyb3d8bbwe

Microsoft.WindowsAlarms_10.1510.12020.0_neutral_split.scale-100_8wekyb3d8bbwe

Microsoft.WindowsAlarms_10.1510.12020.0_x64__8wekyb3d8bbwe

Microsoft.WindowsAlarms_2015.1012.20.0_neutral_~_8wekyb3d8bbwe

Microsoft.WindowsCalculator_10.1510.9020.0_neutral_split.scale-100_8wekyb3d8bbwe

Microsoft.WindowsCalculator_10.1510.9020.0_x64__8wekyb3d8bbwe

Microsoft.WindowsCalculator_2015.1009.20.0_neutral_~_8wekyb3d8bbwe

Microsoft.WindowsCamera_2015.1071.40.0_neutral_split.scale-100_8wekyb3d8bbwe

Microsoft.WindowsCamera_2015.1071.40.0_neutral_~_8wekyb3d8bbwe

Microsoft.WindowsCamera_2015.1071.40.0_x64__8wekyb3d8bbwe

microsoft.windowscommunicationsapps_17.6308.42271.0_x64__8wekyb3d8bbwe

microsoft.windowscommunicationsapps_2015.6308.42271.0_neutral_~_8wekyb3d8bbwe

Microsoft.WindowsMaps_4.1509.50911.0_neutral_split.scale-100_8wekyb3d8bbwe

Microsoft.WindowsMaps_4.1509.50911.0_neutral_~_8wekyb3d8bbwe

Microsoft.WindowsMaps_4.1509.50911.0_x64__8wekyb3d8bbwe

Microsoft.WindowsPhone_10.1510.9010.0_x64__8wekyb3d8bbwe

Microsoft.WindowsPhone_2015.1009.10.0_neutral_~_8wekyb3d8bbwe

Microsoft.WindowsSoundRecorder_10.1510.12110.0_x64__8wekyb3d8bbwe

Microsoft.WindowsSoundRecorder_2015.1012.110.0_neutral_~_8wekyb3d8bbwe

Microsoft.WindowsStore_2015.10.13.0_neutral_split.scale-100_8wekyb3d8bbwe

Microsoft.WindowsStore_2015.10.13.0_x64__8wekyb3d8bbwe

Microsoft.WindowsStore_2015.1013.14.0_neutral_~_8wekyb3d8bbwe

Microsoft.XboxApp_2015.930.526.0_neutral_~_8wekyb3d8bbwe

Microsoft.XboxApp_9.9.30030.0_x64__8wekyb3d8bbwe

Microsoft.ZuneMusic_2019.6.13251.0_neutral_~_8wekyb3d8bbwe

Microsoft.ZuneMusic_3.6.13251.0_neutral_resources.scale-140_8wekyb3d8bbwe

Microsoft.ZuneMusic_3.6.13251.0_x64__8wekyb3d8bbwe

Microsoft.ZuneVideo_2019.6.13251.0_neutral_~_8wekyb3d8bbwe

Microsoft.ZuneVideo_3.6.13251.0_neutral_resources.scale-150_8wekyb3d8bbwe

Microsoft.ZuneVideo_3.6.13251.0_x64__8wekyb3d8bbwe

This may change as new updates are applied to Windows 10, so you may need to run the command prompt as SYSTEM and export the listing of a dir command out to a text file to see if the following rename commands need to be added to.

But for now, I identified the Modern Apps in this list that I wanted rid of and added them to another simple batch command. I have commented out the ones I wanted to keep with the :: notation. Again, you can customize this list as you require, depending on what you would like to keep or get rid of (again, lines may have wrapped). Don't forget to test thoroughly first though!

c:
cd "Program Files\WindowsApps"

ren 9E2F88E3.Twitter_5.0.1.0_x86__wgeqdkkx372wm BLOCKED_9E2F88E3.Twitter_5.0.1.0_x86__wgeqdkkx372wm
ren king.com.CandyCrushSodaSaga_1.62.900.0_x86__kgqvnymyfvs32 BLOCKED_king.com.CandyCrushSodaSaga_1.62.900.0_x86__kgqvnymyfvs32
ren Microsoft.3DBuilder_10.9.50.0_neutral_~_8wekyb3d8bbwe BLOCKED_Microsoft.3DBuilder_10.9.50.0_neutral_~_8wekyb3d8bbwe
ren Microsoft.3DBuilder_10.9.50.0_x64__8wekyb3d8bbwe BLOCKED_Microsoft.3DBuilder_10.9.50.0_x64__8wekyb3d8bbwe
:: ren Microsoft.Appconnector_1.3.3.0_neutral__8wekyb3d8bbwe BLOCKED_Microsoft.Appconnector_1.3.3.0_neutral__8wekyb3d8bbwe
:: ren Microsoft.Appconnector_2015.707.550.0_neutral_~_8wekyb3d8bbwe BLOCKED_Microsoft.Appconnector_2015.707.550.0_neutral_~_8wekyb3d8bbwe
ren Microsoft.BingFinance_4.6.169.0_neutral_~_8wekyb3d8bbwe BLOCKED_Microsoft.BingFinance_4.6.169.0_neutral_~_8wekyb3d8bbwe
ren Microsoft.BingFinance_4.6.169.0_x86__8wekyb3d8bbwe BLOCKED_Microsoft.BingFinance_4.6.169.0_x86__8wekyb3d8bbwe
ren Microsoft.BingNews_4.6.169.0_neutral_~_8wekyb3d8bbwe BLOCKED_Microsoft.BingNews_4.6.169.0_neutral_~_8wekyb3d8bbwe
ren Microsoft.BingNews_4.6.169.0_x86__8wekyb3d8bbwe BLOCKED_Microsoft.BingNews_4.6.169.0_x86__8wekyb3d8bbwe
ren Microsoft.BingSports_4.6.169.0_neutral_~_8wekyb3d8bbwe BLOCKED_Microsoft.BingSports_4.6.169.0_neutral_~_8wekyb3d8bbwe
ren Microsoft.BingSports_4.6.169.0_x86__8wekyb3d8bbwe BLOCKED_Microsoft.BingSports_4.6.169.0_x86__8wekyb3d8bbwe
ren Microsoft.BingWeather_4.6.169.0_neutral_~_8wekyb3d8bbwe BLOCKED_Microsoft.BingWeather_4.6.169.0_neutral_~_8wekyb3d8bbwe
ren Microsoft.BingWeather_4.6.169.0_x86__8wekyb3d8bbwe BLOCKED_Microsoft.BingWeather_4.6.169.0_x86__8wekyb3d8bbwe
:: ren Microsoft.CommsPhone_1.10.15000.0_neutral_split.scale-100_8wekyb3d8bbwe BLOCKED_Microsoft.CommsPhone_1.10.15000.0_neutral_split.scale-100_8wekyb3d8bbwe
:: ren Microsoft.CommsPhone_1.10.15000.0_neutral_~_8wekyb3d8bbwe BLOCKED_Microsoft.CommsPhone_1.10.15000.0_neutral_~_8wekyb3d8bbwe
:: ren Microsoft.CommsPhone_1.10.15000.0_x64__8wekyb3d8bbwe BLOCKED_Microsoft.CommsPhone_1.10.15000.0_x64__8wekyb3d8bbwe
:: ren Microsoft.ConnectivityStore_1.1509.1.0_neutral_~_8wekyb3d8bbwe BLOCKED_Microsoft.ConnectivityStore_1.1509.1.0_neutral_~_8wekyb3d8bbwe
:: ren Microsoft.ConnectivityStore_1.1509.1.0_x64__8wekyb3d8bbwe BLOCKED_Microsoft.ConnectivityStore_1.1509.1.0_x64__8wekyb3d8bbwe
ren Microsoft.Getstarted_2.3.7.0_neutral_~_8wekyb3d8bbwe BLOCKED_Microsoft.Getstarted_2.3.7.0_neutral_~_8wekyb3d8bbwe
ren Microsoft.Getstarted_2.3.7.0_x64__8wekyb3d8bbwe BLOCKED_Microsoft.Getstarted_2.3.7.0_x64__8wekyb3d8bbwe
ren Microsoft.Messaging_1.10.22012.0_neutral_split.scale-150_8wekyb3d8bbwe BLOCKED_Microsoft.Messaging_1.10.22012.0_neutral_split.scale-150_8wekyb3d8bbwe
ren Microsoft.Messaging_1.10.22012.0_neutral_~_8wekyb3d8bbwe BLOCKED_Microsoft.Messaging_1.10.22012.0_neutral_~_8wekyb3d8bbwe
ren Microsoft.Messaging_1.10.22012.0_x86__8wekyb3d8bbwe BLOCKED_Microsoft.Messaging_1.10.22012.0_x86__8wekyb3d8bbwe
ren Microsoft.MicrosoftOfficeHub_17.6306.23501.0_x64__8wekyb3d8bbwe BLOCKED_Microsoft.MicrosoftOfficeHub_17.6306.23501.0_x64__8wekyb3d8bbwe
ren Microsoft.MicrosoftOfficeHub_2015.6306.23501.0_neutral_~_8wekyb3d8bbwe BLOCKED_Microsoft.MicrosoftOfficeHub_2015.6306.23501.0_neutral_~_8wekyb3d8bbwe
ren Microsoft.MicrosoftSolitaireCollection_3.3.9211.0_neutral_split.scale-100_8wekyb3d8bbwe BLOCKED_Microsoft.MicrosoftSolitaireCollection_3.3.9211.0_neutral_split.scale-100_8wekyb3d8bbwe
ren Microsoft.MicrosoftSolitaireCollection_3.3.9211.0_neutral_~_8wekyb3d8bbwe BLOCKED_Microsoft.MicrosoftSolitaireCollection_3.3.9211.0_neutral_~_8wekyb3d8bbwe
ren Microsoft.MicrosoftSolitaireCollection_3.3.9211.0_x64__8wekyb3d8bbwe BLOCKED_Microsoft.MicrosoftSolitaireCollection_3.3.9211.0_x64__8wekyb3d8bbwe
:: ren Microsoft.NET.Native.Framework.1.0_1.0.22929.0_x64__8wekyb3d8bbwe BLOCKED_Microsoft.NET.Native.Framework.1.0_1.0.22929.0_x64__8wekyb3d8bbwe
:: ren Microsoft.NET.Native.Framework.1.0_1.0.22929.0_x86__8wekyb3d8bbwe BLOCKED_Microsoft.NET.Native.Framework.1.0_1.0.22929.0_x86__8wekyb3d8bbwe
:: ren Microsoft.NET.Native.Framework.1.1_1.0.23115.0_x64__8wekyb3d8bbwe BLOCKED_Microsoft.NET.Native.Framework.1.1_1.0.23115.0_x64__8wekyb3d8bbwe
:: ren Microsoft.NET.Native.Framework.1.1_1.0.23115.0_x86__8wekyb3d8bbwe BLOCKED_Microsoft.NET.Native.Framework.1.1_1.0.23115.0_x86__8wekyb3d8bbwe
:: ren Microsoft.NET.Native.Framework.1.2_1.2.23231.0_x64__8wekyb3d8bbwe BLOCKED_Microsoft.NET.Native.Framework.1.2_1.2.23231.0_x64__8wekyb3d8bbwe
:: ren Microsoft.NET.Native.Framework.1.2_1.2.23231.0_x86__8wekyb3d8bbwe BLOCKED_Microsoft.NET.Native.Framework.1.2_1.2.23231.0_x86__8wekyb3d8bbwe
:: ren Microsoft.NET.Native.Runtime.1.0_1.0.22929.0_x64__8wekyb3d8bbwe BLOCKED_Microsoft.NET.Native.Runtime.1.0_1.0.22929.0_x64__8wekyb3d8bbwe
:: ren Microsoft.NET.Native.Runtime.1.0_1.0.22929.0_x86__8wekyb3d8bbwe BLOCKED_Microsoft.NET.Native.Runtime.1.0_1.0.22929.0_x86__8wekyb3d8bbwe
:: ren Microsoft.NET.Native.Runtime.1.1_1.1.23118.0_x64__8wekyb3d8bbwe BLOCKED_Microsoft.NET.Native.Runtime.1.1_1.1.23118.0_x64__8wekyb3d8bbwe
:: ren Microsoft.NET.Native.Runtime.1.1_1.1.23118.0_x86__8wekyb3d8bbwe BLOCKED_Microsoft.NET.Native.Runtime.1.1_1.1.23118.0_x86__8wekyb3d8bbwe
:: ren Microsoft.NET.Native.Runtime.1.1_1.1.23406.0_x64__8wekyb3d8bbwe BLOCKED_Microsoft.NET.Native.Runtime.1.1_1.1.23406.0_x64__8wekyb3d8bbwe
:: ren Microsoft.NET.Native.Runtime.1.1_1.1.23406.0_x86__8wekyb3d8bbwe BLOCKED_Microsoft.NET.Native.Runtime.1.1_1.1.23406.0_x86__8wekyb3d8bbwe
ren Microsoft.Office.OneNote_17.6131.10051.0_x64__8wekyb3d8bbwe BLOCKED_Microsoft.Office.OneNote_17.6131.10051.0_x64__8wekyb3d8bbwe
ren Microsoft.Office.OneNote_2015.6131.10051.0_neutral_~_8wekyb3d8bbwe BLOCKED_Microsoft.Office.OneNote_2015.6131.10051.0_neutral_~_8wekyb3d8bbwe
ren Microsoft.Office.Sway_17.6216.20251.0_x64__8wekyb3d8bbwe BLOCKED_Microsoft.Office.Sway_17.6216.20251.0_x64__8wekyb3d8bbwe
ren Microsoft.Office.Sway_2015.6216.20251.0_neutral_~_8wekyb3d8bbwe BLOCKED_Microsoft.Office.Sway_2015.6216.20251.0_neutral_~_8wekyb3d8bbwe
ren Microsoft.People_10.0.2840.0_neutral_split.scale-100_8wekyb3d8bbwe BLOCKED_Microsoft.People_10.0.2840.0_neutral_split.scale-100_8wekyb3d8bbwe
ren Microsoft.People_10.0.2840.0_x64__8wekyb3d8bbwe BLOCKED_Microsoft.People_10.0.2840.0_x64__8wekyb3d8bbwe
ren Microsoft.People_2015.1012.106.0_neutral_~_8wekyb3d8bbwe BLOCKED_Microsoft.People_2015.1012.106.0_neutral_~_8wekyb3d8bbwe
ren Microsoft.SkypeApp_3.2.1.0_neutral_~_kzf8qxf38zg5c BLOCKED_Microsoft.SkypeApp_3.2.1.0_neutral_~_kzf8qxf38zg5c
ren Microsoft.SkypeApp_3.2.1.0_x86__kzf8qxf38zg5c BLOCKED_Microsoft.SkypeApp_3.2.1.0_x86__kzf8qxf38zg5c
:: ren Microsoft.VCLibs.120.00_12.0.21005.1_x64__8wekyb3d8bbwe BLOCKED_Microsoft.VCLibs.120.00_12.0.21005.1_x64__8wekyb3d8bbwe
:: ren Microsoft.VCLibs.120.00_12.0.21005.1_x86__8wekyb3d8bbwe BLOCKED_Microsoft.VCLibs.120.00_12.0.21005.1_x86__8wekyb3d8bbwe
:: ren Microsoft.VCLibs.140.00_14.0.22929.0_x64__8wekyb3d8bbwe BLOCKED_Microsoft.VCLibs.140.00_14.0.22929.0_x64__8wekyb3d8bbwe
:: ren Microsoft.VCLibs.140.00_14.0.22929.0_x86__8wekyb3d8bbwe BLOCKED_Microsoft.VCLibs.140.00_14.0.22929.0_x86__8wekyb3d8bbwe
:: ren Microsoft.VCLibs.140.00_14.0.23816.0_x64__8wekyb3d8bbwe BLOCKED_Microsoft.VCLibs.140.00_14.0.23816.0_x64__8wekyb3d8bbwe
:: ren Microsoft.VCLibs.140.00_14.0.23816.0_x86__8wekyb3d8bbwe BLOCKED_Microsoft.VCLibs.140.00_14.0.23816.0_x86__8wekyb3d8bbwe
ren Microsoft.Windows.Photos_15.1001.16470.0_neutral_split.scale-100_8wekyb3d8bbwe BLOCKED_Microsoft.Windows.Photos_15.1001.16470.0_neutral_split.scale-100_8wekyb3d8bbwe
ren Microsoft.Windows.Photos_15.1001.16470.0_x64__8wekyb3d8bbwe BLOCKED_Microsoft.Windows.Photos_15.1001.16470.0_x64__8wekyb3d8bbwe
ren Microsoft.Windows.Photos_2015.1001.17200.0_neutral_~_8wekyb3d8bbwe BLOCKED_Microsoft.Windows.Photos_2015.1001.17200.0_neutral_~_8wekyb3d8bbwe
ren Microsoft.WindowsAlarms_10.1510.12020.0_neutral_split.scale-100_8wekyb3d8bbwe BLOCKED_Microsoft.WindowsAlarms_10.1510.12020.0_neutral_split.scale-100_8wekyb3d8bbwe
ren Microsoft.WindowsAlarms_10.1510.12020.0_x64__8wekyb3d8bbwe BLOCKED_Microsoft.WindowsAlarms_10.1510.12020.0_x64__8wekyb3d8bbwe
ren Microsoft.WindowsAlarms_2015.1012.20.0_neutral_~_8wekyb3d8bbwe BLOCKED_Microsoft.WindowsAlarms_2015.1012.20.0_neutral_~_8wekyb3d8bbwe
:: ren Microsoft.WindowsCalculator_10.1510.9020.0_neutral_split.scale-100_8wekyb3d8bbwe BLOCKED_Microsoft.WindowsCalculator_10.1510.9020.0_neutral_split.scale-100_8wekyb3d8bbwe
:: ren Microsoft.WindowsCalculator_10.1510.9020.0_x64__8wekyb3d8bbwe BLOCKED_Microsoft.WindowsCalculator_10.1510.9020.0_x64__8wekyb3d8bbwe
ren Microsoft.WindowsCalculator_2015.1009.20.0_neutral_~_8wekyb3d8bbwe BLOCKED_Microsoft.WindowsCalculator_2015.1009.20.0_neutral_~_8wekyb3d8bbwe
ren Microsoft.WindowsCamera_2015.1071.40.0_neutral_split.scale-100_8wekyb3d8bbwe BLOCKED_Microsoft.WindowsCamera_2015.1071.40.0_neutral_split.scale-100_8wekyb3d8bbwe
ren Microsoft.WindowsCamera_2015.1071.40.0_neutral_~_8wekyb3d8bbwe BLOCKED_Microsoft.WindowsCamera_2015.1071.40.0_neutral_~_8wekyb3d8bbwe
ren Microsoft.WindowsCamera_2015.1071.40.0_x64__8wekyb3d8bbwe BLOCKED_Microsoft.WindowsCamera_2015.1071.40.0_x64__8wekyb3d8bbwe
ren microsoft.windowscommunicationsapps_17.6308.42271.0_x64__8wekyb3d8bbwe BLOCKED_microsoft.windowscommunicationsapps_17.6308.42271.0_x64__8wekyb3d8bbwe
ren microsoft.windowscommunicationsapps_2015.6308.42271.0_neutral_~_8wekyb3d8bbwe BLOCKED_microsoft.windowscommunicationsapps_2015.6308.42271.0_neutral_~_8wekyb3d8bbwe
ren Microsoft.WindowsMaps_4.1509.50911.0_neutral_split.scale-100_8wekyb3d8bbwe BLOCKED_Microsoft.WindowsMaps_4.1509.50911.0_neutral_split.scale-100_8wekyb3d8bbwe
ren Microsoft.WindowsMaps_4.1509.50911.0_neutral_~_8wekyb3d8bbwe BLOCKED_Microsoft.WindowsMaps_4.1509.50911.0_neutral_~_8wekyb3d8bbwe
ren Microsoft.WindowsMaps_4.1509.50911.0_x64__8wekyb3d8bbwe BLOCKED_Microsoft.WindowsMaps_4.1509.50911.0_x64__8wekyb3d8bbwe
ren Microsoft.WindowsPhone_10.1510.9010.0_x64__8wekyb3d8bbwe BLOCKED_Microsoft.WindowsPhone_10.1510.9010.0_x64__8wekyb3d8bbwe
ren Microsoft.WindowsPhone_2015.1009.10.0_neutral_~_8wekyb3d8bbwe BLOCKED_Microsoft.WindowsPhone_2015.1009.10.0_neutral_~_8wekyb3d8bbwe
ren Microsoft.WindowsSoundRecorder_10.1510.12110.0_x64__8wekyb3d8bbwe BLOCKED_Microsoft.WindowsSoundRecorder_10.1510.12110.0_x64__8wekyb3d8bbwe
ren Microsoft.WindowsSoundRecorder_2015.1012.110.0_neutral_~_8wekyb3d8bbwe BLOCKED_Microsoft.WindowsSoundRecorder_2015.1012.110.0_neutral_~_8wekyb3d8bbwe
ren Microsoft.WindowsStore_2015.10.13.0_neutral_split.scale-100_8wekyb3d8bbwe BLOCKED_Microsoft.WindowsStore_2015.10.13.0_neutral_split.scale-100_8wekyb3d8bbwe
ren Microsoft.WindowsStore_2015.10.13.0_x64__8wekyb3d8bbwe BLOCKED_Microsoft.WindowsStore_2015.10.13.0_x64__8wekyb3d8bbwe
ren Microsoft.WindowsStore_2015.1013.14.0_neutral_~_8wekyb3d8bbwe BLOCKED_Microsoft.WindowsStore_2015.1013.14.0_neutral_~_8wekyb3d8bbwe
ren Microsoft.XboxApp_2015.930.526.0_neutral_~_8wekyb3d8bbwe BLOCKED_Microsoft.XboxApp_2015.930.526.0_neutral_~_8wekyb3d8bbwe
ren Microsoft.XboxApp_9.9.30030.0_x64__8wekyb3d8bbwe BLOCKED_Microsoft.XboxApp_9.9.30030.0_x64__8wekyb3d8bbwe
ren Microsoft.ZuneMusic_2019.6.13251.0_neutral_~_8wekyb3d8bbwe BLOCKED_Microsoft.ZuneMusic_2019.6.13251.0_neutral_~_8wekyb3d8bbwe
ren Microsoft.ZuneMusic_3.6.13251.0_neutral_resources.scale-140_8wekyb3d8bbwe BLOCKED_Microsoft.ZuneMusic_3.6.13251.0_neutral_resources.scale-140_8wekyb3d8bbwe
ren Microsoft.ZuneMusic_3.6.13251.0_x64__8wekyb3d8bbwe BLOCKED_Microsoft.ZuneMusic_3.6.13251.0_x64__8wekyb3d8bbwe
ren Microsoft.ZuneVideo_2019.6.13251.0_neutral_~_8wekyb3d8bbwe BLOCKED_Microsoft.ZuneVideo_2019.6.13251.0_neutral_~_8wekyb3d8bbwe
ren Microsoft.ZuneVideo_3.6.13251.0_neutral_resources.scale-150_8wekyb3d8bbwe BLOCKED_Microsoft.ZuneVideo_3.6.13251.0_neutral_resources.scale-150_8wekyb3d8bbwe
ren Microsoft.ZuneVideo_3.6.13251.0_x64__8wekyb3d8bbwe BLOCKED_Microsoft.ZuneVideo_3.6.13251.0_x64__8wekyb3d8bbwe 

Now once you've done this, any user who logs on to the machine will see that the folders we have renamed to "BLOCKED_" get ignored when the Start Menu and Tiles are created, cutting down the logon time as well as making things much more slick and familiar for our users. However, what you may notice is that whereas the Start Menu is now nice and streamlined, the Start Tiles have still tried to set up all of the default shortcuts - they just couldn't find them, resulting in the unholy mess you see in the image below.


Clearly the Start Tiles also have a dependency on another file somewhere - can we find where it is?

Of course we can :-) In the default user profile, specifically in C:\Users\Default\AppData\Local\Microsoft\Windows\Shell, there is a large (98KB) XML file called DefaultLayouts. This is the file that tells the operating system how to try and construct the default Start Tiles. If you delete this file and log on, your Start Menu will simply look like this:-


That looks vastly better already, but what if we used the technique we discussed in an earlier article for exporting the Start Tile layout in conjunction with this? So we simply remove the DefaultLayouts.xml file and drop in there a LayoutModification.xml file, as discussed in the previous article? In case you don't want to trawl the earlier article, here's a quick recap
  • Log on to a Windows 10 endpoint and configure the Start Tiles as you want them to appear to the user
  • Export this using the Export-StartLayout cmdlet to a file called LayoutModification.xml
  • Copy this file into C:\Users\Default\AppData\Local\Microsoft\Windows\Shell in your image or endpoints
  • Remove the DefaultLayouts.xml file from the same folder (actually, in testing, whether this file was present or not made no difference, so you can possibly omit this step and simply use the LayoutModification.xml file)
This actually seems to work really swimmingly. Check out my customized, streamlined Start Menu and Tiles, with a minimum of Modern Apps and no confusion for the user. You could trim this down even further still (no idea really why I actually left the Microsoft Wifi and Phone apps on there) - simply edit the commands from earlier in the article if you wish to try and make it leaner and meaner!


What's more, the user can customize it to their heart's content, they don't get any aggressive FTA resets, and the first logon time has dropped from 4m 10s down to 1m 04s (on my underpowered 2GB Hyper-V VMs)! The percentage improvement is around 70%+, and much more efficient than the use of the Default User folder in the NETLOGON share that I covered in an earlier article.

Deployment of this can be done in a number of ways. You can use scripts or tools to make these changes on your base operating system prior to users logging on, but perhaps the most efficient way would be to deliver these tweaks as part of the build process or even incorporate them into the base image (irrespective of the technology you're using to deliver it). The psexec requirement makes it slightly challenging, but a bit of scripting should suffice to allow you to change the folders in %PROGRAMFILES%\WindowsApps without touching the NTFS ACLs, which is a surefire way to break the Modern Apps entirely.

So there you have it - a method to give yourself Windows 10 machines on Current Branch for Business with the exact set of Modern Apps that you deem necessary (in my experience, quite a short list). Needless to say, Microsoft may shovel down updated versions of Modern Apps through the update channel that could possibly make some of them reappear, but if you keep a close eye on things, you should be able to intercept and disable these using the techniques described above.

I shall be making a quick video of this method at some point - a link will be posted at the end of the article as soon as it is published on my YouTube channel. And a shout out to Charlie Barrett of SCC for pointing me in the right direction to unearth some of Windows 10's under-the-hood behaviour.

Update 19/04/16

I noticed late last night that Microsoft updated all of the Modern Apps on my test machines, which incremented all of the version numbers of the folders we talked about earlier. So I quickly knocked up a batch script which will rename all of the targetfolders no matter what the version number. Obviously, test thoroughly before using this or any of the techniques in this article. I've got enough problems fixing my own screw-ups to be held responsible for anyone else's! ;-)

The commands will need to be saved as a .bat or .cmd file and executed with the SYSTEM privileges we described earlier, for which you will need to spawn a command window using psexec.exe (details given further up the page). I didn't have time to attack this in PowerShell - anyone wants to try it, feel free. I may revisit it later to convert it to PS.

Obviously, as previously, I have put in the names of the folders that I have elected to remove (or keep, if they're not in the script!) Customize this as necessary for your environment.

Here's the script:-

@echo off
setlocal
setlocal enableextensions


:: Move to correct folder

c:
cd "\Program Files\WindowsApps"


:: Pull full names of target folders in WindowsApps, and pass to renaming routine


for /d %%a in ("C:\Program Files\WindowsApps\9E2F88E3.Twitter*") do set fullsourcepath=%%a & CALL :RENAME
for /d %%a in ("C:\Program Files\WindowsApps\Microsoft.Bing*") do set fullsourcepath=%%a & CALL :RENAME
for /d %%a in ("C:\Program Files\WindowsApps\king.com*") do set fullsourcepath=%%a & CALL :RENAME
for /d %%a in ("C:\Program Files\WindowsApps\Microsoft.3D*") do set fullsourcepath=%%a & CALL :RENAME
for /d %%a in ("C:\Program Files\WindowsApps\Microsoft.CommsPhone*") do set fullsourcepath=%%a & CALL :RENAME
for /d %%a in ("C:\Program Files\WindowsApps\Microsoft.GetStarted*") do set fullsourcepath=%%a & CALL :RENAME
for /d %%a in ("C:\Program Files\WindowsApps\Microsoft.Messaging*") do set fullsourcepath=%%a & CALL :RENAME
for /d %%a in ("C:\Program Files\WindowsApps\Microsoft.MicrosoftOfficeHub*") do set fullsourcepath=%%a & CALL :RENAME
for /d %%a in ("C:\Program Files\WindowsApps\Microsoft.MicrosoftSolitaire*") do set fullsourcepath=%%a & CALL :RENAME
for /d %%a in ("C:\Program Files\WindowsApps\Microsoft.Office*") do set fullsourcepath=%%a & CALL :RENAME
for /d %%a in ("C:\Program Files\WindowsApps\Microsoft.People*") do set fullsourcepath=%%a & CALL :RENAME
for /d %%a in ("C:\Program Files\WindowsApps\Microsoft.Skype*") do set fullsourcepath=%%a & CALL :RENAME
for /d %%a in ("C:\Program Files\WindowsApps\Microsoft.Windows.Photos*") do set fullsourcepath=%%a & CALL :RENAME
for /d %%a in ("C:\Program Files\WindowsApps\Microsoft.WindowsAlarms*") do set fullsourcepath=%%a & CALL :RENAME
for /d %%a in ("C:\Program Files\WindowsApps\Microsoft.WindowsCamera*") do set fullsourcepath=%%a & CALL :RENAME
for /d %%a in ("C:\Program Files\WindowsApps\Microsoft.windowscommunicationsapps*") do set fullsourcepath=%%a & CALL :RENAME
for /d %%a in ("C:\Program Files\WindowsApps\Microsoft.WindowsMaps*") do set fullsourcepath=%%a & CALL :RENAME
for /d %%a in ("C:\Program Files\WindowsApps\Microsoft.WindowsPhone*") do set fullsourcepath=%%a & CALL :RENAME
for /d %%a in ("C:\Program Files\WindowsApps\Microsoft.WindowsSoundRecorder*") do set fullsourcepath=%%a & CALL :RENAME
for /d %%a in ("C:\Program Files\WindowsApps\Microsoft.WindowsStore*") do set fullsourcepath=%%a & CALL :RENAME
for /d %%a in ("C:\Program Files\WindowsApps\Microsoft.Xbox*") do set fullsourcepath=%%a & CALL :RENAME
for /d %%a in ("C:\Program Files\WindowsApps\Microsoft.Zune*") do set fullsourcepath=%%a & CALL :RENAME

:: Rename target folders in SystemApps

cd "\Windows\SystemApps"

ren ContactSupport_cw5n1h2txyewy BLOCKED_ContactSupport_cw5n1h2txyewy
ren Microsoft.MicrosoftEdge_8wekyb3d8bbwe BLOCKED_Microsoft.MicrosoftEdge_8wekyb3d8bbwe
ren Microsoft.XboxGameCallableUI_cw5n1h2txyewy BLOCKED_Microsoft.XboxGameCallableUI_cw5n1h2txyewy
ren Microsoft.XboxIdentityProvider_cw5n1h2txyewy BLOCKED_Microsoft.XboxIdentityProvider_cw5n1h2txyewy
ren WindowsFeedback_cw5n1h2txyewy BLOCKED_WindowsFeedback_cw5n1h2txyewy

endlocal
goto :eof

 
:RENAME

:: Rename WindowsApps folders

Echo.
Echo Renaming folder %fullsourcepath%...
Echo.

:: Pull the folder name (minus full path) for destination

for /f "tokens=4 delims=\" %%b in ('echo %fullsourcepath%') do set fulldestpath=%%b

:: Rename folder to BLOCKED_xxxx

ren "%fullsourcepath%" BLOCKED_%fulldestpath%

goto :eof

I've tested this on a few Windows 10 machines, and it seems to work OK. I will be testing again when the next batch of Modern App updates sneak out (they don't appear to come through "ordinary" channels such as WSUS or SCCM).

Update 21/04/2016

In order to stop Modern Apps coming back down to your machine, you have a couple of choices. You could either run the script above on a schedule of some sort (you would have to call the script from psexec with the /accepteula switch, probably at startup or as a Scheduled Task), or you could disable Modern App updates by GPO.

I prefer the second option, and this would be a good thing in general as Modern Apps update outside of the normal channels, and are quite good at suddenly shovelling down changes when Microsoft feel like it. Remember when Microsoft Sway suddenly appeared on everyone's Start Tiles, or when our Lock Screens decided they were going to show Rise of the Tomb Raider adverts instead of our corporate logo? This is not really acceptable in corporate environments, and if you were using Edge, for instance, and an overnight unscheduled update suddenly broke all your web apps, you'd be kind of miffed.

The GPO is in Computer Config | Admin Templates | Windows Components | Store, and will need to be set from a Windows 10 or Server 2016 machine if you haven't got a central GPO ADMX share.Set "Turn off automatic download and install of updates" to kill the Modern App update mechanism, and you might want to add "Turn off the offer to update to the latest version of Windows" while you're in there.

The last pieces of the jigsaw – dealing with Office 365 performance issues in virtual environments using FSLogix Office 365 Containers for Citrix

$
0
0
Ain't that a mouthful of a title for a post? :-)

Anyways, having spent part of last week at BriForum London, it’s interesting to come away with a broader view of what is happening in the virtualization world.

One of the things I found most intriguing was the perception that on a number of levels, desktop virtualization – either on full-fat VDI or hosted shared desktops – is moving into a much more mature phase. Issues with storage and infrastructure are much less noticeable, and Moore’s Law has seen that we now have solutions that are much more capable of dealing with the nuances of a virtualized desktop environment. Hyperconvergence, superfast storage arrays, GPUs – technologies that can deliver have overcome a lot of the early blockers to widespread virtualization adoption.

But of course, there are still problems to be overcome – the final pieces of the jigsaw to be put into place, the last bumps in the user experience to be ironed out.


One of these is the performance of Office 365 in the virtual environment – particularly in the Citrix-provided desktop arena. Assuming you’re using the “Exchange Online” version of Microsoft Office (rather than the full-fat web-based version), where there is still a client involved, you may well have come across some of these performance problems.


Microsoft generally recommends using Cached Exchange Mode for Office 365, in order to provide acceptable startup, session, and search/indexing performance. But in XenApp environments, the user OST cannot be stored locally as the user may not always land on the same server for their next session. In non-persistent XenDesktop environments, the user profile is discarded between sessions, and again, the OST file cannot be stored locally.

You also can’t use traditional UEM solutions to deal with the OST file as imagine a user with a 15-20GB mailbox – do you want to copy that down onto the endpoint at every logon and back to the network at logoff? Redirection doesn’t cut it, because that’s an unsupported configuration. If you bite the bullet and use Online Mode, you’re going to give yourself a lot of availability and performance issues (large calendars being a particular bottleneck), as well as a substantial increase in network overhead.

So while using Cached Exchange Mode is the main performance tweak Microsoft recommend for Outlook, they also don’t recommend using it for Remote Desktop Session Host. If you’re doing RDSH, then they suggest that you keep the Exchange server on the same network switch as the RDSH server. But we’re using Office 365 – and we’re not in a position to put our RDSH into Azure as well – so what do you do?

Microsoft do offer some mitigation, after a fashion – for instance, GPOs exist that allow you to limit the cache option to just a couple of months’ worth of email, but this simply “hides” the issue until the user starts searching for mail from more than a specified time ago. Creative systems administrators can also attack this issue in a huge number of ways, limited only by their imagination and technical skills/budgets. They could go fully persistent VDI, purchase themselves a whacking great pipe with incredible amounts of bandwidth, use custom retention policies, get Microsoft to kill off MAPI – the possibilities are endless. But each of them have pros and cons, support implications, and possible architectural changes to plan and implement. And in the end (and I think this is the most worrying point)the overhead of dealing with the performance issues can potentially essentially erase the cost savings in outsourcing email to Microsoft in the first place. Or can possibly drive up your XenApp hosted or VDI costs to the point of not being practical. Not situations anyone wants to be in!

There’s got to be a simpler answer, hasn’t there?

Well, step forward FSLogix.

FSLogix have a track record in providing “point” solutions to particular pain areas that users and administrators experience in the here-and-now. None of the “let’s re-engineer your entire infrastructure” approach that you get when talking to some software vendors – what you get is straight-to-the-crux-of-the–matter solutions for the problems that are burning you today.

Image management issues? Flip the whole golden image model on its head and just reveal applications to the user as necessary with FSLogix Apps.

Java version hell? Just block the out-of-date versions from the operating system and only reveal them when required with the FSLogix Java Rule Editor.

And now, if you’re suffering from poor hosted Outlook performance on XenApp/XenDesktop/VDI/RDSH, then along comes FSLogix Office 365 Containers.

Office 365 Containers use the same engine as all of the other FSLogix features, simply using a filter driver to seamlessly mount a centrally-managed container for the OST file into what is effectively local storage. What’s more, it simply slots into your existing deployment infrastructure, managed easily through ADMX files that integrate seamlessly with Group Policy objects.

Over at my affiliate company HTG, we’ve been testing with the release version of Office 365 Containers and we’ve observed a 45% improvement in initial Outlook startup time, a 52% improvement in search performance, and a 75% decrease in the size of the local user profile, all by using the lightweight FSLogix agent. This was done across XenApp 7.8 on Server 2016 VDA, and XenDesktop 7.8 on Windows 10 VDA. A snapshot of our testing results for these platforms are below (broken down to an average):-

XenDesktop 7.8 on Windows 10 VDA

Outlook "logon" time
In standard configuration - 7m 34s
With FSLogix Office 365 Container - 0m 34s

Outlook search time (for obscure item)
In standard configuration - 0m 38s
With FSLogix Office 365 Container - 0m 6s

User profile size
In standard configuration - 426MB
With FSLogix Office 365 Container - 102MB  

XenApp 7.8 hosted desktop on Server 2016 VDA

Outlook "logon" time
In standard configuration - 8m 12s
With FSLogix Office 365 Container - 0m 58s

Outlook search time
In standard configuration - 0m 49s
With FSLogix Office 365 Container - 0m 8s  

User profile size
In standard configuration - 408MB
With FSLogix Office 365 Container - 92MB

On top of this, there is a noticeable decrease in network utilization and latency observed when using the FSLogix solution. I'm still compiling all the results from the lab (network stuff not being my favourite area!), but it seemed to be in the region of a 25% reduction, which again, in a Citrix environment, is not to be sniffed at. I don't expect you to just take these lab results at face value, though - every enterprise is different - so I'd recommend you get a demo set up and test yourself.

And this isn't limited to just getting cached Exchange mode working with Outlook - you can also use this to work with the OneDrive cache and the cached information in Skype for Business too.

Of course, now that I've said that, you want to know how easy is to set up and demonstrate this saving in your environment? Well, it's only a six-step setup routine, so it doesn't get much simpler than this, in my opinion...

  • Launch your XenDesktop or XenApp endpoints
  • Install the FSLogix Apps agent onto the endpoints using your preferred mechanism (manual, SCCM, script, the choice is yours) - no reboot required
  • Set up a file share to host the containers for each user
  • Load the provided ADMX file into your Group Policy Management Console


  • Specify the GPO settings required and assign them (in a simple configuration, only two of the available settings are needed to get up and running)
  • Log on with your test user, and test the performance increases for yourself 
This is me laying it all out simply - for instance, in a Provisioning Server environment, this process would be somewhat less straightforward, but I'm sure you all get the gist of how it is intended to be set up :-)
 
But anyway, the key takeaways are clear from this…

  • 25-30% network resource savings on XenApp or XenDesktop 
  • Approximately 83%decrease in Outlook startup time 
  • Approximately 80% increase in search and indexing performance 
  • Around 75% decrease in local user profile size (although you're offloading it somewhere, to be fair)
  • Simple, easy setup that integrates seamlessly into Active Directory environments

What’s not to like? Another piece of the jigsaw is in place!

This may sound like me pushing out a big fat advert for FSLogix, but it's far from that. I like to see software that fixes particular pain points that people talk to me about on a regular basis, and that's exactly what this is. I've seen many an Office 365 implementation fall apart or get abandoned because of precisely the issues that this product is trying to address. Anything that brings us closer to the perfect user experience, in my humble opinion, is something that's well worth looking into.

Prior to this kind of solution, I always had big misgivings about putting Office 365 onto, in particular, a Citrix platform. It feels like that blocker has now been cleared firmly out of the way, and that's a very welcome development.

If you want more info on FSLogix Office 365 Containers or to even get a demo lined up, then hop on over to the following link:-

http://www.htguk.com/office-365-container-virtualisation/
http://blog.fslogix.com/introducing-fslogix-office-365-container-for-citrix

And finally, thanks to all who attended my BriForum sessions and gave me feedback - I had a great time and hopefully everyone learned something useful! And also, today I seem to have landed on the Citrix Technology Advocate (CTA) program....it's all happening!

Deploying per-user file type associations (FTAs) on Server 2012 R2, Windows 8.1, Server 2016 and Windows 10 (reloaded again!)

$
0
0
We've been down the file type associations route before. I've had quite a lot of emails and questions as a result of my previous articles, so I think it's ripe for a bit more clarification and a bit of a (second!) revamp. They're a particular bugbear to those of us using XenApp 7.x or RDSH systems, because we're used to doing them the old easy way, and now the rules have unceremoniously changed.

Note - the background to this article has simply been lifted-and-shifted, for the most part, from the previous article referenced above. However, once we're down in the detail sections, there will be a lot more detail than before. Also, I'm going to remove the previous article in a couple of weeks, as I feel this one is more complete.

FTAs?

We're all familiar with FTAs - they are the program that opens a particular file type extension. Files with the .docx extension commonly open in Microsoft Word. Files with the .txt extension commonly open in Notepad, but you can use many other things, WordPad, Notepad++, even Microsoft Excel. Each user normally has a default FTA that is the program that will open it when you double-click a particular file type. If you wanted to open the file type in a different program (for instance, open a file with the .xml extension in Notepad instead of the default of IE), you can right-click on the file and choose Open With.

Why deploy per-user file type associations?

Imagine you have a XenApp server hosting sessions for a multitude of users. Some users want to use, for instance, Adobe Reader to open PDF files. But some may want, for job reasons, to use something like Adobe Acrobat Pro. There may well be licensing issues to take into account that mean you can't let everyone use the full version, so you may want to enforce the PDF file type association differently for different groups of users. Having to silo XenApp servers based around a file type association doesn't make an awful lot of sense, so I know this is fairly common practice (provided the licensing from the vendor allows this form of control).

There are many other applications that you may want to define this way. Some users may have to open Visio drawings in Visio Viewer and others using the full version. Maybe they might want to open text files in Notepad or Notepad++ dependent on function. Picture files, video files, etc; there are a huge amount of file formats that this could apply to.

And finally, you may want to simply set a specific default FTA for an application, but also then give the users the option to change this to a different application they prefer, and then persist that setting from session to session (potentially across different devices), a particular consideration in XenApp or RDSH environments. (I can hear Microsoft protesting as we speak, you want to do what?)

But the main clincher is - it used to be so straightforward to enable this, either as an enforced policy, or a pre-defined preference that user could change and expect to persist. And in my humble experience, it's not just confined to XenApp or RDSH or other multi-user systems - I've worked with plenty of enterprises who wanted to use these techniques on VDI or physical.

The old ways

In Windows 7/2008 R2/XenApp 6.x, life was so simple. Group Policy Preference Folder Options could be used to enforce a particular FTA, or you could set it to "Apply once" to give them a specific default and then control it themselves, simply by roaming the FileExts area of the user Registry. This was a great improvement over previous Windows versions, where you were reduced to using the ftype and assoc commands which were a bit of a mystery.

The new ways

Of course, as soon as we're on Windows 8.1, Windows Server 2012 R2, Windows 10 or Windows Server 2016 (and along with that, anything on XenApp 7.x), the whole thing has been changed. Why? Your guess is as good as mine, but I believe it's part of a wider play from Microsoft aimed at reducing the complexity of multi-user systems, and henceforth making them easier (read: cheaper to support!) targets for Azure migration. The news from Synergy about Windows 10 XenDesktops being available in Azure makes me more confident that this is the end goal. Seeing Citrix and Microsoft allying in this way kind of makes me think of SHIELD and HYDRA (I'm very fond of a comic-book analogy), but that's an opinion for another article.

Once we're on these later platforms, the Group Policy Preferences method I wrote about previously simply flat-out doesn't work any more. Normally, user FTA settings are written to a specific Registry area - HKCU\Software\Microsoft\Windows\CurrentVersion\Explorer\FileExts, with subkeys for each filetype (e.g. .PDF). But Microsoft appear to have changed something. Now, when you write a new filetype using the Default Programs part of Control Panel (or the Open With context menu), the Registry settings are changed in a very different way. 

To show you what I mean, I've logged on to a Server 2012 XenApp 7.8 system with three different PDF readers installed locally (Adobe Reader, Foxit Reader and SumatraPDF), and I'm going to select FoxIT Reader as the application to use. The way I trigger this is by right-clicking a PDF file and choosing Open With | Choose Default Program, but you can also access this through the Control Panel.


Once I select FoxIT Reader as the default program, we can see the Registry changes we'd expect - but there are some additions we haven't seen previously


Note the Hash value. Apparently, this is a hash generated from the application, the computer name and the username, and which needs to be unique in order for this key to be used. So if I export these values into the user profile and roam them to another XenApp server, the FTA will be lost. If you export, roam, save or persist this Registry key, when you move to another server system, you are prompted to choose the default program again, because the hash doesn't match. Apparently this was done to reduce tampering by malware, but it's very short-sighted because it doesn't take into account multi-session systems like XenApp and RDS.

Incidentally, here's Microsoft's specific quote on the issue (which naturally avoids telling us they're probably dumbing down your solutions to make them easier to absorb into Azure :-))

"Pre-Win 8, apps could set the default handler for a file type/protocol by manipulating the registry, this means you could easily have a script or a group policy manipulating the registry.

However in Win 8 onwards, the registry changes are verified by a hash (unique per user and app) that detects tampering by apps. In the absence of a valid hash, we ignore the default in the registry."

A result of this, and even more annoying, is the fact that the action of setting a default program in this way also writes a permissions change to the UserChoice key. See below:-


Note the Deny set for the user account that made the change (in this case I was logged on as xxxx). This means that you can't set the values in this key through a script or such like without altering the Registry permissions first. But even if you do alter the permissions, you need the Hash value to match the server system - and without knowledge of the algorithm in use, you're not going to get very far.

What do Microsoft recommend that we do?

Well, they have actually given us a method of dealing with this. Let it not be said that they haven't made a function available for setting the file associations! It is somewhat long-winded, and involves setting the file association(s) for a user, and then exporting it(them) out to an XML file using the following command


Once you've exported the XML file with your configured file associations (you can edit it by hand to just get the FTAs you need), you can then deploy this at logon by using a Group Policy Object. This all sounds good so far...

...until you realize that the GPO that sets the FTA is Computer Configuration only. That's right, it writes to a Registry key in HKEY_LOCAL_MACHINE. Making it a royal pain in the proverbials for deploying to multi-session environments such as XenApp. If you don't believe me, check it out - it's to be found only in Computer Config | Policies | Admin Templates | Windows Components | File Explorer


This is really annoying. As I said before, I don't think this move is in any way truly security-related. If it was, they could simply write up a GPO that does this on a user basis. It's not the only GPO that has moved quite annoyingly to being specifically device-based - try setting a home page for Microsoft Edge for different sets of users. Anyway - Microsoft's plans for world domination aside, let's address this in the here and now. How can we manage it?

Cracking the problem

I did some work with Duncan Murdoch on this, and our testing (and that of other guys I've spoken to, such as Freek Berson, Shaun Ritchie and Ryan Gallier) indicates that the basic formula we came up with works. However, the last article I did wasn't particularly clear about the requirements, so we've laid them out much more simply in this one, as well as adding some gotchas that apply specifically to Server 2016 and Windows 10.

We've approached this from two perspectives:-

1. You just want to enforce a specific FTA for certain user groups (a policy setting, if you like) - every time the user logs on the FTA is set

2. You want to enforce a specific FTA at first logon, and then allow the user to change this if they wish (a preference setting) - this selected setting is then saved and roams with the user

Naturally, #2 is a lot more detailed than #1 :-)

Technical details

Firstly, a bit of technical background.

I looked at three FTAs originally - PDF, VSD and JPEG/JPG. These are fairly common and are all FTAs I've been asked about in comments and emails. A lot of people also talked about the browser and office documents - but those are specifically addressed in the Limitations section. However, although all of these are in the attached AppSense config, I've again specifically used the PDF file type as the main example.

There are three main areas of interest in the Registry when it comes to FTAs (where xxx is the file type extension concerned)

Key #1 - HKLM\Software\Classes\.xxx
Key #2 - HKCU\Software\Classes\.xxx
Key #3 - HKCU\Software\Microsoft\Windows\CurrentVersion\Explorer\FileExts\.xxx

The interplay between these is unclear, but each is queried when it is looking for particular file type actions to perform. There are many other areas in the Registry that are also queried, but these three appear to be the most pertinent.

When a user changes an FTA manually (using Open With or Default Programs), this appears to write a UserChoice subkey to Key #3 (along with the Hash value, and the Registry permissions change).

Keys #1 and #2 are used mainly as "guides" where the final key doesn't exist (that's about all I can tell - I'm no developer!) And this is the trick we're going to utilize to allow us to both set and roam the FTAs.

The final thing we need to know, from a technical perspective, is the file type handler. This is kind of like the "code" that you put in the Registry to tell it what FTA to use. You can normally dig these up by installing the software in question, opening the file type extension with it, and looking at the UserChoice key in FileExts (the last Registry path above). Here are some common ones we've come across in our testing to get you started:-

AcroExch.Document.xx - Adobe Reader version xx (for PDF)
Applications\SumatraPDF.exe - Sumatra PDF (for PDF)
FoxitReader.Document - FoxIT Reader (for PDF)
AcroExch.Document.DC - Adobe Document Cloud (for PDF)
Word.Document.xx - Word version xx (version number, not year of release) (for DOCx)
Applications\Swriter.exe - OpenOffice (for DOCx)docxfile - WordPad(for DOCx)

Visio.Drawing.xx -Visio version xx (version number, not year of release) (for VSD)
VisioViewer.Viewer - Visio Viewer (for VSD)
GIMP-2.8-jpeg - GIMP (for JPG)
PBrush - Microsoft Paint (for JPG)
jpegfile - Windows Photo Viewer (for JPG) - not available on Windows 10 or Server 2016
txtfile - Notepad (for TXT)


Limitations

Now, if you want to do things like apply browser and Office document FTAs you're going to find it a little more difficult.

Office-wise, most people are Microsoft customers anyway and unlikely to change (in my experience, anyway!) It's also quite tricky to get the likes of OpenOffice, for instance, to register properly as a file type handler when changing this around. For this reason (and to try and keep this article down in size!), I'm going to avoid visiting the subject of Office FTAs. If anyone's interested in co-operating on a way to do this, please get in touch.

Internet browsers are also very difficult. There are different handlers for each protocol type, and also various file types to be considered (XML, HTM*, MHTML, etc.) There are also a huge range of Registry values that deal with this, and the fact that many of them also have the infamous Hash value now applied to them as well, meaning that moving between devices just prompts the user to choose an association again (or resets it back to Edge, on Windows 10 or Server 2016). Here's an example of some places you would need to look to get a browser FTA set (and this is without getting started on individual protocols or filetypes!) :-

HKCU\Software\Microsoft\Windows\CurrentVersion\Explorer\FileExts
HKCU\Software\Microsoft\Windows\Shell\Associations\UrlAssociations

HKLM\Software\Classes
HKCU\Software\Classes
HKCU\Software\Classes\Local Settings\Software\Microsoft\Windows\Shell\MuiCache

HKCU\Software\Microsoft\Internet Explorer 

So again, browser-wise, I'm going to have to leave this one for the moment, but it's something I'd be very interested in collaborating on, if anyone has any time and/or insight to share!

Windows 10 and Server 2016

And finally, a quick note around Windows 10 and Server 2016 with Modern Apps. Using the tricks we're going to describe sends these operating systems into a twist, and they will aggressively reset your FTAs to their own favourites, Modern Apps, with even the slightest hint of encouragement. So, for instance, if you're putting a custom user FTA on PDFs, for instance, you need to get rid of Microsoft Edge. If you're doing it for JPGs, you need to get rid of the Microsoft Pictures app. Use my post about disabling Modern Apps to get this done, otherwise they will constantly reset your custom file type associations in that nannying, intrusive, we-know-what's-best-for-you-and-all-your-users way that Microsoft seem ever so keen to impose on everyone. 

Enforcing a particular FTA

Firstly, we will just look at enforcing a particular FTA. So when a user logs on, they are provided with an FTA that is decided by the administrator based around a specific Condition (security group, OU, you choose).

The main thrust is, that if neither Key #1 or Key #3 mentioned above exist when the user logs on, then the (Default) value from Key #2 will be used to apply the FTA to the user. So, to summarize:-

Ensure that Key #1 is removed (this is HKLM)

Ensure that Key #3 is removed (this is HKCU)

Ensure that Key #2 specifies the correct file type handler for the application, and that this is restricted to a specific group, OU, user, whatever you desire

You can do this quite easily with Group Policy Preferences. Here are some examples:-

This onesets the default VSD FTA to either Visio Standard 2007 or Visio Viewer 2013, based around an OU membership (quick confession - I could only test this one on Windows 10 and Windows 8.1 because my copy of Visio doesn't run on RDSH)

These should work fine once configured for your environment. The only problem with these is if an administrator installs a new application it may rewrite the HKLM value in Key #1 until the Group Policy refresh cycle takes place, but a controlled process for installation of new software should take care of this potential issue.

Setting and then roaming a user-defined FTA

This is a little trickier, but we've done it in test for each of PDF, VSD and JPG files here. Extending it may prove tricky, dependent on the application (I'm working on others, but in reality it sometimes depends on how the app writes to the Registry).

This is a little complicated, tooling-wise. Surprisingly enough, I'm using AppSense Environment Manager to handle this. Here is an example workflow which you can adapt to a script or other tool. In the example, we're using PDF, but we have successfully tested this with VSD and JPG as well - hopefully the technique is easily portable to other file type formats.

In this example shown, when a user logs on, I am setting the default PDF handler to Adobe Reader 11, but then overwriting it with a custom user preference if this exists in a network share. At logoff, if the default handler has been changed, it is written to a Registry key via PowerShell and then saved out to the network share mentioned above. So the user will always get Adobe Reader 11 as the PDF handler - unless they have changed this, in which case it will apply their customized setting from the network.


Logon

Filetype PDF

Set default FTA for PDF - write (AcroExch.Document.11) to REG_SZ HKCU\Software\Classes\.pdf\(Default)
Delete Registry key HKCU\Software\Microsoft\Windows\CurrentVersion\Explorer\FileExts\.pdf
Delete Registry key HKLM\Software\Classes\.pdf (elevated rights required)
If it exists, hive in the value for HKCU\Software\Classes\.pdf\ from \\SERVER\SHARE\file (overwriting the value from the first step with the user customization)

Post-logon (Windows 10 or Server 2016 only)

Delete key HKCU\Software\Microsoft\Windows\CurrentVersion\Explorer\FileExts\.pdf\UserChoice (this sometimes gets re-populated by those pesky Modern Apps!)

Logoff

Filetype PDF


IF user has changed FTA (value ProgId exists in HKCU\Software\Microsoft\Windows\CurrentVersion\Explorer\FileExts\.pdf\UserChoice)
    Run PowerShell to copy HKCU\Software\Microsoft\Windows\CurrentVersion\Explorer\FileExts\.pdf\UserChoice\ProgId to HKCU:\Software\Classes\.pdf\(Default)
    Hive out the value from HKCU\Software\Classes\.pdf to \\SERVER\SHARE\FILE
    Delete Registry key HKCU\Software\Microsoft\Windows\CurrentVersion\Explorer\FileExts\.pdf
    Delete Registry key HKLM\Software\Classes\.pdf (elevated rights required)
ELSE
    Hive out the value from HKCU\Software\Classes\.pdf to \\SERVER\SHARE\FILE
    Delete Registry key HKCU\Software\Microsoft\Windows\CurrentVersion\Explorer\FileExts\.pdf
    Delete Registry key HKLM\Software\Classes\.pdf (elevated rights required)


This may seem a bit convoluted, so here it is in AppSense EM to maybe make things seem a bit more straightforward. Here are the Actions you need to perform at logon:-


The details of the Action "Set Adobe Reader as default PDF FTA" are also here:-


As for the logon section, this is put together as below:-


More details are needed on this, "If user has selected new FTA for PDF files" is as below:-


The PowerShell Action that copies the ProgId key to the Classes\.pdf key is shown here:-

  
And the Hiving Actions (both in Logon and Logoff) are copying of Registry entries from HKEY_CURRENT_USER\Software\Classes\.pdf either from, or to, a network location. You could do this in AppSense, using regedit.exe, using reg.exe, PowerShell, VBScript - loads of ways to crack this particular nut.

The trickiest bit is elevation of privilege for the HKLM removals, which is where AppSense EM makes everything so much easier (SYSTEM elevation as a tick-box). I believe Ryan Gallier did some work around this in batch on CitrixIRC

Yes, this feels massively more complicated to write down than it was to put together! The AppSense EM config is available here if that helps anyone out (it actually contains entries for PDF, JPG and VSD, for the record).

Summary

This feels quite hideously complicated. It's a right headache compared to how easy it used to be in the past. Microsoft, ten out of ten for making our lives harder. Hope all those Azure dollars are worth it!

If you're just enforcing then Group Policy cuts it nice and easily (well, fairly easy, nowhere near as easy as it used to be). If you want to roam them from device to device, you're into some heavy scripting or UEM tools, mainly to get the timings right and use elevated permissions to delete from HKLM.

Bear in mind that this is heavily application-dependent. I found with GIMP, that if you didn't allow the application to register itself as the handler for the filetype you're playing with, this won't work. So make sure before you start doing this that you've allowed the target application to "hog" all available filetypes.

And Modern Apps that have FTAs (like Edge, Photos, Videos, etc.) really screw the pooch. If you want to use this method, get rid of them! They also have an aggressive tendency to overwrite the Registry setttings you pushed down at logon. Frankly, Modern Apps are better off out of the equation. See my previous blog article on how to kill the damn things - almost as hard as killing vampires.

Mainly, I see people using this method a) because they did before, and b) to avoid licensing issues with things like Adobe Acrobat Pro. If this helps you in any way get around these issues, then it's been worth it.

Phew! Enough already. I'm off to watch the football :-)  

QuickPost: Throwing your errors into the Notification Center

$
0
0
On a lot of the projects I work on, support staff are keen to run a few "pre-flight checks" as part of the logon process. Ensuring that machines are named, homed and running correctly is often something they like to do to avoid any potential issues during the user's session - sometimes going so far as to log the user out or even shut the machine down if an errant value is detected.

Of course, communicating these errors to the user is key - you at least want them to know why they're being forcibly logged off, or perhaps to get them to contact the helpdesk to get the issue(s) resolved. For a long time, I've just used VBScript or PowerShell to flip up a pop-up window and have done with it. However, incessant pop-ups at logon can get annoying - especially when you've already got a few things popping up anyway (Skype, intranet page, etc.). Is there a way we can just dump them nicely into the Notification Center down in what used to be known as the "system tray"? After all, that's where everything that "notifies" is supposed to go these days...

Well, fortunately we can, with a few simple lines of PowerShell.

In this example, I was checking for low disk space. So first I had to actually ascertain whether or not the machine was in an "errant" state. Quick and dirty - I just did this by querying the disk space and then setting an environment variable to "Critical" if it was under a certain level. This could probably be done much more efficiently, but hey, it works, and I'm on a bit of a short timeframe today, so I'm not going to develop it any further just yet :-)

# Set free space threshold (1GB in this example)

$threshold = 1

# Get free space of C: drive

$freespacebytes = [System.IO.DriveInfo]::GetDrives() | Where-Object {$_.Name -eq 'C:\'} | Select-Object -expandproperty AvailableFreeSpace

# Convert free space figure to GB

$freespaceGB = $freespacebytes /= 1070000000

# Set environment variable to CRITICAL or NON_CRITICAL

if($freespaceGB -lt $threshold)
{
 [Environment]::SetEnvironmentVariable("CDriveSpace", "Critical", "User")
}
else
{
 [Environment]::SetEnvironmentVariable("CDriveSpace", "Non-Critical", "User")
}


Now, once that variable is set, we just need to take some action to spit out an error that appears in the Notification Center. There are a couple of ways to do this. The first actually requires you to provide a 16x16 icon somewhere in order for the command to work - the second has no dependency, so it's up to you which one you use.

Also, timing is an issue here - the shell must be fully initialized and visible to the user in order for the PowerShell to work correctly. If you're an AppSense Environment Manager user, then the "Post-logon trigger" is ideal for this situation. If you're not, and you're using something like a logon script, it may or may not work as intended. In this situation I think a Scheduled Task would probably be a better bet, or configure a Logon Script Delay via Group Policy (2012 R2 and up).

Method 1 (lines may wrap)

[void] [System.Reflection.Assembly]::LoadWithPartialName("System.Windows.Forms")

$objNotifyIcon = New-Object System.Windows.Forms.NotifyIcon

$objNotifyIcon.Icon = "C:\windows\system32\icon.ico"
$objNotifyIcon.BalloonTipIcon = "Error"
$objNotifyIcon.BalloonTipText = "C: drive disk space is less than defined threshold of 1GB. Please free up disk space or contact support."
$objNotifyIcon.BalloonTipTitle = "Machine check failure"

$objNotifyIcon.Visible = $True
$objNotifyIcon.ShowBalloonTip(10000)


Some notes...the first line beginning with [void] is necessary to avoid an interactive progress message as it loads the required assemblies.

Icon refers to the actual icon you see visible in the Notification Area in the bottom right of the screen.

BalloonTipIcon is the icon you will see when the actual error pops up in the right-hand corner (this can be set to Error, Info or Warning, with the appropriate icon for each)

BalloonTipTitle is pretty self-explanatory....

...as is BalloonTipText.

Finally, the number (10000 in this example) is the amount of time in milliseconds that the error will display. The system does have maximum and minimum values for this, however, so you may find your values overridden if you configure them extremely high or low.

Method 2 (lines may wrap)

function Show-BalloonTip 
{

  [CmdletBinding(SupportsShouldProcess = $true)]
  param
  (
    [Parameter(Mandatory=$true)]
    $Text,
  
    [Parameter(Mandatory=$true)]
    $Title,
  
    [ValidateSet('None', 'Info', 'Warning', 'Error')]
    $Icon = 'Error',

    $Timeout = 10000
  )

  Add-Type -AssemblyName System.Windows.Forms

  if ($script:balloon -eq $null)
  {
    $script:balloon = New-Object System.Windows.Forms.NotifyIcon
  }

  $path                    = Get-Process -id $pid | Select-Object -ExpandProperty Path
  $balloon.Icon            = [System.Drawing.Icon]::ExtractAssociatedIcon($path)
  $balloon.BalloonTipIcon  = $Icon
  $balloon.BalloonTipText  = $Text
  $balloon.BalloonTipTitle = $Title
  $balloon.Visible         = $true

  $balloon.ShowBalloonTip($Timeout)
}

Show-BalloonTip -Text 'There is not enough free space on the C: drive. Please either free up space or contact support.' -Title 'Machine check fail!' -Icon Error -Timeout 10000


In this example a function is used and then called with the Show-BalloonTip cmdlet. Not there is no particular icon used this time - the Icon parameter only refers to Error, Warning or Info as mentioned earlier.

Both of these examples work equally well - example output from each is shown below. The only difference is in the icon displayed in the notification area (highlighted in red) - Method 1 allows you to customize this whereas Method 2 puts a "blank" Windows icon there.

 
Method 1 output

Method 2 output
So there you have it - a straightforward way to dump your pop-ups and customized errors/warnings/information into the Notification Center. Hope this is useful!

Creating a custom Outlook signature in AppSense Environment Manager v10

$
0
0
AppSense DesktopNow version 10 has landed, bringing with it a raft of new features and improvements on the old version 8. One of the ones I was looking forward to was the ability to create custom Outlook signatures for users as they log in for the first time. It's always been possible to do this with scripts, but it was quite complicated and often resulted in some "weirdness" as Word and Outlook processes fired up at logon time.

I've worked at a number of places where users have to set up a "corporate standard" signature, even to the extent of matching fonts and colour to ensure that the branding remains consistent across the enterprise. Being able to set this up on-the-fly without too much complexity certainly sounds like a good idea, no?

Active Directory

However, one of the first things you need to do is ensure that the information you're going to pull in for the user is consistent in Active Directory. You can't use environment variables to set up a signature (unless you just want it displaying your username). Many people will want something simple such as the user's name and email address next to static contact information such as company name, web address and postal address, so as long as the relevant fields in the Active Directory user object are populated correctly, we should be able to pull this in to AppSense and use them to populate the signature.

In the interests of completeness, though, we are going to pull quite a lot of detail from the user object for this example. In the images underneath, you can see how we have entered the relevant information on the user object. The fields we are going to pull in to populate the email signature are highlighted in red


Worth noting is the fact that we've used some fields for purposes that don't seem to fit with the name - for instance, we've used the Post Office Box field to hold the second line of the postal address. It doesn't matter how you use them - you could put the company name in the postcode field if you wanted - as long as it is consistent across all users. We've also used the Other button from the General tab's Telephone Number field to input the user's mobile number - but we could also have used any of the fields from the Telephones tab on the user object. As I said, it's entirely up to you how you populate the information - just make sure it is consistent!

What you will also need to do is open up the Attribute Editor tab (you need Advanced Features turned on in the AD console to see it) so that you can match the actual attribute names with the fields on the user object. Some are self explanatory - for instance, Department maps to department - but others are not so obvious. Take the field for City, for instance - the actual attribute name is simply l (that's a lowercase "L"). In the example below, we're showing where the field for the Other telephone number is stored, with the name of the attribute on the left.


Once you've populated all your attributes correctly (and made sure that all other user objects have them populated correctly - this may be a time to do some bulk AD attribute updates via a script), then we need to do a little bit of PowerShell in Environment Manager to set these AD attributes as session variables.

Session variables

Session Variables are really useful, and they don't have the overhead of environment variables. When we set a session variable (for instance, for the user's phone number) that variable will only exist in the context of the Environment Manager session and can only be read and manipulated by the EM process itself.

In order to set them correctly, we need to read them in at a particular time. During the user logon is the option we've gone for here, but if you want to avoid overhead you could do it after logon or even when the Outlook process starts. We're going to do it in PowerShell, although I am sure it could be done via VBscript or even using batch commands. However as we are doing it in PowerShell we won't have to rely on external files or commands.

We are also going to do it natively though PowerShell rather than having to load the RSAT tools on our endpoints to get access to the specific AD cmdlets. A big thanks has to go to Freddy Grande for providing me with the lines of PowerShell to do this - I was thinking I might have to load the RSAT tools directly into my image before he mailed me this excellent solution.

The first thing we need to put into our Custom Action are the AppSense PowerShell modules, otherwise we won't be able to create Session Variables from within the script

# Import AppSense PS module

Import-Module ((Get-ItemProperty'HKLM:\SOFTWARE\AppSense\Environment Manager').ClientPath +'EmCmdlet.dll')

Once this is done, we can set up the directory service search (this is where all the neat stuff happens, thanks Freddy!)

# Prepare to pull Active Directory user information

$UserName = $env:username
$Filter = "(&(objectCategory=User)(samAccountName=$UserName))"
$Searcher = New-Object System.DirectoryServices.DirectorySearcher
$Searcher.Filter = $Filter
$ADUserPath = $Searcher.FindOne()
$ADUser = $ADUserPath.GetDirectoryEntry()

Next we can pull the information from the user attributes we identified, and set them as Session Variables (with more intuitive names too!)

# Set user attributes as session variables

Set-SessionVariable -Name Name -Value $($ADUser.displayName)
Set-SessionVariable -Name JobTitle -Value $($ADUser.title)
Set-SessionVariable -Name Department -Value $($ADUser.department)
Set-SessionVariable -Name Company -Value $($ADUser.company)

# Set address as session variables

Set-SessionVariable -Name AddressLine1 -Value $($ADUser.streetAddress)
Set-SessionVariable -Name AddressLine2 -Value $($ADUser.postOfficeBox)
Set-SessionVariable -Name City -Value $($ADUser.l)
Set-SessionVariable -Name County -Value $($ADUser.st)
Set-SessionVariable -Name PostCode -Value $($ADUser.postalCode)

# Set other details as session variables

Set-SessionVariable -Name OfficeTelephone -Value $($ADUser.telephoneNumber)
Set-SessionVariable -Name MobileTelephone -Value $($ADUser.otherTelephone)
Set-SessionVariable -Name Email -Value $($ADUser.mail)
Set-SessionVariable -Name WebPage -Value $($ADUser.wWWHomePage)

This will set all of our Session Variables ready for manipulation in the Email Signature Action.

Setting the signature

You can find the relevant Action under Actions | Outlook | Email Signature. The dialog you are presented with is (as you'd expect) very similar to the Signatures dialog in Outlook itself. You can manipulate it in the same ways - put as much static text and images in it as you need, and simply use the Session Variables to hold the user-specific information. Our example is shown below


It's also up to you whether you want to enforce the signature in each user session (i.e. prevent the user from customizing it), or simply run this the first time they log on and then let them make changes. If you wanted to just run it at first logon, the easiest way would be to set a flag (like a Registry value) to something like CorporateSignatureSet, and then use the existence of this flag as a trigger to avoid running the Email Signature action during future sessions.

Results

So now we can log on and see what our custom signature looks like. Once we connect to our Outlook account (which should be fairly straightforward, as we've correctly populated the Email field in Active Directory!), we should see that when we create a new email, our signature is already present and assigned...


Awesome...fully pre-populated, no need for user intervention, it's all set up and ready.

Summary

So as long as you keep your Active Directory information current, you should be able to use this technique to create customized signatures based around the user object information, without the need for complex scripting.

There are also other features for Outlook that I've yet to test out in version 10 - setting up Office 365 profiles being the one I'm most interested in. More on that and other features in coming articles.

Update

There is currently a slight bug in the AppSense implementation of this technique - if you utilize more than nine variables in the signature, it may not work correctly. However I have reported this and it should be fixed hopefully pretty quickly - I will update this post when it is. Of course, if you're using eight or less variables in the signature (and I can imagine a lot of people won't need this many - things like company name, web address, office address and office phone number are often completely static), then you should be good to go with the current version.

QuickPost: Setting file type associations (FTAs) using AppSense Environment Manager v10

$
0
0
Remember the huge debacle of FTAs (file type associations) we've discussed on this blog a few times previously? Remember how Microsoft have made it so horribly difficult to set or enforce or roam a specific FTA for different sets of users? Remember how the article I wrote showed you how to do it by removing Registry values (rather backwardly)? Well, this is only good news if you're an AppSense customer, but if you are, you can now manage your FTAs directly from Environment Manager.

AppSense Environment Manager version 10 now ships with a nifty File Type Association action which sits under Actions | File and Folder | File Type Associations.


As you'd expect, it's very easy to set up. Simply put in the path to the application you want to associate with the filetype, and specify the filetype itself (including the preceding period - e.g. .pdf)


Then you can easily set up Conditions to complement these Actions, as in the example below where we have applied a different PDF FTA for each of three different AD security groups


Enforcing FTAs is as simple as that - whenever a user logs in the FTA you have defined is applied to them, based around the huge set of Conditions available in the EM console. You could even set it up so that the FTA is applied only if the actual program exists on the endpoint (see below)


However, if you wanted to roam FTAs you are now approaching the limitations of Microsoft's new rules which are discussed in the previous article. But you could still do this in AppSense Environment Manager with a bit of cleverness...

  • You would need to capture any custom user-defined FTAs by monitoring if the value ProgId exists in HKCU\Software\Microsoft\Windows\CurrentVersion\Explorer\FileExts\.pdf\UserChoice (using PDF as the example here) at logoff time
  • If it does, capture the value from here and save it somewhere (flag file, Registry value, Personalization Server, the choice is yours)
  • At next logon, read the flag file or value and use that as a trigger to set the FTA to the required application.

I will see if I can document a process for doing this and post it as an update to this article.

But anyway - at least AppSense have given us a surefire way for enforcing particular FTAs on Windows 8/Server 2012 R2/Windows 10/Server 2016, which is taking us back to the good old days when we could do this via Group Policy Preferences. Ironic isn't it - GPP used to be able to do this flawlessly, whereas with AppSense you were reduced to scripting (see this article). But now, Group Policy can only enforce them on a device level (useless for multi-user systems or shared devices), and AppSense can do it natively. How progressive is that?

Everything you wanted to know about virtualizing, optimizing and managing Windows 10, but were afraid to ask – part #8: OPTIMIZATION

$
0
0

With Windows 10 now into its latest edition, the 1607 “Anniversary” update, it now appears, for better or worse, to be here to stay. It has generated a lot of interest; supposedly the “last version of Windows”, many expected it to be akin to Windows 7 – an improvement following a much-maligned previous Windows version. However, the reality has turned out to be somewhat different from what many were expecting.

Microsoft are now “cloud first, mobile first”, and a lot of this new strategy shows through – sometimes somewhat cynically – in Windows 10. For my sins, I’ve been involved in a Windows 10 deployment since August of 2015, so now, just over a year in, it is maybe time to share the things I’ve learned in the hope that it may give some of you a bit of help when it comes to deploying (or not deploying!) this new version of Microsoft’s flagship operating system.

This set of articles is going to expand at the rate of one a day over the next week or so, and cover a wide range of issues for those of you deploying Windows 10 – whether it be fully virtualized via Citrix XenDesktop or the like, or simply a general physical deployment. Hopefully, it will be everything you need to know!

Don’t forget to read the first parts of this series too – EDITIONS, SERVICING BRANCHES, MODERN APPS, TELEMETRY, THE START MENU, ROAMING and PROFILES.

OPTIMIZATION

Getting the best possible performance out of Windows 10 is paramount, because users (especially those on Windows 7) will have a certain level of expectation. In fact, what you are facing these days is not simply an expectation borne out of previous experience – it is much more of a generational thing.Fifteen years or so ago, users didn’t really have devices in their houses (maybe games consoles, the odd PC, but generally not much). In the enterprise, users were given PCs using a monolithic image with natively-installed applications, usually delivered by something like SMS (the product that was later to become SCCM, for younger readers). Users had no choice, no preferences, no input – they just got what they were given, the tools to do their job as prescribed by enterprise IT.Of course, now we have a generation of new users with tablets, smartphones, online services and subscriptions, all of whom expect a certain level of performance and intuitiveness, because that’s what they’ve become used to. If the interface they’re presented with doesn’t measure up to their expectations, then they will reject it. So we’ve got to extract the maximum possible performance from a Windows 10 instance for our new breed of users – and that can be challenging, because Windows 10, performance-wise, is a bit different compared to its predecessors.OBSERVATIONSWhen we deployed Windows 10, we noticed a few bottlenecks from a performance perspective:-

Very long first logons these are a major bugbear, especially in open-access areas where many users share the same machines. In our observations, standard Windows 10 can take four to five minutes for the first logon to be processed. This issue also manifests itself, unsurprisingly, in non-persistent VDI environments

Lots of disk activity – Windows 10 shows a large uptick in disk I/O compared to Windows 7 and Windows 8.1. According to campfire rumours, Microsoft based a lot of their design and testing for Windows 10 on three large customers from the US who have all adopted solid-state drives right across their environments. Whatever the accuracy of this, Windows 10 appears to be particularly optimized for SSD environments. It performs much more acceptably when used with a solid state drive for the boot disk

Large system footprint – Windows 10, in its default configuration, has a very large footprint of services and scheduled tasks. Some of these are not necessary for enterprise environments and can be disabled

Update processesMicrosoft had the whole “Patch Tuesday” practice nailed down, with a predictable and process-friendly method of deploying updates, but Windows 10 appears to throw caution firmly to the wind in this department. Universal Windows Apps appear to update simply whenever they feel like it, and even the standard operating system updates come down in a far more haphazard fashion than has ever been seen before

Boot behaviour we also have noticed a real discrepancy between logon times and initial system performance when a “cold” boot is compared to a “warm” one. When Windows 10 starts up, the logon screen is presented to the user while a lot of boot processes are still running in the background, and this background activity consumes a lot of resource, resulting in sub-optimal performance if a user logs straight on after a boot-up. This is a smoke-and-mirrors tactic introduced by Microsoft in Windows 8 to give the impression of faster startup times, but it can detract from the overall perception of the system’s performance

REMEDIATIONS

Firstly, if at all possible, I’d recommend using Windows 10 systems with SSD or some form of flash-based storage, whether the systems are physical or virtual. If you can, this offsets some of the “drag” that you will see, particularly if moving from Windows 7 to Windows 10.

Remediating that long first logon is something that we’ve discussed previously. Using a custom default user profile, removing Modern Apps, creating customized Start Layout files – all of these help towards getting this down. In an ideal world, your first logon should be reduced by these methods down to 40 seconds or under, which I would class as acceptable.

Dealing with update processes is a tricky one. Firstly, I would remove as many Modern Apps as possible and disable the Store and Store updates to cut down on a lot of this. Then you need to make a decision about how you want to deploy updates to your endpoints. Obviously you want to turn off the Windows Update peering features (this can be done via GPO), and make sure you use a technology like WSUS or SCCM to maintain control of when updates are deployed.

The “cold boot” issue can be overcome also, if you find this is affecting you. If you have high-turnover environments where users need to get working quickly, waking the machines prior to peak times and “pre-booting” them may be a useful approach. If you’re a VDI environment, you could automatically spin machines up using a variety of management technologies – if you’re not, using Wake On LAN or the like may allow you to achieve this.

With regard to reducing the system footprint and putting in some settings that will improve the performance of the system (particularly for VDI), then we are fortunate to have some automated help at hand, in the shape of the VMware Operating System Optimization Tool (OSOT).

OSOT

This tool was originally developed to optimize systems for Horizon View deployments, but it’s so effective I would recommend that it is used – carefully! – in any Windows 10 deployment. Obviously you need to test it on non-production systems first and validate the performance of your applications – if you want me to fix anything you break in this way, I will be charging my full day rate 🙂

You can find the tool at this URL – https://labs.vmware.com/flings/vmware-os-optimization-tool. What I generally do is wait until my Windows 10 machines are building, then drop into Audit Mode (see the PROFILES article for how to do this) and then run the OSOT whilst in Audit Mode. This performs all of the customizations on the user that will then be used to create the default profile, which kills two birds with one stone, as all of the user-level customizations are then baked into the image along with the machine-level ones.

You can also use the OSOT to create your own templates for optimizations if you want to get advanced. I can’t stress enough, this is an invaluable tool for operating system optimizations, and the fact that it is provided free just makes it even better. You can also use it on all earlier Windows operating systems, including servers.

If you want to just do this in a very simple straightforward way, you just unpack the OSOT and run it directly on your client image, from a network share or wherever you may have stored it. In this example, we’ve run it on a completely vanilla Windows 10 Enterprise 1607 build with a standard domain-joined configuration. You will notice that it produces a list of options and recommendations, along with possible advice as to under what circumstances you may want to enable each setting.

Once you’re happy with your selections (or if you’re just testing and want to see what impact the changes have), simply click the Optimize button and let it do its stuff!

  
This will apply all of the selected optimizations. As I said earlier, this is particularly effective when done in Audit Mode so that all of the user-level customizations then get captured into the default user profile (as long as you clean it up afterwards as specified in the PROFILES article), and would then be applied to all users that log on to the endpoint. It also does a certain amount of garbage removal around Modern Apps (although some will be leftover and need you to remove them), and it also takes a hammer to some of Windows 10’s more, shall we say, less useful features, so it’s pretty much an all-round Windows 10 cleanup tool. 

You can also download “public templates” which have been submitted by the community, or even submit your own, so that when newer Windows 10 versions arrive you will still be able to deal with them. It’s an excellent tool, and I must mention Jeroen van der Kamp of LoginVSI for first alerting me to it when he did a Citrix User Group presentation on Windows 10. Quite simply, this is an invaluable tool to any Windows 10 administrator. One of the issues with Windows 10 is that because of the fast update cadence, there is considerably more application testing and remediation required – so automation of any type is very welcome and takes pressure off IT departments which may already be completely overloaded. You simply can’t ignore the OSOT – if you’re deploying Windows 10, get it in your arsenal.

SUMMARY

So what are the takeaways for optimizing Windows 10?

  • Get SSDs if possible in your machines (if they‘re physical) or use fast storage (if they’re virtual)
  • Remove Modern Apps you don’t need, and disable the Store updates
  • Use WSUS or SCCM or the like for updating, and make sure you have a tightly controlled update process
  • Investigate “pre-booting” techniques if you want machines to be in a fully optimized state when users come in and start logging on
  • Use the VMware OSOT in Audit Mode to apply a tested optimization template (don’t forget to clean up the default profile afterwards!)

With these optimizations in place, you should be able to see performance from your Windows 10 estate that approximates that which you had before. For the most part, in-session performance from Windows 10 isn’t markedly different, but if you apply these optimizations, you should be able to make sure it is as lean and mean as possible for those demanding new generations of end-users.

BOOTNOTE

My last day-to-day project came to a sudden end, so if anyone wants my help on anything, I’m currently available. I’d be only too happy to help, advise or even come and present to companies about Windows 10 migration and deployment (not surprisingly, I have a huge amount of material about it – these articles only scratch the surface!) Of course, I’m also all about the EUC arena, user and app virtualization, Citrix, AD and many other technologies – anyone who has a project they need help with, then just get in touch with me by emailing james [at] htguk [dot] com.

The next instalment of this series is going to be about MANAGEMENT – stay tuned!

The post Everything you wanted to know about virtualizing, optimizing and managing Windows 10, but were afraid to ask – part #8: OPTIMIZATION appeared first on HTG | Howell Technology Group.

Everything you wanted to know about virtualizing, optimizing and managing Windows 10…but were afraid to ask – part #7: PROFILES

$
0
0

With Windows 10 now into its latest edition, the 1607 “Anniversary” update, it now appears, for better or worse, to be here to stay. It has generated a lot of interest; supposedly the “last version of Windows”, many expected it to be akin to Windows 7 – an improvement following a much-maligned previous Windows version. However, the reality has turned out to be somewhat different from what many were expecting.

Microsoft are now “cloud first, mobile first”, and a lot of this new strategy shows through – sometimes somewhat cynically – in Windows 10. For my sins, I’ve been involved in a Windows 10 deployment since August of 2015, so now, just over a year in, it is maybe time to share the things I’ve learned in the hope that it may give some of you a bit of help when it comes to deploying (or not deploying!) this new version of Microsoft’s flagship operating system.

This set of articles is going to expand at the rate of one a day over the next week or so, and cover a wide range of issues for those of you deploying Windows 10 – whether it be fully virtualized via Citrix XenDesktop or the like, or simply a general physical deployment. Hopefully, it will be everything you need to know!

Don’t forget to read the first parts of this series too – EDITIONS, SERVICING BRANCHES, MODERN APPS, TELEMETRY, THE START MENU and ROAMING.

PROFILES

Kind of following on from the ROAMING section, we’re going to have a quick discussion about profiles in Windows 10. It is interesting to note how profile sizes have changed in the most recent versions of Windows – here’s some data showing the average size of a user profile at first logon

Windows 7 – 20MB
Windows 8.1 – 61MB
Windows 10 – 122MB

A sixfold increase in profile size from Windows 7 to Windows 10 – quite impressive!

Now historically, most of us have mitigated against the issues caused by default profile sizes by using various methods to both reduce this size and increase the performance of the system. Using different profile types has often been a key part of this. Some discussion about the different profile types is below.

Mandatory and super-mandatory

There’s not much difference between these two – a mandatory profile is defined on the user object or by GPO, and loads a specific locked-down profile (pre-created by an administrator) which is discarded from the endpoint at logoff. Super-mandatory is exactly the same, except the user can’t log on if the mandatory profile is unavailable.

These options have long been used in XenApp and XenDesktop environments, and also in high-volume non-persistent enterprises. Unfortunately, on Windows 10 (currently) both mandatory and super-mandatory profiles don’t work. Because of the Start Tiles database, a mandatory profile ends up with user information hard-coded and therefore the OS detects the database as corrupted, and the Start Menu doesn’t function. We’re told by Microsoft they have this logged as a bug and are going to fix it eventually, but no timescale is available as of yet and it seems to be a low priority for them.

Roaming

Roaming profiles allow the user’s profile to be saved out to the network at logoff and restored at next logon, effectively moving the saved profile from device to device. As we already covered in the ROAMING article, though, on Windows 10 these profiles a) don’t currently work, and b) can’t save the Start Tiles database anyway, because it is stored in %LOCALAPPDATA%.

Local

Local profiles are exactly that – a copy stored local to the device. They don’t roam from machine to machine and are simply stored wherever the user logged in. Microsoft recommend that everyone on Windows 10 use local profiles, but that doesn’t lend itself to roaming or non-persistent environments, it doesn’t protect the user’s data and configuration in the event of primary device failure, and it assumes that each user has a dedicated device. Also, if you’re in an environment where multiple users utilize different machines (such as public access areas), you may find hard disk space filling up with hundreds or even thousands of copies of local user profiles.

Currently on Windows 10 there isn’t a real way to utilize anything but local profiles without hitting some issues. So if you’re have a roaming requirement or non-persistent solution, you need to leverage some form of UEM tool to achieve this with local profiles. If you’re in a dedicated “one device per person” environment, then this is all well and good – but you’re still going to hit problems when it comes to failed devices or migrating settings before feature upgrades land.

Removing cached copies of local profiles

If you want to remove cached copies of local profiles in multi-user environments to stop disk space filling up, you have a few options:-

1. Add all your users to the Guests group – this works and the profiles are discarded at logoff, but strangely, being a Guest on Windows 10 means that certain Start Menu functions are missing, so I wouldn’t recommend using this method.

2. Spoof a mandatory profile – you can do this by setting up a logon script to run the following PowerShell (lines will wrap)

$USERSID = ([Security.Principal.WindowsIdentity]::GetCurrent()).User.Value
$regpath = “HKLM:\Software\Microsoft\Windows NT\CurrentVersion\ProfileList\$USERSID”
$name = “State”
Set-ItemProperty -Path $regpath -Name $name -Value “5”

This will mark the profile as mandatory just after login, avoiding the issues with mandatory profiles because it actually loads a local profile, but forcing the OS to discard the profile at logoff. This actually works quite well, especially as you can use a security filter to apply this to only specific groups of users.

3. Configure the GPO to delete profile copies over a certain number of days – this is found at Computer Config | Admin Templates | System | User Profiles | Delete user profiles older than a specified number of days at system restart. The minimum value is 1, so on restart any profiles over a day old will be removed. This works fairly well as long as you restart regularly – it can be a little problematic if the user has got multiple profile copies on the device, or if there are specific accounts (such as service accounts) that you don’t want to be removed.

4. Use a tool like delprof2.exe to delete unused user profiles – you can run this at many different times, but my favourite is simply using a Scheduled Task that runs once a day and clears out any other user profiles. You can set filters to allow specific accounts (such as admin or service accounts) to be ignored, and many other parameters which are detailed in the link above. I find this method to be excellent if you need to filter down the scope of your deletion rather than removing all user profiles.

Out of these methods, I’d recommend either 2, 3 or 4, dependent on the environment. 2 or 4 are most suitable if you need control of which users you apply this to – 3 is a bit of a sledgehammer approach.

Custom default user profile

One of the best performance enhancements I’ve done in Windows 10 is to create a custom default user profile by using Audit Mode. However, because it is Windows 10, you actually need to sanitize your custom default user profile after creation, because otherwise you may encounter issues with the Start Menu due to that pesky database! If done properly, it will allow you to significantly reduce the logon time of first users, especially when combined with the removal of all unneeded Modern Apps.

Here is the process for creating it that I follow – feel free to adapt this as necessary to your environment.

Launch Windows 10 build until it reaches the following point

Press Ctrl-Shift-F3 to trigger Audit Mode

This will log you in as a local administrator and allow you to customize the user profile, then save it out to the image. Firstly, click on Cancel at the sysprep dialog

Create an XML file with the following text:-

<?xml version=”1.0″ encoding=”utf-8″?><unattend xmlns=”urn:schemas-microsoft-com:unattend”>
<settings pass=”specialize”>
<component name=”Microsoft-Windows-Shell-Setup” processorArchitecture=”amd64″ publicKeyToken=”31bf3856ad364e35″ language=”neutral” versionScope=”nonSxS” xmlns:wcm=”http://schemas.microsoft.com/WMIConfig/2002/State” xmlns:xsi=”http://www.w3.org/2001/XMLSchema-instance”>
<CopyProfile>true</CopyProfile>
</component>
</settings>
<cpi:offlineImage cpi:source=”wim:D:/sources/install.wim#Windows 10 Enterprise” xmlns:cpi=”urn:schemas-microsoft-com:cpi” />
</unattend>

Changing the settings in bold to those as required in your environment (the path to the install files, and the Windows 10 Edition)

Make a note of the XML file name and path – I normally copy it to C:\unattend.xml
Customize the user profile as much as you need. I normally choose this time to remove all Modern Apps I don’t want (see my previous article on this), set the default view to show file extensions, set the browser home page, remove unneeded startup items, and hide the Quick Access in File Explorer. Do as much or as little as you need to.
When you are finished, open an administrative command prompt and run the following command
%windir%\system32\sysprep\sysprep.exe /generalize /oobe /reboot /unattend:c:\unattend.xml
where c:\unattend.xml is the path to the XML file you created.
Now, this will restart the system and complete the installation, copying your user profile into the default user profile area.
However, because this is Windows 10, you need to sanitize this default profile, otherwise you may end up with a broken Start Menu. When the machine restarts, it will log you on with a local account, and you can then browse into the default profile and remove the parts that aren’t needed. This process is very similar to the creation of a mandatory profile, with one big difference – you don’t rename it to a .man file extension at the end.
Normally, I do the following:-
Open C:\Users\Default and show Hidden files and Protected files (DO NOT FORGET TO DO THIS STEP!)
Delete C:\Users\Default\AppData\LocalLow
Delete C:\Users\Default\OneDrive
Remove everything from C:\Users\Default\AppData\Local EXCEPT the following folders:-
\Microsoft\Windows\Shell (you need this folder for Start Tiles)
\Microsoft\Windows\WinX (you need this folder for the right-click Start Menu)
Remove everything from C:\Users\Default\AppData\Roaming EXCEPT the following folder:-
\Microsoft\Windows\Start Menu\Programs (you need this for the All Apps Start Menu)
Open the Registry hive from C:\Users\Default\ntuser.dat in regedit.exe
Check the Registry permissions allow all users Read permissions at least
Search for and remove all references to the base username (normally Administrator)
Remove the following Registry keys from the loaded hive (if they exist):-
\EUDC
\GameConfigStore
\Appxbackup
SOFTWARE\RegisteredApplications
SOFTWARE\Policies
SOFTWARE\AppDataLow
SOFTWARE\Microsoft\Fax
SOFTWARE\Microsoft\GameBar*
SOFTWARE\Microsoft\OneDrive
SOFTWARE\Microsoft\SkyDrive
SOFTWARE\Microsoft\F12
SOFTWARE\Microsoft\UserData
SOFTWARE\Microsoft\UE-V
SOFTWARE\Microsoft\Windows\CurrentVersion\ApplicationToasts
Unload the loaded hive (DO NOT FORGET TO DO THIS STEP!)
Remove temporary Registry files (.regtrans-ms and .blf extensions in the user root folder)
Once all of these sanitization steps are done, the C:\Users\Default folder will be ready for deployment or use. You can copy this folder directly into different images of the same OS level and it should function in the same ways, allowing a smoother first logon and the deployment of many default settings.
SUMMARY
Profiles are a bit of a pain in the Windows 10 world – mainly because mandatory, super-mandatory and roaming profiles are either currently broken or missing required functionality. Summing up how to deal with profiles in Windows 10 is therefore pretty simple:-

Use local profiles, combined with a roaming technology if necessary to accommodate roaming requirements, recovery from device failure or OS upgrades
If you need to remove cached profile copies, use delprof2.exe or a spoofed profile so you can filter this to your needs
Always try to create and sanitize a custom default user profile, it takes time but will afford better performance at first logon

Stay tuned for the next part of this series, hopefully towards the end of the week, where we will talk OPTIMIZATION.

The post Everything you wanted to know about virtualizing, optimizing and managing Windows 10…but were afraid to ask – part #7: PROFILES appeared first on HTG | Howell Technology Group.

Windows 10 part #7 – maintaining ALL your settings using a standard roaming profile (including the Start Tiles)

$
0
0

Windows 10 is, by its nature of constant updates, a moving target. So far I’ve had a couple of cracks at roaming a full Windows 10 user state between domain-joined machines. Both of them so far proved to be quite intrusive, necessitating in each case the restart of a system service to accomplish anything near to what we were after. This just doesn’t sit well with me – it complicates the tooling required, for one thing – and looks messy. However, as Microsoft release updates to it, bug fixes appear to be included which are making things slightly easier.

UPDATE – with the 1607 release of Windows 10, I’ve done a full recap of this subject which is more up-to-date. Please refer to the new article here.

This doesn’t, though, address the glaring issue that the Start Tiles settings sit in %LOCALAPPDATA%. If you’re using a standard Microsoft roaming profile, LOCALAPPDATA isn’t included, and can’t be without third-party tools – you can exclude directories from a roaming profile, but not add them, via GPO. Whilst I’ve speculated that this may be by design, with an intention to subsume all of the roaming market into Microsoft’s Azure-based Enterprise State Roaming (when it lands), it still doesn’t help us out. If you’re deploying Windows 10 right now, or in the near future – and bear in mind we’ve had the Threshold release in November 2015, and are now waiting for Redstone in June (effectively SP2) – then you still can’t roam the most glaringly in-your-face part of the new Windows 10 look and feel.

To recap, here’s what we’ve tried before, with varying degrees of success:-

Method 1

  • At logoff, stop the “Tile Data model server” service
  • Copy out the %LOCALAPPDATA%\TileDataLayer\Database\* files onto the network
  • At logon, copy the files back in from the network to the local folder

This method required elevated privileges to stop the service, and was also a bit hit-and-miss. The privilege elevation could be scripted or tooled around, but reliability was not great, and when it didn’t work, would invariably corrupt the Start Menu.

Method 2

  • At logoff, use the Powershell Export-StartLayout cmdlet to copy the Start Tiles settings out to a file on the network
  • At logon, set a GPO that imports the XML file generated at logoff to create the Start Tiles from this
  • A short time after logon, “unlock” the Start Tiles for manipulation by resetting the Registry value that locks them, and then restart the “Tile Data model server” service to refresh the Start Tiles

This method was considerably more effective than the previous one, but still required elevated privileges to stop the service, and also needed a “delayed action” after logoff to allow the Start Tiles to be created without unlocking them. This made it more suited to using a tool like AppSense Environment Manager, although not impossible to script your way around.

But there has to be a better way, surely?

Now, there’s a corresponding cmdlet in PowerShell that goes with Export-StartLayout – Import-StartLayout. However, it can only be used to either import layouts to an offline WIM image, or, if you’re like Aaron Parker and just go out and run it on a live OS, you’ll find out it simply works on the default profile. So no good unless you’re creating a new local user profile.

Hmmm…let’s dig under the hood a bit. What does Import-StartLayout actually do?

Process Monitor reveals it simply writes a file called LayoutModification.xml into the C:\Users\Default\AppData\Local\Microsoft\Windows\Shell folder. This file is then read during the logon process, and (I’m assuming) then used to create the Start Tiles in the newly-created local user profile. A succession of writes to the file %LOCALAPPDATA%\TileDataLayer\Database\vedatamodel.edb (that awful database that controls these Tile settings) would lead me to believe that my postulation could well indeed be accurate.

What would happen if we used Export-StartLayout to create a file at logoff in the user’s homedrive called LayoutModification.xml, and then popped this into %LOCALAPPDATA%\Microsoft\Windows\Shell for a user with a roaming profile as they logged in? After all, the Start Tiles have to be created for a roaming profile user – because they don’t have any in their profile.

It works 🙂

However, the key is, the roaming user profile must deleted from the endpoint at logoff. This is something Windows 10 has historically had trouble with, because the damned “Tile Data model layer” service hangs on to the database (I believe this is intended to be fixed in Redstone, but don’t quote me on that). Even with “Delete cached copies of roaming profiles” defined via GPO. But, in the latest preview builds (14279) the deletion of roaming profiles appears a lot more stable (although not 100%, it is a damn sight better than early builds), so I’m sure this is slated for a fix sooner rather than later.

So we can successfully deploy a roaming profile for a Windows 10 domain deployment by using the following steps:-

  • Define a roaming profile path for the target user in ADUC
  • Ensure that your clients have the “Delete cached copes of roaming profiles” GPO defined
  • Set up a GPO Logoff Script to run the command in the next line
  • Export-StartLayout -Path \\SERVER\Share\User\LayoutModification.xml
  • Set up a Group Policy Preference File Item (see image) to copy the following file to the named destination folder at user logon (or use a script, or third-party tool)
  • \\SERVER\Share\User\LayoutModification.xml –> %LOCALAPPDATA%\Microsoft\Windows\Shell

This will then create a new set of Start Tiles with the settings that you exported from your previous session when you log in to a new machine. Finally, smooth roaming without all the complicated hacks!

The key to all of this is the name of the file that you output with Export-StartLayout, and where you put it. Call it LayoutModification.xml, and drop it back in the required folder when the user logs back in, and it will generate a set of Start Tiles based on the layout you exported from.

But the best thing is, it doesn’t lock the Start Tiles in place – the user can edit them to their heart’s content without any of the jiggery-pokery we had to do in Method 2 above. Glorious, no?

Unfortunately, now it’s time for the bad news.

Running Export-StartLayout at logoff (no matter how you trigger it) has problems in some builds of Windows 10. Which means dependent on the build you’re on, the actual export function may or may not work. It works fine when run interactively during the session – it’s only when triggered at logoff that you get the failure. If it doesn’t work, it throws an error like this

This is a major PITA. It appears to be related to some combination of updates why this occurs, because I have 10240 builds that don’t get this error and 10586 builds that do. One thing I have noticed though is 14279 builds – all of them – don’t suffer from the error. So whatever is causing it is slated to be fixed in Redstone. Windows 10’s awful documentation of bug fixes – many builds shipped just with this one sentence “bug fixes and improvements” – mean I have no idea where the fix came in or what possibly causes it to manifest on some builds and not others.

You can tell pretty much straight away if you’re affected by this, because when you log off the LayoutModification.xml file won’t be updated. Running the PowerShell from within the user session will update it fine.

If you’re on one of the affected builds, you have two choices:-

  • Wait for the Redstone release in June (deploying preview builds to live machines is probably not an option)
  • Set up a Scheduled Task to run the PowerShell Export-StartLayout cmdlet that starts when the user logs on, and continues every few minutes until they log out
  • Set up a Scheduled Task that is triggered by a Logoff event (Security event id 4647, if I remember right, and it will need Logoff Auditing configured as well to work)

Doing it via a Scheduled Task makes the whole routine feel rather “hacky” again, but if you’re suffering from this issue, it’s the only way that you can do it short of waiting for the Redstone release. The interval you need to configure depends on your preference, and how your users behave. You may also need to configure your task to run the PowerShell window with the windowstyle -Hidden parameter.

I covered setting up a Scheduled Task using AppSense Environment Manager in a previous post. However, if you’re not in an AppSense environment, you should be able to do it through Group Policy Preferences, or create it in the Task Scheduler and export it out to other machines using an XML file.

An example XML file to import a Scheduled Task is shown here. This points to \\UKSLDC003\FileStore\ExportStartLayout2.ps1 and runs in the context of the user JRR\jrankin, should you choose to edit for your own use

<?xml version=”1.0″ encoding=”UTF-16″?>
<Task version=”1.4″ xmlns=”http://schemas.microsoft.com/windows/2004/02/mit/task”>
<RegistrationInfo>
<Date>2016-03-22T19:06:45.4275818</Date>
<Author>JRR\jrankin</Author>
<URI>\ESL</URI>
</RegistrationInfo>
<Triggers>
<TimeTrigger>
<Repetition>
<Interval>PT1M</Interval>
<Duration>P1D</Duration>
<StopAtDurationEnd>false</StopAtDurationEnd>
</Repetition>
<StartBoundary>2016-03-22T00:00:00</StartBoundary>
<Enabled>true</Enabled>
</TimeTrigger>
</Triggers>
<Principals>
<Principal id=”Author”>
<UserId>S-1-5-21-2950944927-1203068717-1704750700-1114</UserId>
<LogonType>InteractiveToken</LogonType>
<RunLevel>LeastPrivilege</RunLevel>
</Principal>
</Principals>
<Settings>
<MultipleInstancesPolicy>IgnoreNew</MultipleInstancesPolicy>
<DisallowStartIfOnBatteries>true</DisallowStartIfOnBatteries>
<StopIfGoingOnBatteries>true</StopIfGoingOnBatteries>
<AllowHardTerminate>true</AllowHardTerminate>
<StartWhenAvailable>false</StartWhenAvailable>
<RunOnlyIfNetworkAvailable>false</RunOnlyIfNetworkAvailable>
<IdleSettings>
<StopOnIdleEnd>true</StopOnIdleEnd>
<RestartOnIdle>false</RestartOnIdle>
</IdleSettings>
<AllowStartOnDemand>true</AllowStartOnDemand>
<Enabled>true</Enabled>
<Hidden>false</Hidden>
<RunOnlyIfIdle>false</RunOnlyIfIdle>
<DisallowStartOnRemoteAppSession>false</DisallowStartOnRemoteAppSession>
<UseUnifiedSchedulingEngine>true</UseUnifiedSchedulingEngine>
<WakeToRun>false</WakeToRun>
<ExecutionTimeLimit>PT72H</ExecutionTimeLimit>
<Priority>7</Priority>
</Settings>
<Actions Context=”Author”>
<Exec>
<Command>powershell.exe</Command>
<Arguments>.\ExportStartLayout2.ps1</Arguments>
<WorkingDirectory>\\UKSLDC003\FileStore</WorkingDirectory>
</Exec>
</Actions>
</Task>

And after all of this, I spotted one more thing. A profile version increment? Interesting…

When you log on with a roaming profile from a machine running build 14279 of Windows 10 and upwards there is an increment to the profile version. That’s right, Windows 10 shipped with a .v5 profile but on version 14279 the profile becomes a .v6. Which means that potentially roaming profiles from pre-14279 builds are incompatible with those on the Redstone build. And what’s more, historically, profile version increments have only occurred on operating system upgrades. Does this mean that June’s update will see us being moved to what is effectively Windows 10.1?

Personally, if I was on one of the builds that can’t manage to run the export command at logoff, I’d be tempted to wait for the Redstone update, unless this was an absolute deal-breaker. The very fact that the profile type has changed leads me to believe that Redstone will provide full roaming profile functionality such as we had in Windows 7 – a year too late maybe, but there nevertheless.

Anyway, I’ve put together a quick video which should hopefully show you this theory in action…hopefully this may help some of you out there!

The post Windows 10 part #7 – maintaining ALL your settings using a standard roaming profile (including the Start Tiles) appeared first on HTG | Howell Technology Group.

Windows 10 part #8 – speeding up the first logon process

$
0
0

I sent out some Tweets recently regarding knocking around 66% off the first logon time of a Windows 10 machine. Whilst people are not overly concerned about the actual first logon time (as long as the subsequent ones are speedy enough), there are environments where users will quite often be exposed to “first logons”. As an example, we have in current engagement a selection of “open access” machines, where due to their very nature, local copies of profiles are not maintained. This in essence means that every time a user logs on, they are experiencing the long and drawn-out “first logon” process.

There are various ways you can mitigate against this which I’ve been exploring for some period of time. However, it’s worth bearing in mind that as Windows 10 is under the flag of “continuous development” – build 14295 just released has some interesting changes, such as the presence of App-V logs, indicating that the client will soon be natively available – any tricks and tips I’ve put together here may not necessarily work in the same way once newer builds make it to general release. For now, though, I’ve had success with them, and headed off some of the user dissatisfaction from the long logon times in open access areas.

We also studied the logon process using Lakeside SysTrack, and found that the biggest cause of slowdowns and alerts on our Windows 10 deployments was due to huge disk I/O, normally around the logon period but also within the user session itself. From this we’ve extrapolated the conclusion that Windows 10 is optimized for SSDs, and if possible, you should deploy it on systems where the OS drive is solid state. This tallies with what I’ve been hearing, that Microsoft based their operating system development around three large customers from the US who have been using SSDs as standard for four or five years now.

Anyway, I actually documented my conclusions on an article over at 4SysOps. You can read the article via the link below – there’s also a link to my YouTube video demonstrating my findings, if you can understand my north-eastern accent 🙂

Improving Windows 10 logon time – https://4sysops.com/archives/improving-windows-10-logon-time/

Video demonstration –  https://www.youtube.com/watch?v=gxXDOHDrnZ8

I will also be doing a presentation on all things Windows 10 at BriForum London this year.

The post Windows 10 part #8 – speeding up the first logon process appeared first on HTG | Howell Technology Group.

Viewing all 178 articles
Browse latest View live