The security settings in the AppSense DesktopNow Management Center are, well, to be quite nice about them, a little clunky and unintuitive. As it often takes a while to get your head around these when you are looking to get something done quite quickly, it would make sense to do a quick article on setting up some basic permissions for Management Center access. So, here we go!
Before we begin, it might make sense to define what we want from the security roles we are about to set up. In my test lab currently, we have one Deployment Group set up (the imaginatively named "#1"). We are going to set up three distinct custom sets of permissions:-
1. Allow users to log in to the Management Center and create, view and modify packages globally
2. Allow users to log in to the Management Center and deploy packages globally
3. Allow users to log in to the Management Center and assign computers to the Deployment Group #1 only
It's worth noting now that AppSense Management Center divides permissions into two distinct types - Server and Object. Server roles operate globally across the Management Center, whereas Object roles can be assigned to specific objects such as Deployment Groups, configurations, reports, agents and Alerts. The granularity you can achieve by combining these two sets of permissions is quite diverse - it is simply the lack of intuitiveness in the UI that achieves this that holds it back slightly.
So the first thing we would need to do is add our groups and then define our custom roles. We will need two custom server roles for permissions sets 1 and 2 described above, and a custom object role for permissions set 3.
First we will need to open the Management Center and connect to a Management Server. Then, from the left-hand side menu, select the Security tab.
Next we will need to add the groups we want to use in these custom roles to the Management Server. Click on the Add Group button and add the groups you need. It's important to add users and/or groups here, as this is where the right to log on to the Management Console itself is defined. Even if you add users and groups specifically to object Security properties, they won't be able to log on to the console to exercise said rights unless they are specifically added here.
The default security setting is "Logon Allowed but no Server Permissions", meaning that group members can access the Management Center but not perform any tasks until they are specifically given the permissions. As we haven't defined our custom roles yet, we won't add any of the default ones. The predefined ones are:-
Server Roles
Modifier - permission to perform edit and delete actions across the whole management server.
Server Administrator - permission to perform create, edit and delete actions across the whole management server. This role is assigned by default to the user installing the Management Center.
Viewer - permission restricted to read-only across the whole management server.
Object Roles
Viewer — permission only to view the object.
Modifier— permission to perform edit actions, but not delete actions, on the object.
Full Control— permission to perform edit and delete actions on the object.
Now we need to define two new Server Roles and one new Object Role. Click on the Security Roles | Server icon in the left-hand pane, and then click New Server Role. For our "Package Admin" role (number 1 in the list we compiled earlier), we will choose the following options:-
And for our "Deployment Admin" role (number 2 in the list we compiled earlier), we will follow the same process and choose these options:-
Now our Server Roles list should look something like this:-
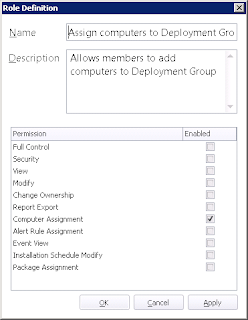
Next click on the Object tab underneath Server in the left-hand pane and choose the New Object Role task from the Action pane on the right. Add the options as required below for our "#1 Computer Assignment Admin" (number 3 in the list we compiled earlier)
And now our Object Roles list will look like this:-
Next we will switch back to the Server Permissions section in the left-hand pane and highlight the first group we added, in this case this was the AD group First line support. Click the Edit Roles button in the Action pane
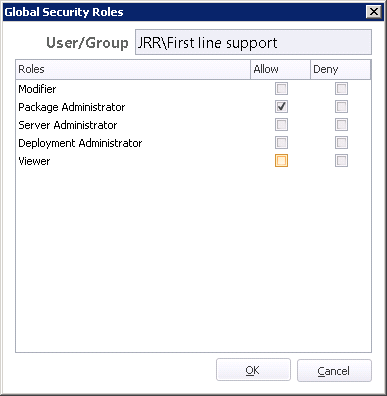
We will now see that the Server Roles we have added are available to be added here. We will add the First line support group to the Package Administrator role
and add the Second line support group to the Deployment Administrator role using the same Edit Roles button
You will notice when doing this that you can Deny as well as Allow each role. The Deny functions would be used normally when using groups that may overlap in their responsibilities - for instance, when a user is a member of a group that allows Server Admin access due to some other permission defined on the group that the user requires. In this case, you would define a Deny for the user to disallow the access (although really you should separate the responsibilities assigned to the group into two separate AD groups). When you define a Deny, the Security Role appears in brackets to denote the denial.
Now our list of Server Permissions looks like this
Now our list of Server Permissions looks like this
Those two server roles, which are now assigned, should fulfill our first two requirements successfully. However, we still need to define a group that can add Computers to Deployment Group #1. As you may have guessed, even though we have defined the Object Role for this we now need to apply it directly to the Deployment Group itself, so switch to the Deployment Groups tab.
Right-click the Deployment Group we are looking to manage, and click the Security option
Click on the Add button and select the user or group you wish to add. In this case we can choose directly from AD (a little demonstration of the non-uniformity of the Security parts of the console here), but we will need to bear in mind that adding a user here does not grant the right to access the Management Console, as I mentioned earlier. We should also see at this stage that we can select our custom Object Role for the user or group at this point.
If you give a user or group rights to do something to a Deployment Group (such as in this case, add Computers) but not to View the Deployment Group, you will run into an issue, insomuch that the user can't see the Group to add Computers to it! So in the screenshot below, you will see that the Viewer permission has been added as well as the custom role.
If you give a user or group rights to do something to a Deployment Group (such as in this case, add Computers) but not to View the Deployment Group, you will run into an issue, insomuch that the user can't see the Group to add Computers to it! So in the screenshot below, you will see that the Viewer permission has been added as well as the custom role.
Now we have successfully set up our third requirement! So, let's log on as a user who needs one of these three requirements and see if the security roles we have set up work correctly. (Handy hint - you don't need to open multiple sessions to test AppSense permissions - when you connect to a Management Server, there is always a "Connect As" option displayed which lets you connect as a different user. Neat!)
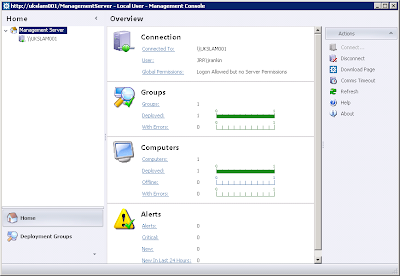
First we will log in as the user who has been simply given permissions to add Computers to Deployment Group #1. Straight away you notice a few differences in the initial logon screen. You can see that the Global Permissions are Restricted
First we will log in as the user who has been simply given permissions to add Computers to Deployment Group #1. Straight away you notice a few differences in the initial logon screen. You can see that the Global Permissions are Restricted
We do, however, have the option to view our Deployment Group titled #1. However, when we browse each screen in the Deployment Group you will again see a restricted interface. For instance, the Assigned Packages screen looks very bare
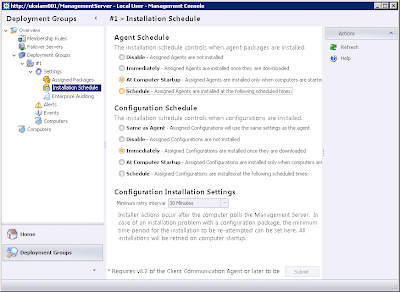
and the Installation Schedule screen can't be interacted with much at all, despite repeated attempts
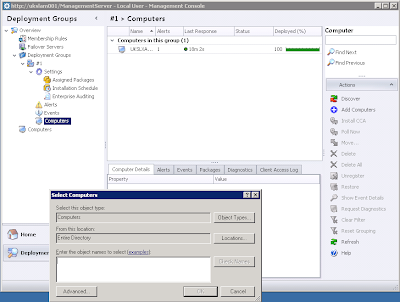
The Computers screen, though, allows us to still make use of the Add and Discover functions, which is what we'd expect
We can continue this process with members of the two AD groups that we set up with global server permissions, but now that you've seen it in action once, I will leave it up to yourselves to explore the various permissions that can be set, and how they then behave when you launch the various management consoles associated with AppSense DesktopNow software.
One final word that I should mention - ownership. As in NTFS land, the ownership attribute trumps all other permissions and overrides any restrictions which may apply. You can set the owner explicitly on objects within the Management Console. I am fairly sure that also as in NTFS, the creator of an object becomes the owner initially.
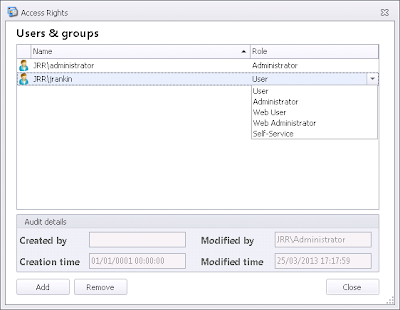
So that covers a quick run-through of the basic security permissions and roles within the AppSense consoles. Note that this doesn't include Personalization Server access - that's controlled from within the User Personalization part of the Environment Manager console under Global | Access Rights. The configurable user roles are a lot more linear in Personalization Server - you are simply assigned a role from Administrator, User, Web User, Web Administrator and Self-Service as shown below. Because these roles mostly deal directly with accessing the Personalization data through the web interface, we will leave this part of it for the article on setting up web access and self-service - hopefully coming fairly soon!


