Quantcast
Channel: HTG
Viewing all 178 articles
Browse latest View live

Setting LegalNoticeCaption and LegalNoticeText through AppSense DesktopNow Environment Manager

$
0
0
When it comes to putting systems and infrastructure together for end-users, perception and presentation are key. That's why, in end-user computing, it always pays to have things looking smooth and professional. A lot of the user perception with regard to the quality of a system goes hand-in-hand with the presentation - if something looks like it's been thrown together by a bunch of drunken monkeys, it's going to be facing an uphill battle to win users over.

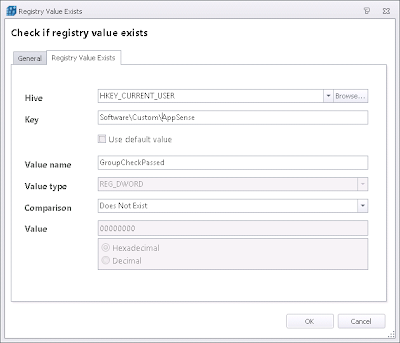
That's why I've always found it a bit of a pain when putting together legal notices for systems. Since the Windows NT4 days, you've been provided with two Registry keys - LegalNoticeCaption and LegalNoticeText - that allow you to provide the title and the body of the legal notice displayed to your users at logon time. However, those who can remember Windows NT4's teal-green heyday will also recall that it only accepted a single text string.

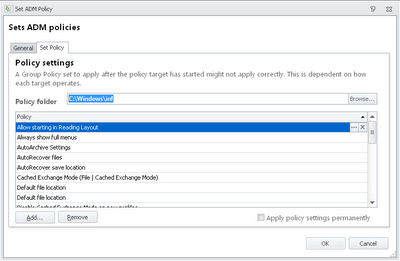
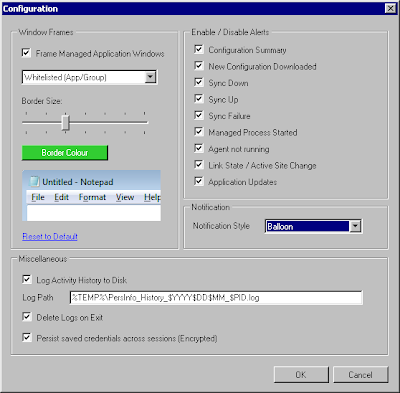
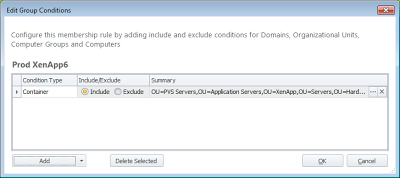
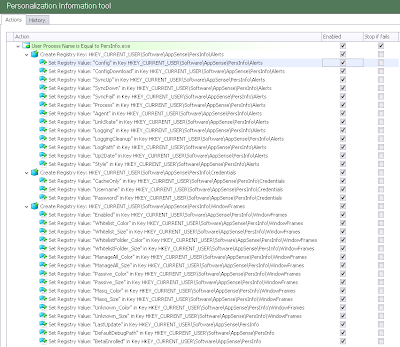
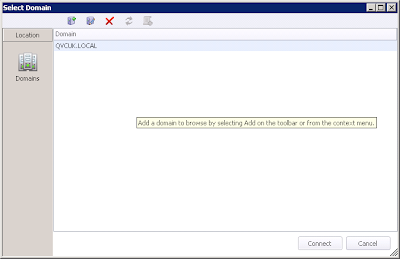
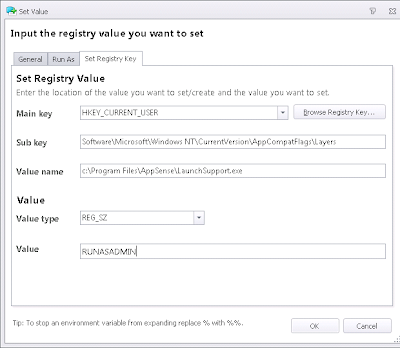
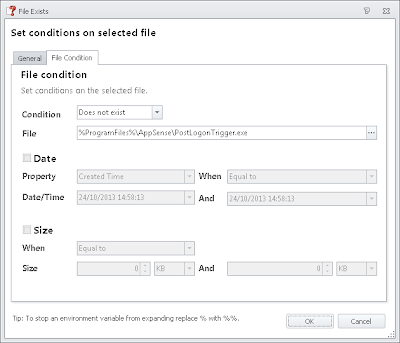
The Registry keys that help you out with providing a legal notice to your users

Fast forward to the goodness of Windows 2000, and the comma was adopted as a carriage return character for your legal notice Registry values. However, as you've probably guessed, this wasn't really much use in the real world, as most paragraphs in the English language have a tendency to adopt common punctuation such as the comma to provide rhythm and syntax to text.
 
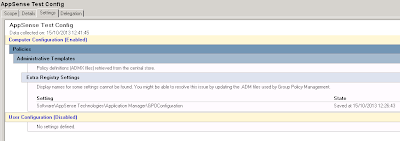
Move on now to Windows 2003, and these keys moved up and around a bit inside the Registry to allow them to be managed through Group Policy Objects. There was even (cue fanfare) a change to allow you to insert carriage returns in the editor for the text - but no change as to how this was interpreted by the Windows operating system itself, which made the changes in the editor absolutely useless. Even now, on Windows 2008 R2 (although I can't speak to Windows Server 2012 yet), no matter how you format your text in the editor, you will end up with a legal notice that looks like this to the users


Pretty rubbish, really - and as I said earlier, it's a good way to make your infrastructure look bad to the users, by making the first thing they see poorly formatted and amateurish.
 
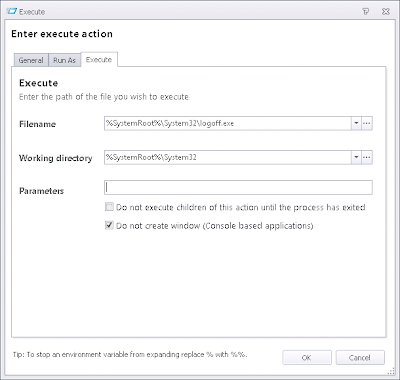
So, how do we get around this? There are two main ways you can attack this. The first is for those of you in a Citrix Provisioning Services or similar environment, where you can simply edit the binary data of the text string in your gold image. The second is for those not using Citrix Provisioning Services or similar technology, and uses an AppSense Environment Manager Computer Startup Action to set the values in the Registry (although you could do it with a Group Policy Startup Script, if you're not an AppSense customer). And of course, there may be those out there with mixed environments that need to use both of these options alongside each other.
 
Deploying the Legal Notice in a Citrix Provisioning Services (or similar technology) environment
 
The strength of technologies like Citrix PVS is in exactly situations like these. If a setting needs to be applied to x amount of systems, you simply update the gold/master image with the required settings, seal the image, and then restart your endpoints. Hey presto! - you've deployed the setting to all of them.

First you'll need to insert your required text into something like Notepad. Don't format it with carriage returns - use something else instead. I use the tilde (~) symbol - it stands out nicely for this purpose. Use two tildes for a single carriage return and four for a line space. In case you're struggling to get my meaning, here's the text I'd put into Notepad if I was doing this for the legal notice shown in the screenshot previously.

~~This computer system is the property of Acme Corporation and is for authorised use by employees and designated contractors only.~~~~Users have no explicit or implicit expectation of privacy whilst utilising the applications, infrastructure and services provided by the company.~~~~Any or all uses of this system and all files on this system may be intercepted, monitored, recorded, copied, audited, inspected, and disclosed to authorised site, company, and law enforcement personnel.~~~~By logging on to this system, the user consents to such interception, monitoring, recording, copying, auditing, inspection, and disclosure at the discretion of authorised site or company personnel. Unauthorised or improper use of this system may result in administrative disciplinary action and/or criminal penalties.~~~~By continuing to use this system you indicate your awareness of and consent to these terms and conditions of use.~~~~It is the user's responsibility to LOG OFF IMMEDIATELY if you do not agree to the conditions stated in this notice.~~

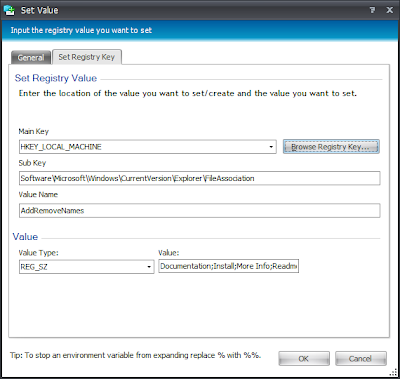
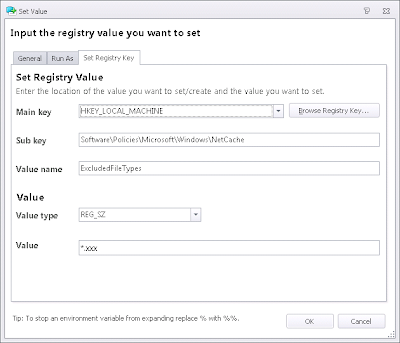
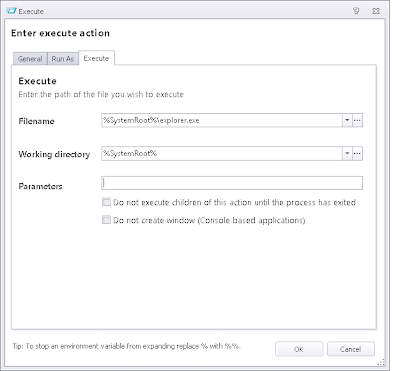
Once you've done this, you will need to paste the text of the above directly into your LegalNoticeText Registry value. In case you don't know where to find it, it sits in HKLM\Software\Microsoft\Windows NT\CurrentVersion\Winlogon, and is a REG_SZ value. You can also set the corresponding LegalNoticeCaption value at the same time - this is simply the title of the legal notice window, and I normally simply use something like "Logon warning".

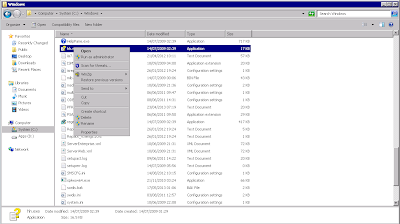
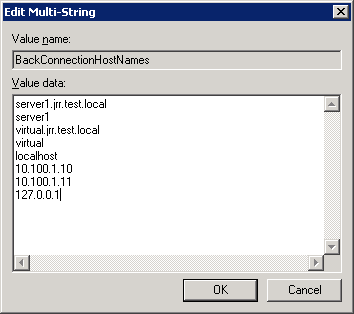
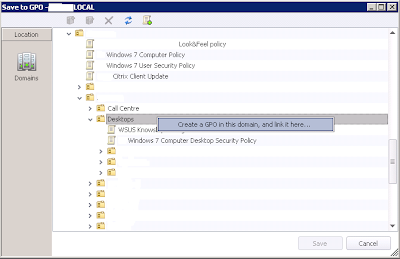
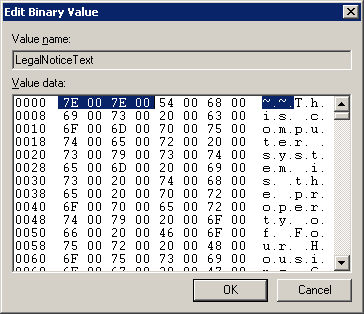
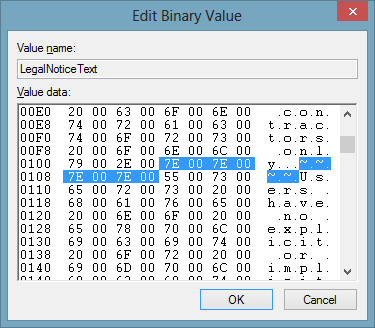
Now, once you've pasted this tilde-separated text into the LegalNoticeText value, right-click the value and choose the Modify binary data option as below


The next trick is to find the binary representation for the double tilde (you can use the right-hand portion of this window to help you, as it shows the corresponding "normal" text in that side) which should be 7E 00 7E 00. I've highlighted them in the screenshot below. You will need to do the same, because we are going to replace it by typing a new value straight over the top. The reason we used double tildes is because the data we are replacing it with also has four sets of paired values and it makes it easier to replace them like-for-like.


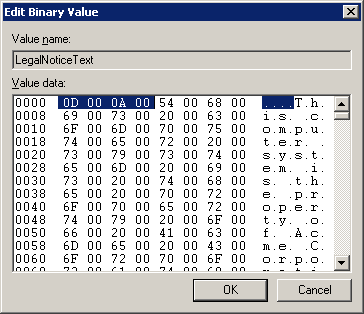
Now we will replace this with the data that represents a carriage return. The data is 0D 00 0A 00.


Next we need to search down through the binary data and find the next set of double tildes.


There are two this time, because we need to put in two carriage returns which will give us a line space between paragraphs. So we are replacing the 7E 00 7E 00 7E 00 7E 00 with 0D 00 0A 00 0D 00 0A 00 in this case.


Based on the number of paragraphs you have to format, you now need to repeat this process until all the double tildes are replaced.

Once you've done this, assuming you've done it correctly (if you haven't, if you've missed a value slightly, you may see some bizarre output in the text when you log on!) your Legal Notice should look much nicer, as shown in the next screenshot. If something goes wrong, it's usually best to start again from scratch (i.e. delete the value and recreate it) rather than hunting through the binary data to try and find the error.


It might just be me, but I think that from the off, that looks a far more slick, polished and professional introduction to your users.

So now all you'd need to do would be to seal the image and deploy it out to your PVS (or equivalent) environments.

Deploying the Legal Notice in a traditional environment using Environment Manager

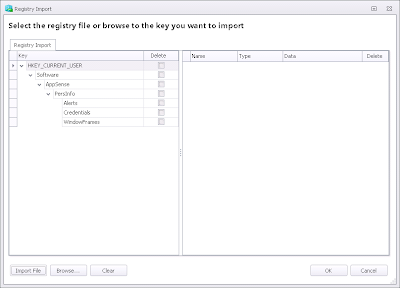
Without something like PVS, you are going to have to think of another way to deploy this. Naturally the first thing a lot of people would consider would be something like a Registry export and import - create the settings on a test machine as above, and then export the Registry key to a .reg file, and import it in to your endpoints.

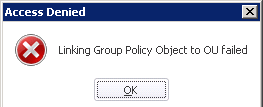
However, this doesn't seem to work at all. If you set the values as above and then export them to a .reg file, when you import them back in, the LegalNoticeCaption appears without issue - but the important bit, LegalNoticeText, is blank. I don't know the exact cause of this and would probably be interested in finding out, but it is probably something to do with the export format for a REG_SZ value and the binary format of the data we are trying to import.

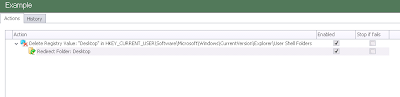
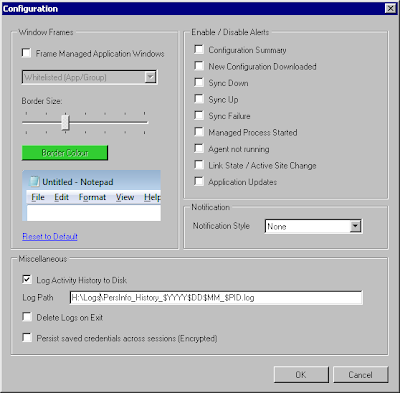
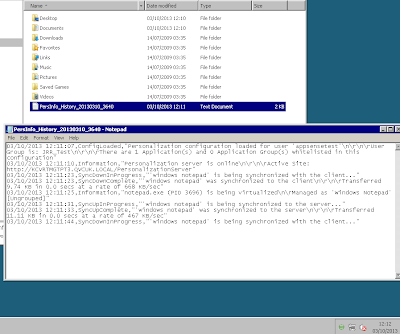
The text value shows as completely blank after a .reg file is imported
So, how can we get around this? The only reliable way I found to achieve this was to actually use a VBScript to deploy the values, which allowed us to insert legible carriage returns directly into the target Registry area. As mentioned earlier, you don't specifically need AppSense Environment Manager to do this - a Group Policy Startup Script would suffice - but the AppSense Environment Manager option, as always, tends to give you a lot more flexibility and granularity with regard to the application of the setting.

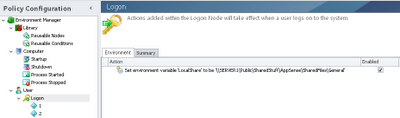
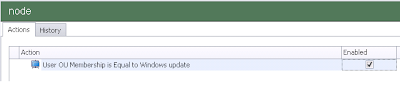
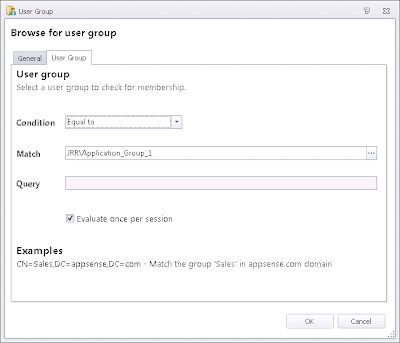
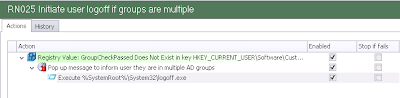
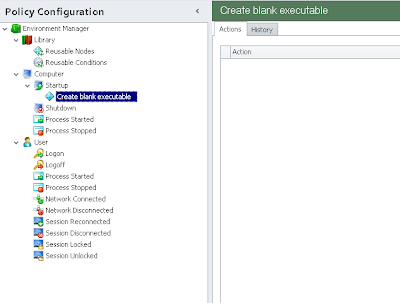
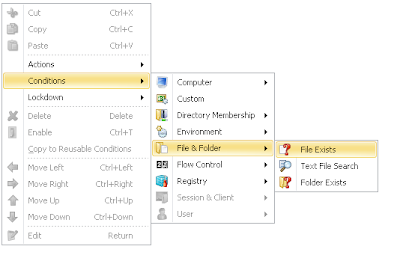
We create a new Reusable Node for this Action. Unless you are planning on referencing it multiple times within the same configuration then a Reusable Node strictly isn't necessary, but for portability it seemed like a logical thing to do. Inside the new Node we simply create a single Custom Action and populate it with this code (kindly adapted from an online example provided by Mike Stephens of Microsoft)

'==========================================================================
' AUTHOR: Mike Stephens , Microsoft Corporation
'
' DATE: 26/11/2007
'
' Sample VBScript to set LegalNotice values with carriage returns
' ==========================================================================


set wShell = CreateObject("Wscript.Shell")
strLegalCaption = "Logon warning"

Const POLICY_KEY = "HKLM\Software\Microsoft\Windows\CurrentVersion\policies\system\"
Const LEGAL_CAPTION_VALUENAME = "legalnoticecaption"
Const LEGAL_TEXT_VALUENAME = "legalnoticetext"

strLegalText = ""

strLegalText = strLegalText & ""& vbcrlf

strLegalText = strLegalText & "This computer system is the property of Acme Corporation and is for authorised use by employees and designated contractors only."& vbcrlf &vbcrlf

strLegalText = strLegalText & "Users have no explicit or implicit expectation of privacy whilst utilising the applications, infrastructure and services provided by the company."& vbcrlf & vbcrlf

strLegalText = strLegalText & "Any or all uses of this system and all files on this system may be intercepted, monitored, recorded, copied, audited, inspected, and disclosed to authorised site, company, and law enforcement personnel."& vbcrlf & vbcrlf

strLegalText = strLegalText & "By logging on to this system, the user consents to such interception, monitoring, recording, copying, auditing, inspection, and disclosure at the discretion of authorised site or company personnel. Unauthorised or improper use of this system may result in administrative disciplinary action and/or criminal penalties."& vbcrlf & vbcrlf

strLegalText = strLegalText & "By continuing to use this system you indicate your awareness of and consent to these terms and conditions of use."& vbcrlf & vbcrlf

strLegalText = strLegalText & "It is the user's responsibility to LOG OFF IMMEDIATELY if you do not agree to the conditions stated in this notice."& vbcrlf & vbcrlf

' Edit the lines above as necessary

wShell.RegWrite POLICY_KEY & LEGAL_CAPTION_VALUENAME, strLegalCaption, "REG_SZ"
WShell.RegWrite POLICY_KEY & LEGAL_TEXT_VALUENAME, strLegalText, "REG_SZ"

Obviously, you will have to substitute your own text for the values for both strLegalText (on a per-paragraph basis) and strLegalCaption.

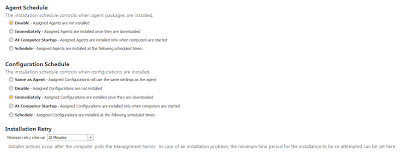
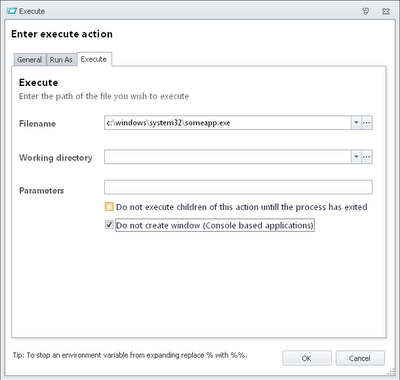
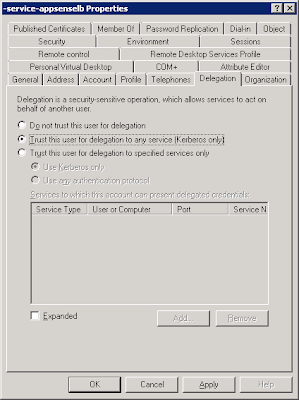
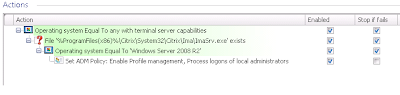
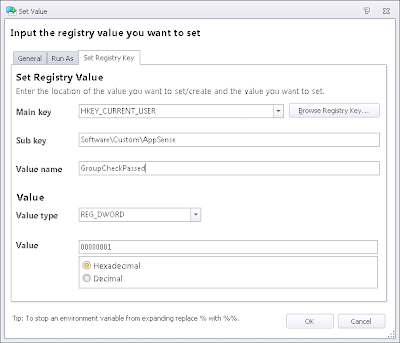
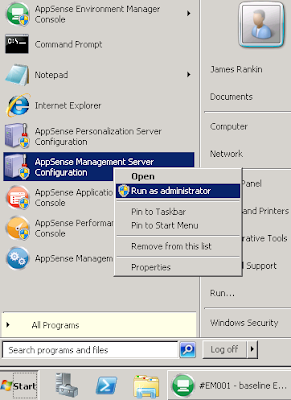
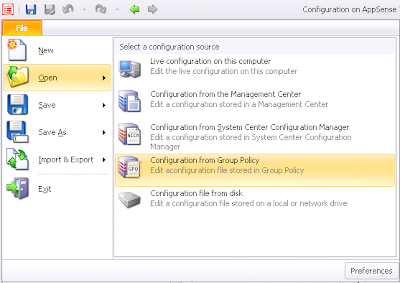
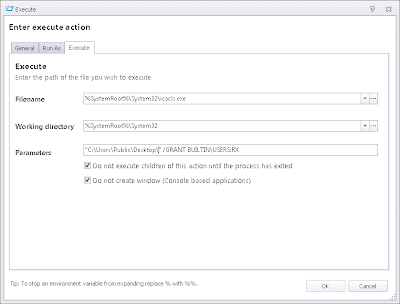
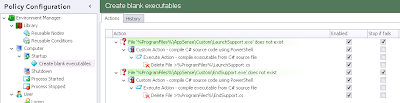
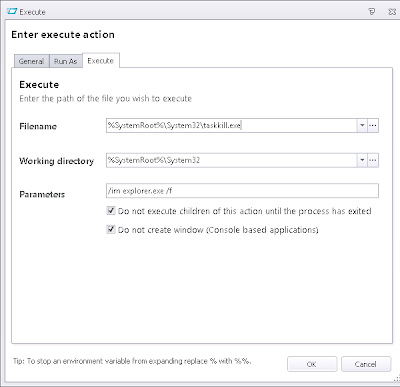
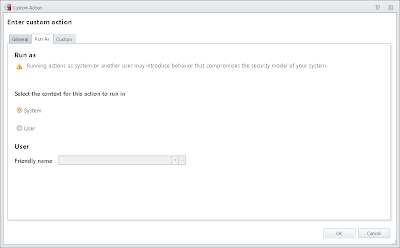
Now, once you've got this Custom Action saved set it to run as System as below


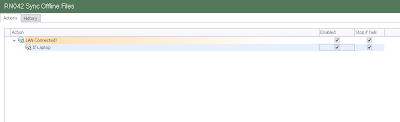
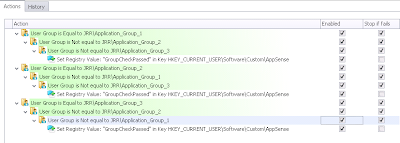
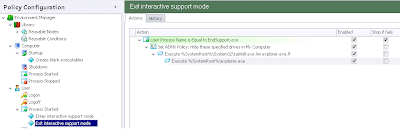
and then reference the Node from an appropriate area in the Computer Startup trigger.

Now, when we save the configuration, deploy it, and then restart our systems, we should see a nice professional-looking Legal Notice as shown below


Summary

I'm kind of hoping that this value is handled better in Server 2012 and Windows 8/8.1, as it has traditionally been a bit of a nightmare to get it deployed in a nicely-formatted way. Citrix admins in particular suffer a lot from bad perceptions of their infrastructure due to circumstances beyond their control - poor application performance and incompatibility being two of the most common - so a way to tidy up and polish the first screen the users see should go at least some way to improving the first impression they get!

AppSense DesktopNow Environment Manager Session Data Library

$
0
0
I've been stuck in Session Data hell recently. Part of overhauling a badly-configured AppSense Environment Manager infrastructure is painstakingly poring over the Personalization database, the data captured into it by applications, and the Session Data and Desktop Settings. This particular instance of it had a huge amount of Session Data configured. Most of them became redundant after an upgrade, but still, an awful lot of stuff had been dumped into the Session Data section without the requisite amount of forethought.

This article has a quick run-through of how Session Data works, followed by a "library" of commonly-used keys - which I'd appreciate everyone's help in adding to!

Session Data vs Desktop Settings

It's important to try and understand Session Data and its sister section, Desktop Settings, and why they exist, if you are going to use them correctly. In previous incarnations of Environment Manager, you originally had a section titled "Desktop Settings" rather than Session Data. There are many settings within the Windows shell - think things to do with the Taskbar and Explorer, mainly - that require a "desktop refresh" in order for the settings to activate. So the Desktop Settings section was introduced, where you would configure Registry keys that you needed to import at logon and then trigger the refresh to ensure the settings were available for all users without any issues.

This then became problematic in that administrators would add all sorts of non-relevant paths to the Desktop Settings section. The reason they did this was because they needed to share personalized data between applications and application groups, and the Desktop Settings section was the only part of the interface that allowed them to achieve this. Think data like printer settings, mail profile settings - all of which  dragged out the logon time and making the performance of the session worse.

So in 8.1 and up AppSense introduced the Session Data area to complement a new, improved Desktop Settings area. The Desktop Settings area became rather more static - offering a set of built-in Desktop Settings for you to customize as required. The Session Data section, on the other hand, became effectively what "Desktop Settings" had been previously - a fully-customizable list of Registry keys. Session Data is imported into the user session after Desktop Settings and before Policy Configuration - now minus the overhead of the extended logon .

Desktop Settings (which have expanded further in version 8.3 and 8.4)


Session Data (configured badly!)


Desktop Settings/Session Data vs Policy Configuration

Now there are some schools of thought that recommend the use of old-style Policy Configuration Registry Hiving Actions as an alternative to using Desktop Settings and Session Data. Why would you do that?

Well, there is the fact that the Conditions available to Policy Configuration are so much more granular than anything you can configure in Personalization Server. Session Data is, effectively, a large mass of settings that are dumped on the endpoint - and when you are analyzing the Personalization Data, they sit in one section, lumped under Session Data. If you were to manage both email profile settings and printer settings in Session Data and the printer settings went awry, the archive rollback would reset both sets of data. With Registry Hiving Actions in Policy Configuration, you could reset each of them separately.

Of course, there is the built-in archive facility in Personalization Server that is a big draw for a lot of people, in addition to the self-service and/or web-based access to this. You could configure similar redundancy for your Registry Hiving files, but this would have to be something external and possibly harder to access - maybe leveraging something like a scheduled robocopy job.

Another point to note is that Registry Hiving also requires a file share and associated storage - whereas with Personalization Server, you've already committed all the space by creating the database (assuming you've sized it properly!)

Others will be quick to point out that you can now (in version 8.3 and upwards, if I remember correctly) configure Desktop Settings and Session Data on a per-Personalization Group basis. This is true, and it is very good, but it still only allows you to be as granular as the Conditions available for Personalization Group Membership Rules allow. As it stands, Policy Configuration has a vastly better array of Conditions available to it - think things like OS Version, Session and Client, Registry, File and Folder, etc. - compared to the few that the Personalization Groups boast. I think if the Conditions library available in Personalization was updated to match that in Policy Configuration, you could separate Desktop Settings and Session Data much more effectively and a big part of the reasons for choosing Configuration over Personalization would be rendered a moot point.

A final point to consider is the possible overhead in finding out which Registry keys and/or files you will need to hive in order to save all of the settings you get natively through the Desktop Settings functionality. You can probably guess a few off the top of your head - HKCU\Software\Microsoft\Windows\CurrentVersion\Explorer springs to my mind almost immediately - but there also may be things in the filesystem requiring attention, such as CSIDL_APPDATA\Microsoft\Internet Explorer\Quick Launch\User Pinned. If you are going down this route, you will need to do some very thorough testing to ensure you are capturing all of the settings that are available for customization through the native PS interface.

However - as it stands, it is up to you to decide which method works best for you. There is no right or wrong way to do it - it simply depends on the requirements that you have.

Common Session Data keys

With that in mind, should you choose to utilize Session Data - and to be fair, a lot of places do - you may be wondering what sort of keys you may need to add to get common issues resolved? AppSense kindly add the most common one - the Microsoft Outlook messaging subkey - for you, but apart from that, you will have to configure the required exceptions yourself, based on good testing procedures. However, I've culled together a list here of the most commonly-used ones, to help you put your Session Data settings together that little bit faster. Please bear in mind this is naturally a "live" list - additions are most welcome, because there's only so much time I have on my hands! :-)

Microsoft Outlook (required for Mail icon in Control Panel to work correctly with Outlook profile, in additon to many other Outlook-integrated applications)

HKEY_CURRENT_USER\Software\Microsoft\Windows NT\CurrentVersion\Windows Messaging Subsystem (should be added automatically, unless in upgrade situation)
HKEY_CURRENT_USER\Software\Microsoft\Exchange

Mouse button settings

HKEY_CURRENT_USER\Control Panel\Mouse

Date and time format

HKEY_CURRENT_USER\Control Panel\International

Location

HKEY_CURRENT_USER\Control Panel\International\Geo

Manual drive mappings

HKEY_CURRENT_USER\Network (if Unmap At Logoff is configured for any drive mapping, however, this will not function)

Control Panel view settings

HKEY_CURRENT_USER\Software\Microsoft\Windows\CurrentVersion\Explorer\ControlPanel

IE form passwords and LiveMeeting 2007 Outlook toolbar

HKEY_CURRENT_USER\Software\Microsoft\Protected Storage System Provider (may also require a Hiving Action for %APPDATA%\Microsoft\Protect)

Clear History Internet Explorer function

HKEY_CURRENT_USER\Software\Microsoft\Internet Explorer\TypedURLs

Additional clocks

HKEY_CURRENT_USER\Control Panel\TimeDate\AdditionalClocks

AutoPlay settings

HKEY_CURRENT_USER\Software\Microsoft\Windows\CurrentVersion\Explorer\AutoplayHandlers\EventHandlersDefaultSelection
HKEY_CURRENT_USER\Software\Microsoft\Windows\CurrentVersion\Explorer\AutoplayHandlers\UserChosenExecuteHandlers

Additional default desktop icons (in a non-redirected environment)

HKEY_CURRENT_USER\Software\Microsoft\Windows\CurrentVersion\Explorer\HideDesktopIcons\NewStartPanel

Additional Taskbar toolbars

HKEY_CURRENT_USER\Software\Microsoft\Windows\CurrentVersion\Explorer\Streams\Desktop

Lync 2010

HKEY_Current_User\Software\Microsoft\Windows\CurrentVersion\Ext\Stats
HKEY_Current_User\Software\Microsoft\Communicator
HKEY_Current_User\Software\Microsoft\Office\11.0\Outlook\IM

Windows Live Messenger 2011 auto sign-in

HKEY_CURRENT_USER\Software\Microsoft\IdentityCRL

Printer settings

HKEY_CURRENT_USER\Printers
HKEY_CURRENT_USER\Software\Microsoft\Windows NT\CurrentVersion\Devices
HKEY_CURRENT_USER\Software\Microsoft\Windows NT\CurrentVersion\PrinterPorts
HKEY_CURRENT_USER\Software\Microsoft\Windows NT\CurrentVersion\Windows

Mozilla Firefox

HKEY_CURRENT_USER\SOFTWARE\Classes\.htm
HKEY_CURRENT_USER\SOFTWARE\Classes\.html
HKEY_CURRENT_USER\SOFTWARE\Classes\.shtml
HKEY_CURRENT_USER\SOFTWARE\Classes\.xht
HKEY_CURRENT_USER\SOFTWARE\Classes\.xhtm
HKEY_CURRENT_USER\SOFTWARE\Classes\.xhtml
HKEY_CURRENT_USER\SOFTWARE\Classes\.webm
HKEY_CURRENT_USER\SOFTWARE\Classes\FirefoxHTML
HKEY_CURRENT_USER\SOFTWARE\Classes\FirefoxURL
HKEY_CURRENT_USER\SOFTWARE\Classes\ftp
HKEY_CURRENT_USER\SOFTWARE\Classes\gopher
HKEY_CURRENT_USER\SOFTWARE\Classes\http
HKEY_CURRENT_USER\SOFTWARE\Classes\https
HKEY_CURRENT_USER\SOFTWARE\Classes\StartMenuInternet
HKEY_CURRENT_USER\Software\Microsoft\Internet Explorer\Main
HKEY_CURRENT_USER\SOFTWARE\Microsoft\Windows\CurrentVersion\Explorer\FileExts
HKEY_CURRENT_USER\SOFTWARE\Microsoft\Windows\Shell\Associations

Taskbar notifications

HKEY_CURRENT_USER\Software\Classes\Local Settings\Software\Microsoft\Windows\CurrentVersion\TrayNotify

Windows Explorer Preview Pane

HKEY_CURRENT_USER\Software\Microsoft\Windows\CurrentVersion\Explorer\
Modules\GlobalSettings

Microsoft Office user information (if not captured by Microsoft Office Application Group)

HKEY_CURRENT_USER\Software\Microsoft\Office\Common\UserInfo


Please, please, please, send me any more suggestions you have to be added to this list (or removed, as future versions become more stable). Anything that can cut down on the amount of time required to configure applications or user sessions is good news to AppSense admins everywhere!

Pinning a .CHM file to the Taskbar using AppSense DesktopNow Environment Manager

$
0
0
OK, I'm feeling a bit ropey after being the guest of the kind people at AppSense last night down here in London, so for today I think we will just have a little bit of a case study in using Environment Manager to solve real-world user issues. The requirement we started with was to pin a shortcut to the Taskbar that opened up a specific HTML Help file - a file with the .chm extension. Sounds simple enough, no?

As I started to look into this it became obvious that it was not as straightforward as I thought. As far as I was aware, it was executables and shortcuts that could be pinned to the Taskbar or Start Menu - but if I created a shortcut to my HTML Help file, the "Pin To Taskbar" context menu option was not available for it. Renaming the file to a .exe extension allowed me to pin it, but when I tried to edit the shortcut properties in %AppData%\Microsoft\Internet Explorer\Quick Launch\User Pinned\Taskbar, the Pinned Item promptly disappeared.

Next I tried to pin the HTML Help executable itself to the Taskbar (%windir%\hh.exe). I was quite disconcerted to find that I couldn't actually do this, and wondered if this was the reason that I also couldn't pin a shortcut to a .chm file to the Taskbar either?

There was clearly something going on "under the hood" of Windows with regard to this pinning. Here is an example of a "normal" shortcut that has the options for Pinning (both to Taskbar and Start Menu)


and here's an example of a shortcut to our HTML Help file, which as you can see is minus the options for Pinning (I believe in Windows-dev land, these options on the context menu are referred to as "verbs")


Following on from this, here's an example of an executable (in this case explorer.exe), with all of its verbs intact


and here's the executable for HTML Help (hh.exe), showing that the verbs we are looking for are once again missing


Strange behaviour indeed! If ever there was a time to go digging through the depths of the interwebs for information on the inner workings of the Windows OS, then this was it.

After a bit of research and Google-fu, I found to my surprise that certain executables were effectively banned from being Pinned, and were also excluded from the Frequently Used List. The list of "banned" executables is listed in the Registry at these two keys:-

HKLM\Software\Microsoft\Windows\CurrentVersion\Explorer\FileAssociation\HostAppsHKLM\Software\Microsoft\Windows\CurrentVersion\Explorer\FileAssociation\AddRemoveApps

Items listed in these keys comprise:-

Applaunch.exe
Control.exe
Dfsvc.exe
Dllhost.exe
Guestmodemsg.exe
Hh.exe
Install.exe
Isuninst.exe
Lnkstub.exe
Mmc.exe
Mshta.exe
Msiexec.exe
Msoobe.exe
Rundll32.exe
Setup.exe
St5unst.exe
Unwise.exe
Unwise32.exe
Werfault.exe
Winhlp32.exe
Wlrmdr.exe
Wuapp.exe


...with right in the middle of that lot, our friend hh.exe. This would also explain why we can't pin a shortcut to an HTML Help file to the Taskbar either - the association with the "banned" executable in the shortcut properties must prevent the option from being available.

I've also noticed other, non-Microsoft programs and/or shortcuts that can't be Pinned to the Taskbar or Start Menu. These programs must take advantage of the System.AppUserModel.PreventPinning property that is available to developers, or alternatively they can use the Registry to do this, by adding a NoStartPage entry to the application's registration in HKEY_CLASSES_ROOT\Applications\Example.exe.

So, now that we are suitably educated, how can we go about getting our .chm file onto the Taskbar?

Well, one anomaly I did find was that although you can't pin a shortcut to a .chm file to the Taskbar, and you can't pin the HTML Help executable itself to the Taskbar, what you can pin to the Taskbar is a shortcut to hh.exe that references the .chm file as a parameter. In case you're not getting what I mean, if I create a shortcut like this


once I have the shortcut on my desktop, I can now access the verbs as normal!


So....next thought was how to deploy this. The first thing I tried was to create the shortcut in an accessible network location, but here some more anomalous behaviour exhibited itself - if the shortcut wasn't on a local drive, the verbs were again missing. I can maybe understand the reasoning behind this with regard to trusted files - but if I was using a redirected Start Menu and I couldn't pin items to the Taskbar because the shortcuts were sat on a remote network drive, I'd be pretty much driven bonkers by this "feature".

Anyway - given that the shortcut needed to be created locally, and it would have to be done in an area that the user could write to, what we needed was a way to create the shortcut, pin the shortcut to the Taskbar, and then remove the shortcut we created, leaving the Pinned Item behind intact. All of this needed to be done in a nice sequential order, so if we weren't using AppSense Environment Manager, we'd probably be having to use some sort of logon script, as Group Policy can't really do dependent actions. But luckily, we are using Environment Manager, so it should be possible!

Before I started creating the required configuration, though, one more interesting piece of information was revealed. When you create the shortcut, the default name given is the name of the executable, in this case hh.exe. However, to tidy things up, I decided I was going to rename the shortcut to "Custom Help". Imagine my surprise when, after doing the rename, I found that the verbs for Pinning had disappeared again!

After a bit more digging it turns out that Microsoft maintain a "blacklist" of disallowed names for shortcuts and executables in the Registry. Bizarre though it sounds, if any of the following strings - regardless of case - are present in the name of a shortcut or executable, they are automatically disallowed from being Pinned

Documentation
Help
Install
More Info
Read me
Read First
Readme
Remove
Setup
Support
What's New


and as we can see, renaming the file to a string containing the word "Help" is the reason why this happened.

Obviously the easy way around this is to not use any of the blacklisted strings in the shortcut name - but as this is a Help file we are pinning, it's kind of annoying not to be able to use "Help" in the shortcut title. The default name of "hh" also looks really unprofessional when a user hovers the mouse over the Pinned Item, so it's clear we also need to find a way around this. The settings are controlled by the following Registry key, which should be familiar from the section above:-

HKLM\Software\Microsoft\Windows\CurrentVersion\Explorer\FileAssociation\AddRemoveNames

So hopefully we can use Environment Manager to manipulate these Registry values so that we can give our Pinned Item a sensible name!

Right - so, forearmed with all this new knowledge about the internals of Windows, we've finally got down to opening up the Environment Manager console and can set about trying to make it work :-) The first thing we will need to do is set the Registry key to allow us to use Help in the name. We will set this as a Computer Startup Action, but dependent on your environment you may need to put this into a gold/master image or maybe even use Group Policy to deploy it.


The value is semicolon-delimited and can be configured in any way you require, but if you just wanted "Help" removing, the value would be

Documentation;Install;More Info;Readme;Read me;Read First;Setup;Support;What's New;Remove

Once we've set that, as it is an HKLM setting, any instance of explorer.exe that starts afterwards will take advantage of the new setting we have defined here.

IMPORTANT - don't forget to set the Registry Action to run as "System" rather than "Current User", as it is an HKLM entry the user will not have the privileges to update an HKLM value!

So next we will use the Create Shortcut Action to create a shortcut to generate our Pinned Item from. We've placed it on the Desktop as we are going to remove it afterwards


Now we will need to programatically create the Pinned Item on the Taskbar. As many of you probably know, a Pinned Item on the Taskbar is a shortcut in %AppData%\Microsoft\Internet Explorer\Quick Launch\User Pinned\Taskbar - but you can't just create this and expect it to work. It also requires the settings from HKCU\Software\Microsoft\Windows\Current Version\Explorer\Taskband to complement this in order for the Pinned Item to display successfully. As it becomes extremely fiddly to import the Registry settings along with the shortcut - and bearing in mind that the Registry settings will change as and when users add new Pinned Items of their own - it's much easier to do this using a scripted action of some sort. There are VBScript and PowerShell examples available to achieve this. We are going to use the PowerShell method, but it might be nice to have the capability to Pin shortcuts built in to Environment Manager natively, so consider that a feature request :-)

PowerShell doesn't have a native cmdlet to Pin items - but there is a good PowerShell module available on Microsoft's website. This code will need to be copied and saved to a .psm1 file so you can import it into your PowerShell script. I've saved the file with this code in as D:\PinnedApps.psm1 (mainly because D: is a persistent drive on my servers), but you can set the file path to whatever you require.

Next we need to put a Custom Action nested under the Create Shortcut Action which then imports this PowerShell module and runs the command to pin the shortcut to the Taskbar

import-module D:\PinnedApps.psm1
Set-PinnedApplication -Action PinToTaskbar -FilePath "$env:USERDATA\Apps\Microsoft\Desktop\Custom Help.lnk"

Note that the above command has wrapped on the second line for readability. Also note I am using a path to a redirected Desktop - change the -FilePath parameter as necessary for your environment.

Finally, we can then delete the shortcut we have created earlier as it is no longer necessary, and will not affect the functionality of the Taskbar Pinned Item once we remove it.


So, now all that remains is to test the configuration to see if it works as expected. We save it, deploy it, and then log on to our test server using our test user account...


...and as you can see, it has functioned exactly as we wanted! Whew!

One final note on this. The PowerShell script that does the Pinning relies on the presence of the verbs in order to operate successfully. There is a Group Policy Object that disables Pinned Items, so if this is active, the configuration we described won't work. The GPOs in question are

User Configuration | Start Menu and Taskbar | Remove Pinned Programs from the Taskbar
User Configuration | Start Menu and Taskbar | Remove Pinned programs from the Start Menu

If you did need to deploy a Pinned Item and then disable the functionality so that users could then not pin any more items, you could simply apply these Group Policy Objects after the Actions we configured above had run successfully - which is another advantage the AppSense method has over traditional Group Policy application.

AppSense DesktopNow Management Center Deployment Group best practices

$
0
0
Let's talk about Deployment Groups. In all the places that I go to it strikes me that the Deployment Group structure has, on many occasions, not been thought through sufficiently. What you end up with is a huge clump of Deployment Groups thrown together under many different names - Bob's Test Group, Windows 7 x86 Pre-Pilot Integration Group, NewGroup42, etc. - and straight away another part of your AppSense infrastructure is struck down by the familiar curse. The curse being, the console looks a mess, there's no order or structure to any of it, rules and configurations are conflicting with each other, nothing works as expected, understanding the purpose and flow of the structure is nigh-on impossible, and trying to make sense of it and bring it back to some semblance of normality becomes a project in itself.

It's a common thing, and what really gets me hot under the collar is hearing people blame the software itself for the fact that they've deployed it in such a haphazard fashion! Admittedly, there are things that could be done better - it never fails to annoy me when I see things like machines sitting in multiple groups and non-existent OUs referenced in membership rules, and there's no warning in the console to tell you about these sorts of errors - but the limitations of the console aside, I don't think there's really any reason not to at least try and put the effort in to make the deployment easier to understand.

There's not really any right or wrong way to set up your Deployment Group structure - think the way you would structure an AD/GP environment, it can be done in various different ways - but there are some common mistakes you may want to avoid.

To use the Management Console or not?

Maybe now is a good time to mention that there is a school of thought that believes the Management Console should be used only for the deployment of configurations, and everything else in there should be controlled in other ways. Basically that would mean your alerts would be handled by some centralized monitoring tool - maybe System Center Operations Manager for your high-end customers and probably a bit of creative PowerShell scripting for small environments - and deployment of agents would be done by a tool such as System Center Configuration Manager, leaving only the deployment of configurations to actually be handled by the Management Console itself. You could go one step further with this also and deliver the configurations through SCCM itself as well, should you wish to, leaving the Management Console as a tool for infrastructure overview alone. However, a lot of places don't have the kind of investment in System Center to be able to take advantage of a tool like SCCM - although if you do, I definitely recommend deploying your agents with it - but even if you offload the normal Management Console tasks to a different technology, you will still want to set up the Deployment Groups in as tidy and logical fashion as is humanly possible.

Considerations around Deployment Groups

There are lots of things to sit and think about before you start organizing your Deployment Groups. This is the part that most people fail to do!

Membership Rules

Membership Rules for your Deployment Groups can be configured either by computer name, or dynamically by using an Active Directory OU or Computer Group. In the interests of keeping everything tidy - think the same way you would populate Worker Groups under Citrix XenApp 6.x - it's much better, in my opinion, to use the dynamic option, preferably from an OU. As a computer can only be a member of one OU at a time, using this option exclusively means that you can't inadvertently add a system into two different Deployment Groups. It also means you can deploy the agents and configurations from a Deployment Group simply by dropping a system into the correct OU, cutting down on administrative tasks.

Group Conditions showing a Deployment Group populated by Active Directory OU

Geographical delineations

Some people think you should separate Deployment Groups by location. Is this a good idea?

Normally the considerations to do with location revolve around traffic. You don't want Personalization data being copied across the WAN or users connecting to a Management Server on the other side of the world. But these processes are controlled in other ways besides Deployment Groups - Personalization Servers should be assigned via GPO (ideally) or controlled by the sites list, and Management Servers can be load balanced in a number of ways. The only Deployment Group-based consideration that revolves around location is the Failover Servers list, but this would assume all the Deployment Groups are using the same primary. Realistically, geographical delineations should dictate the presence of additional Management Servers and Personalization Servers, rather than Deployment Groups within a Management Server.

Access Credentials

If you need to supply different sets of credentials for different groups of endpoints, then you will need separate Deployment Groups for these. This should really only be used across multiple forests or domains. In most cases, global Client Access Credentials should suffice and there should be no reason to separate machines into Deployment Groups based around this requirement.


Configurations

It's natural to think longest about configurations when you start considering what is required around Deployment Groups. After all, each Deployment Group can only have one configuration assigned (well, one each for Environment Manager, Application Manager and Performance Manager respectively). If your devices or operating systems will need different configurations, then you'll need to divide them into Deployment Groups, right?

However, let's think carefully about EM in particular. One of the biggest selling points of EM is the broad granularity and huge spectrum of configurable Conditions. You can easily put together a single configuration that covers VDI/non-VDI, different operating systems, CPU architectures, SBC/non-SBC - the list goes on and on. From a purely Environment Manager standpoint, you don't necessarily need to separate your devices based around the configurations.


Performance Manager and Application Manager, however, are slightly different beasts, in that they don't have the breadth of Conditions available within them. Performance Manager in particular, if you use it, will at the very least require you to separate the SBC (RDS or XenApp) systems into a specific Deployment Group, as the Performance Manager settings for this type of endpoint will be detrimental to standard laptop or desktop endpoints. Application Manager can be controlled in a fairly granular fashion through the use of Group Rules, so you may be able to use a single configuration across multiple sets of systems - but if anything device- or OS-specific is needed within it, you will have to engage Deployment Groups.

The idea of using a single - monolithic, if you please - configuration across a broad scope of endpoints is to avoid another of the common issues plaguing AppSense. When you have multiple Deployment Groups with different configurations that use some identical settings, when one of these settings is updated in one configuration, it also has to be updated in all of the others. If one of the configurations is missed, straight away you are going to have a problem. Also, the configurations may start to diverge from each other as they are updated individually, causing inconsistency in the application of settings. The layering and merging available in AppSense 8 FR 4 and up can mitigate against some of these issues, but I always feel better using a single Environment Manager configuration (and Application Manager, if possible). Performance Manager is not so much of a problem, given that the settings in PM are generally far less complicated than those in the other two parts of the DesktopNow suite.

Deployment Settings / Functional Environments

Deployment Settings - computer/upload poll periods, and installation schedules - are set on a Deployment Group basis. Therefore, if you have groups of systems that require different deployment settings, you will need to separate them into Deployment Groups.


This leads us on quite nicely to what I term "functional environments". Different functional environments are usually what necessitate different deployment settings. You might have several functional environments - Production, Pre-Production, Test, etc. For instance, in Test, agents and configurations might be deployed immediately, but in Production, they might not be deployed at all and may be done through a tool such as SCCM under strict change control. In my opinion, functional environments are the main use case for Deployment Groups, as they will require different deployment settings and, at various times, different configurations may need to be applied.

One point that it might be useful to make here is that the Test environment probably needs to be as tightly controlled as Production. Why? Because unless Test mirrors the Production environment as closely as possible, it's never going to be an adequate testing area! I generally allow people to apply updated configurations to Test - but as soon as they have verified (or not) that the changes they made indeed work, the Test environment is rolled back to the same configuration as Production. When a change that has been verified in Test is applied to the live Production environment, then - and only then - is the updated configuration also applied to the Test environment.

With this in mind, I generally maintain a "Development" or "Sandbox" functional environment in addition to Test. The Development area can be altered with impunity, and is merely used for experimentation prior to running changes through Test.

Delegation of privilege

Yet another reason why you might choose to separate systems into Deployment Groups is for management and delegation purposes. As we discussed in a previous post, security in AppSense DesktopNow can be set on a server- or object-based model.

If you want certain sets of devices to be managed by certain groups of users but not others, you can set security on the Deployment Groups themselves. This allows users to log in to the Management Console and manage only the devices you have provided them access to.


It's worth mentioning here, however, if different Deployment Groups share a single configuration, then adding users or groups to the Deployment Group security permissions won't allow them to get at the configuration. A configuration is treated as a separate object inside AppSense DesktopNow, so you will need to delegate privilege for the assigned configurations (and agents, if necessary) as well as the Deployment Group itself.

Auditing

The final reason you might find for Deployment Group usage is for auditing. Enterprise auditing settings can be configured on a per-Deployment Group basis, so if you need to configure heavy auditing for one set of systems and none for some others, this would be the way to achieve it.


Auditing settings would probably tie in to the functional environments, in most cases.


An example

Naturally, every environment will be different, but here's a quick example of a Deployment Group structure.

Each Deployment Group is populated from an Active Directory OU.

In the main it is divided into Functional Environments - Dev, Test, Pre-Production and Production. Each functional environment has different Deployment Settings and Enterprise Auditing. Each functional environment also has it's own configuration - but the configurations are all identical apart from those in Dev.

From there it is also divided into three main areas - XenApp, XenDesktop and Windows 7. The reason for this separation is that different Performance Manager configurations will be applied to each type, therefore it has been subdivided by configuration. The Environment Manager and Application Manager configurations are shared.

The Test, Pre-Production and Production configurations for each device type are the same, and are updated together only under change control. Small changes can be made to Test and Pre-Production but these are always rolled back to the current release version afterwards.

Summary

If you put the required amount of thought into your Deployment Group structure, hopefully you should always have a very clean and logical layout in the console. At a lot of places I spend a lot of time clearing up redundant entries and groups from the Management Console, and it's nothing but an embuggerance to have to deal with these problems.

However, do bear in mind that there are no hard-and-fast rules to setting this up - every environment will be different. Your aim, coupled with the guidelines above, should be to make the structure as clean and simple as possible, so that it is easy to administer, adapt and support.

Installing AppSense DesktopNow configurations onto a persistent disk in a Citrix PVS environment

$
0
0
I’ve been doing a bit of work recently around trying to get AppSense configurations installed onto a persistent disk in a Citrix Provisioning Services environment. It actually isn’t as intimidating a prospect as I initially erroneously thought, so we will run through the process briefly in this blog post.

Citrix Provisioning Services is – or was – more or less the standard for streamed disk deployments in XenApp environments. However, there are some schools of opinion that believe once MCS (Machine Creation Services) is able to provision XenApp servers – which may well happen as XenApp and XenDesktop move closer together in the new versions – that PVS may well end up being deprecated somewhat. With this in mind, the work done here may turn out to be slightly redundant – but I am sure a vast quantity of those enterprises currently utilizing PVS will continue to do so for at least the next few years.

The systems I tested this on were VMWare guests running Windows Server 2008 R2 in a Citrix PVS 6.0 environment. The system drive was on the non-persistent C: partition, with the persistent drive sitting on the D: partition. On the D: drive were many of the things you’d normally expect to see on a persistent drive – log files, antivirus, monitoring tools (EdgeSight in this case), the App-V cache, and the pagefile.

Firstly, the reason behind wanting to maintain your configurations on a persistent drive – after all, don’t a lot of places have the configurations set to install automatically, at the very least on startup? This is indeed true – but if you recall my very first post, Computer Startup Actions aren’t processed unless the configuration is already installed on the endpoint when it starts up. This also means that every time you want to update a Computer Startup Action you will need to update the master or “gold” image – a non-trivial operation in most environments and one that requires strict change control. If you can’t use Computer Startup Actions because of this reason, this also means that you can’t apply Computer Group Policy Objects and take advantage of the breadth of Conditions that AppSense Environment Manager ships with natively.

Now, what we really need to know to get this started is where AppSense stores its configurations! Fortunately, this information and a bit more had already been kindly pointed out to me by Matt Murphy, Neil T, and a few other commenters and emailers, which saved me raising a support call :-) On Windows Vista / 2008 / 2008 R2 / Windows 7, the configuration is downloaded to the %systemdrive%\ProgramData\AppSense folder. The configuration is a .aamp, .aemp or .apmp file dependent on the part of the DesktopNow suite that you are using. On systems using XP / 2003, I believe the default location would be %Allusersprofile%\Application Data\AppSense - but I haven't tested this, so if you are doing this on an older platform, you will need to do a bit of research first.

Unfortunately the AppSense software seems to have a nasty tendency to expect this location to be hardcoded. Even if you install the agents onto the persistent drive (in this case D:), the configuration is still expected to be in the %systemdrive%\ProgramData location. Moving the %systemdrive% variable to a persistent drive would completely negate the entire point of using PVS in the first place, so we need to redirect it somehow.

After a bit of research and discussion, it becomes apparent that there is a Registry key sitting at HKLM\Software\Microsoft\Windows NT\CurrentVersion\ProfileList that controls the location of the ProgramData folder. However – it wouldn’t make sense to redirect the entire folder, when all we are trying to deal with is the AppSense configurations. I did initially try to redirect the entire folder using this Registry key and quite spectacularly stopped the App-V client from working (although after some Registry hacking and a re-registration of all the WMI components, it came back to life). There’s also the distinct possibility you may leave your Windows OS unable to be serviced (i.e. patched) by redirecting the entire folder, so just going for the AppSense part is probably the safest option!

What we can do to achieve this, and what I suspect many of you will have already thought of, is the possibility of using something like subst or a symbolic link to achieve this redirection. Indeed, the symbolic link (or junction point, depending on what you want to call it) looks like the most reasonable option.

Symbolic links are created using the mklink command from an elevated command prompt. Don’t forget that the target directory (the one you want to redirect) cannot exist when you run the command. In the experience I had here I find it would probably be best to do this redirection prior to installing AppSense software, as you can be sure the target folder does not exist and there will be no hidden gotchas – however, you may be able to do it post-install with a bit of jiggery-pokery.

First you need to make sure that your PVS system is in Private Mode, as there will be no point redirecting the folder if the change is just going to disappear at next restart!

Ensure that the %systemdrive%\ProgramData\AppSense folder does not exist, and then run the following command

mklink /J c:\ProgramData\AppSense d:\ProgramData\AppSense

(Naturally, substituting the appropriate drive letters for your persistent and non-persistent areas)
You should now see a junction point appear in the folder as below


Which when double-clicked, leads you neatly into the corresponding folder on the persistent drive.

Note– you don’t specifically need to redirect the entire AppSense folder. As only Environment Manager (at present) has Computer Startup Actions, you could get away with simply using a junction point from %systemdrive%\ProgramData\AppSense\Environment Manager. However, for posterity and future-proofing, I opted to do send all of the configurations to the persistent disk – deciding on the way you wish to do it is entirely your own decision.

So the next action would be to install your AppSense agents as normal. Originally I thought you might need to install these to the persistent drive also, but if you are going to be (as you should) putting the agents into the master/gold image, then it doesn’t matter whether they are on the system drive or not.

Next it will be time to run the Imaging and Provisioning Wizard as part of the XenApp Role Manager utility, to ensure that your system is nicely normalized. After you’ve done this and run whatever other pre-sealing tasks you normally conduct, then it is time to shut the system down and put your image back into Standard Mode.

While your system is restarting this would be a good time to fire up Environment Manager and create a configuration with a Computer Startup Action in it. For the purposes of this demonstration we will choose something simple – setting an Environment Variable called TEST.


Now, bring the PVS system back up. If, like most people, your configurations deploy at startup time, as soon as it connects up you will see it obtain the new configuration.

Let’s check for the existence of the TEST environment variable. It doesn’t exist. This is exactly what we expected – the PVS system came up without a configuration, the configuration was assigned, but the Startup Action didn’t run because the Computer Startup trigger had passed before the configuration was assigned.

We’ll take a quick look in the redirected folder which points to our persistent drive, and as you can see below, the configuration is located in the correct folder.


So the next thing to do is restart the system. As it is a PVS system, it should then return to the base image it had before it was sealed.

When it comes up, we again see it pick the assigned configuration up at startup…


…but this time, when we log in, what we see is this time our Computer Startup Action has successfully run, meaning that the configuration we assigned has persisted between restarts! Sweet!


This is great news – we can now utilize the full power of Computer Startup Actions in an environment like PVS without worrying about updating the gold image every time we make a change!


There is one caveat I have found regarding this, however. In some environments configurations are not deployed using the Management Console – they use System Center Configuration Manager or another deployment tool. When the PVS system starts up in this way, the AppSense software queries the MSI database to see what is installed, and then uses this information to report to the Management Console. If you’ve got the Installation Schedule for Configurations set to Disabled, this will mean that the PVS system will report the configuration(s) as Pending Install– even when they are in fact installed, and active to boot. In these situations, this can make your administration and reporting from the Management Console look a little screwy.

But even with this caveat – and those of you who use the Management Center and have the configurations set to install won’t have this problem – this still is a good, reliable way of getting around the issue of using Computer Startup Actions in an environment where the system drive is non-persistent.

Note– this process should work for other technologies similar to Citrix Provisioning Services, it isn’t specifically intended for PVS. Not sure whether MCS will eventually be able to provision XenApp systems as well as XenDesktop, but when or if it does, I hopefully will get around to trying it on there – everything else I will probably leave in the capable hands of the rest of you :-)

One final note– if you’re using PVS, then I’d recommend taking a look at this article regarding normalization, and this article regarding automating the normalization, just in case you hadn’t come across them already.

And now – I fancy a barbecue, seeing as though the British summer has officially arrived, and will henceforth be gone within 48 hours!

AppSense DesktopNow Environment Manager Computer Startup Actions querying Computer Group membership

$
0
0
One of the things that I like to do in my AppSense configurations is use an "Enabler" node at the top of each trigger. For instance, in the Logon trigger, the very first node queries an Active Directory group to see if the user is a member. If they are not a member, then processing is stopped. This is a very efficient way of ensuring that AppSense processing only occurs on the users that you want it to.

However, I also wanted to do the same thing in the Startup trigger, to ensure that only the correct devices process the AppSense configurations. Whilst this may seem a little pointless - after all, devices will only process the configuration if the agents are installed on the endpoint - what I was after was an easy way to "turn off" AppSense execution on the endpoint for troubleshooting purposes, without having to change Deployment Groups and/or remove or reinstall configurations. The best way I figured was to check for Computer Group membership at the start of the Startup trigger, and only process the configuration if the device was not in the "exemption" Active Directory Computer Group.

Unfortunately, I was a bit confused to find that the Computer Group Condition I set up simply didn't seem to work at all.


After a bit of thought an idea occurred to me as to why, perhaps, it wasn't working. When you set up a User Group Condition, you get the "LSA Supported" suffix on the Condition as shown below. This indicates that the security group membership has been "cached" locally, if you like, and there isn't a need for EM to query Active Directory to verify it. I guess it's kind of like using the user's security token - and it naturally saves valuable time.


Now, what I did notice, is that for the Computer Group Condition, there is no "LSA Supported" suffix.


Does this indicate that for a Computer Group query, EM has to contact Active Directory? If that's true, then it would tell us why the query isn't working...because in the Startup trigger, there's a good chance that the network hasn't initialized yet and the AD lookup can't be completed.

One quick call to AppSense support later, and confirmation is provided - a Computer Group Condition has to contact AD to complete successfully. Incidentally, the Site Membership and Computer OU Conditions suffer from exactly the same issue. This is a bit annoying - especially seeing as at every reboot, like a user, the computer will actually pick up and maintain a local security token that contains the details of the AD groups that the machine account is a member of. Apparently in future the functionality to query the computer security token (or similar) will be added to allow Computer Group Conditions to process without contacting a domain controller - but at the moment, we're looking for a workaround.

What utilities are there available that can tell us what groups a computer account is a member of without requiring network connectivity? Offhand, the one that sprung immediately to mind was gpresult. Can we call gpresult from within Environment Manager - preferably from PowerShell - and output the target group?

I must again make apologies for the rudimentary nature of my PowerShell skills - any suggestions for cleanup or optimization are gratefully accepted. But anyway...this is the PowerShell I came up with. Don't forget we are trying to check whether the machine is not a member of the specified Computer Group, so that's why the return code is 1 if the check for the group name succeeds.

# Query computer security token for specific group membership

$result = (GPRESULT /R /SCOPE COMPUTER | Select-String -pattern "App AppSense Device Exemption Group" -list).line

$result1 = $result -replace "        ",""

if($result1 -eq "App AppSense Device Exemption Group")
{
 exit 1
}
else
{
 exit 0
}


We have saved this as a Reusable Condition, so we can call it whenever we want. It appears to need to run as System to work correctly.

Now, there is a small problem with this. Users update their security tokens at logon time when they are authenticated by a DC. Machines update them at boot time, when they establish a connection to the domain controller. But we already know that the Startup trigger is processed before AD connectivity is available. If I was to add a machine to the exemption group in AD, and then restart it, the security token would still be showing the old group memberships. I would have to restart the system twice - once to pick up the new security token, and the second time to actually process it in the Startup trigger. This isn't very workable, so is there any way around this problem?

Well, there is an executable called klist.exe that is available on 2008 R2 and Windows 7 (and up, hopefully) that can actually refresh a system's tokens without rebooting. If you're intending to use earlier Windows server or client versions with this trick, you might need to pay attention to this article - http://sdmsoftware.com/general-stuff/picking-up-computer-group-membership-changes-without-a-reboot/. As we are working on a XenApp 6/Windows 7 platform, we can use this without any jiggery-pokery being required.

The key is to specify the logon ID so that the tokens for the System account are refreshed. We are going to call this as an Execute Action from the Shutdown trigger - so if a computer is added to a new AD Computer Group, when it begins to restart, it will refresh the tokens so that it is already updated by the time the Startup trigger is executed, and there will be no need to have AD connectivity.


The -li 0x3e7 switch specifies the System account. However, I'm wondering if the Run As tab in the Execute Action is set to System, whether this switch may be unnecessary and purge may be the only parameter that is required?

Anyway, once we've added this to the Shutdown trigger - hey presto! I added the computer account to the "exemption" group in AD, rebooted it once - and the AppSense configuration was not processed at all. Success!

There is one caveat to this, though - this isn't going to work on PVS systems. The computer security token will always be identical to the one present when the image was sealed - therefore with PVS (or similar) systems, there won't be any way to update it without contacting Active Directory. Even multiple restarts won't cut it, because it will reset to the master image at each reboot. I suppose you could try and redirect the security token onto a persistent drive - but I'm not going down that route, the possibilities for totally trashing the operating system seem way too likely!

But if you simply need to be able to query Computer Groups in the Startup trigger in a conventional environment (or maybe just on your physical endpoints, rather than SBC or VDI which may be using PVS images), this little trick should certainly allow you to do it.

Update #1 - thinking about it, you probably could do this on a PVS system, but it's an almighty fudge. You would have to set a User | Logon Action to query the Computer Group (using the native Condition, not the PowerShell we used here), and if successful, write some sort of flag file to the persistent disk. But obviously the problem is that if the membership was changed you would have to restart the system and then also get a user to log in, before the change was reflected in your flag file. This is probably hopelessly inefficient for the purpose I had here.

Update #2 - as pointed out by fellow ACA Aaron Parker, this highlights the fact that Environment Manager is, in current guise, primarily a USER environment management tool rather than device management. I totally agree - and whilst I would love to see EM positioned a bit better as a device management tool, because the Conditions give it so much power - right at this moment, there are better ways you can achieve management of your device environment. Hopefully it may change in the future!

Reading AppSense DesktopNow Environment Manager debug logs using the EMDebug LogParser tool

$
0
0
Recently I was in discussions with an AppSense TRM regarding a lot of niggly issues being seen in a particular client environment. One of the issues I had a bit of concern over was the amount of time spent logging and responding to individual support cases for each of these issues. Now I'm not denigrating the quality of support - the AppSense guys have always been helpful and accommodating - just making a point about the amount of time I was spending troubleshooting what, in some cases, turned out to be fairly minor issues. I engaged the TRM to try and find if there was any way I could do a bit of troubleshooting myself based around the AppSense Environment Manager debug logs.

I'm assuming those of you who are familiar with AppSense DesktopNow will have come across a situation where you've needed to turn on debug logging (discussed in this post - which might need a bit of updating, seeing as though it is from quite a while ago). The usual process is to send them off to AppSense support for perusal - but if, like I was, you find yourself trying to quickly troubleshoot a whole load of POC issues, then it might make more sense time-wise to try and interpret some of the logs yourself.

The tool that AppSense have recently released for help with reading debug logs is the EMDebug Log Parser Tool. I'm told there was a predecessor to this tool that was much less intuitive, but it's something I never found the opportunity to use. The EMDebug Log Parser has an associated library file that needs to sit in the path, but it doesn't need any installation besides this - the best way to run it, IMO, is to bung it on a network share and execute it as necessary.

Firstly - this won't work unless your EM environment is at least version 8.1, but the last 8.0 I saw was a good while ago so I'm hoping there isn't too much of that left out in the wild.

Secondly - you clearly will need some EM Debug Logs to work with! The collection of the logs was covered in an earlier post, but there's a nifty little trick the TRM showed me to turn on EM Debug Logging from within persinfo.exe, which seems easier and quicker than the traditional method.

If you've got the latest version of PersInfo running - and if you're troubleshooting an issue, chances are that you might be running it - you simply need to right-click on the icon in the notification area and select the Advanced | EM Logging | Enable option. The interface to enable it is slightly different to that you may be familiar with from the EM Debug Tool (shown below)...


...but it should still be fairly easy to configure. You will be prompted to restart the services afterwards after which the debug should be active. If you're using the latest version of persinfo, you will see a handy notification in the system tray warning you that the debug is now running, and that this may impact system performance.


So now we need to generate some logs by actually logging on to the machine as an AppSense-enabled user. Once we've logged in (and back out, if we're looking to capture information from the logoff process as well as the logon), it makes sense to stop the debugging in the same way that you started it, to make sure we aren't subjecting our system to an unnecessary load. Then we can browse to the folder where we saved our logs and see what has been captured.


The logs are named according for the specific EM area they refer to, the session ID, and the process ID. It should be fairly straightforward to identify the one you will need to pay attention to. In this case, we are going to investigate the EMUser log from Session 5, which we know will show us the logon actions for the session I just initiated. The configuration it was running was extremely simple, verifying a username and then trying to map a drive which didn't actually exist.


Straight away we can see the Log Parser tool gives us a lovely, colour-coded intuitive view of the log file, which is much easier to read than browsing the text file directly (don't believe me? Give it a try) Right at the top we can see the single Condition in our node, a check for the username. Clicking on the event so it is highlighted provides us with some more detail in the bottom panes of the Log Parser window


It's easy enough to see that the check for the user's username has passed successfully, so naturally then the next thing it tries to do is map a drive in the dependent Action. The colour-coding alone tells us that this Action has failed (as we intended it to), but we will have a look at the extra details to see if we can see any clue as to why it failed.


We can clearly see here the error returned of "operation returned because the timeout period expired". So even if it wasn't already obvious, it should now be clear that the Map Drive Action timed out trying to connect to the network path specified - because it didn't actually exist.

After this you will see an event that logs the successful completion of the Node (even though an Action failed, the node still completed). Don't forget that if a Node doesn't complete successfully it should time out according to the default settings.

The last set of log entries refer to processes starting within the user session. These are logged to see if they match a Process Started Action. Obviously there weren't any configured in our simple test configuration, so nothing else is logged subsequent to these.

So now you should be able to save an Environment Manager debug log and quickly peruse it yourself to see if anything is failing for a particular reason.

Another handy part of the EM Log Parser tool is the Timeline view on the View menu. This shows you a breakdown of the actions over a period of time, and should be very handy in identifying Actions that slow down the user's logon.


What you should look for in a good logon is a more-or-less vertical line, as shown above. Significant delays will spread the timeline view out horizontally and hopefully pinpoint any potential bottlenecks in your configuration.

The EM Log Parser tool also comes with a handy Filter function that will be familiar to anyone who has used Process Monitor at all, which is particularly useful in breaking down large and/or complex logs to target the specific area you are interested in. For instance, if I wasn't interested in Process Started Actions, I could quite simply filter them out from the Table view.


Finally, there is also a Personalization view that specifically deals with the Personalization Server aspects of a user session, and that provides information similar to that which can be gleaned from the excellent PersInfo tool.

Well, hopefully this little run-through should allow you to troubleshoot EM Debug Logs yourself to identify simple issues. Please remember, though, that if you're in any doubt about how to resolve or approach an issue highlighted by this you should really contact AppSense support for some help, especially when working on live production environments.

Thanks to Andrew Silver of AppSense for giving me a run-through of this handy tool.

AppSense products now support MSP patch format

$
0
0
Time for some good news that I first heard at the ACA Summit in Daresbury. Yes, AppSense's patches and updates will now be distributed in the MSP file format. This will bring the Management Suite patches firmly into line with the industry standards that are used by the likes of Microsoft, Citrix, etc.

The idea is that you will now simply receive a patch for a hotfix or a feature release, unlike the current process where a full build is released with only the minor version number changing. As well as making the patches much easier to deploy using your tool of choice, this should also allow for a vastly easier rollback procedure, where you can simply uninstall the MSP rather than having to reverse the full upgrade process.

In addition, we should now have a much clearer delineation between fixes and features, rather than the somewhat muddled miasma of version numbers that we have currently. Private hotfixes (patches), and rollups of hotfixes (which will be known by the term Service Pack, a term Microsoft coined but seem to be abandoning) will be distinct from Feature Releases in that the hotfixes and service packs contain bug fixes but the Feature Releases introduce new functionality or behavioural changes.

The Environment Manager Agent will be the first to support patching, closely followed by the Environment Manager Console, Application Manager and the  Management Center, with Performance Manager adding the ability to be patched at a later date. Personalization Server, for complexity reasons, won't be patched via MSP at present time.

So, all of the products that make up the AppSense Management Suite should, going forwards, now explicitly state if they are a Service Pack Release or a Feature Release. The intention is that most bug fixes will be dealt with as Private Hotfixes and Service Packs; Feature Releases will only contain new features, fixes to bugs that cause a change in behaviour and those fixes which cannot be incorporated into a Service Pack due to the technical limitations of MSP files. The version naming will appear as Version x Feature Release x or FRx, rather than x.x and Service Packs will be named Service Pack x or SPx. The actual build numbers will now only appear in the product consoles About box and in Programs and Features.

You can read more about this if you log into MyAppSense and click on the Product Patching link.

AppSense Environment Manager and "layered configurations"

$
0
0
I used to contract at a client where one of the systems support engineers was a tad, shall we say, prone to mistakes. Seeing him digging about in AppSense configurations or App-V sequences used to bring me out in a cold sweat. You couldn't lock him out of the consoles either - he actually needed access to the configurations to update printers and mapped drives, etc., so it was just something we had to put up with.

However, the imminent release of AppSense Environment Manager 8 Feature Release 4 (check out our shiny new terminology!) should bring an end to this with the use of "layered" configurations. You can now "merge" small configurations together into one single unit for deployment to endpoints. So if you had a support team member like the one mentioned above (we'll call him Frank for posterity), he doesn't need to go into the entire configuration to make small cosmetic changes. We could simply give him access to the Printers or Mapped Drives parts of the configuration, let him update those, and then we simply merge his altered configuration into the "master" one.

As well as neutralising some of the threat provided by the Franks of this world, this "layering" of configurations should be ideal for larger organizations where different groups need to administer different parts of the configuration, again without having access to the whole thing. Your application packaging team could manage App-V shortcuts, your SQL team could provide ODBC connections, your security team could handle lockdown of the desktop - you get the idea. The AppSense administrators would only need to merge the various configurations into one and deploy it to the endpoints.

Hopefully this layered solution will come with some detection tools built in, so that you can tell when settings may conflict with or override settings from other layers of the configuration. An RSOP-style tool that tells you what the final settings for a user or group will be would be very useful, and I'm fairly sure that AppSense will have features like this available.

It certainly makes for a very interesting addition to the AppSense Environment Manager product, and I've barely scratched the surface of the possible applications of this feature in this quick article. As soon as I can get my hands on the new software, we will do a walkthrough on how to put together and deploy a layered configuration, and most importantly, how to troubleshoot it.

I'm not entirely sure yet whether the "layering" feature will be extended to Application Manager and Performance Manager, so I will update on that as soon as I know more.

AppSense Environment Manager Feature Release 4 is due for release "imminently", so hopefully this means in the next day or so!

Guidelines for streamlining an AppSense Environment Manager configuration

$
0
0
I see all sorts of Environment Manager configurations at different clients. Some are put together really well - others make basic mistakes that contribute to the configuration being ineffective, slow or bloated. I've already covered the workflow of a good Environment Manager configuration in a previous post. What this article is more concerned with is some general hints and tips on how to use Actions and Conditions, rather than the structure of the configuration itself.

Node groups

Node Groups are possibly the most little-known feature in AppSense Environment Manager (I think, if I remember correctly, that they first appeared in version 8.1). We've already covered the basics of node groups in this previous post, but it is worth mentioning their usage again here. When AppSense was single-threaded in version 7, it was quite easy to prognosticate the execution order, because everything ran more or less in the order they were laid out in the console. Of course, this naturally had a trade-off in a longer processing time. In version 8, the multi-threaded model allowed for faster execution, but setting up dependencies became a little trickier between nodes.

The answer to this trickiness is to use a node group, which means that any Reusable Nodes set up in the node group run before any child nodes can run.

Reusable nodes/conditions

Reusable Nodes (and Reusable Conditions) follow on nice and logically from Node Groups because once you start setting up Node Groups you will need to populate them with Reusable Nodes! Again, we've already done some coverage of Reusable Nodes/Conditions here, so we won't bother to reinvent the wheel too heavily. The beauty of Reusable Nodes/Conditions is that if you have the same Condition, Action or group of Conditions and Actions used multiple times within the same configuration, if you then need to modify that task, you only need to do it in one place to update all the instances of it within the configuration. Reusable Nodes also reduce the amount of data within the configuration which has the added bonus of reducing the memory footprint of the session.

Environment variables

Anyone familiar with any sort of scripting will recognize the value of a variable being set. For instance, if all your users imported some files in from \\SERVER1\Public\SharedStuff\AppSense\SharedFiles\General in twenty different Actions throughout the configuration, why not use an environment variable called %LocalShare% instead of the full path?

Setting environment variables within the root section of the triggers (Startup, Shutdown, Logon or Logoff) rather than in individual sub-nodes is also more logical, because then the variables are available to all of the sub-nodes in the triggers.


Descriptions

Do I have to mention this again? I think it must be a plague particular to IT staff, this problem, because an awful lot of places I go to (and this is not confined by any means to AppSense configurations - Active Directory groups and OUs are equally as bad for it) have no comments in the Description field. Just to reiterate, it is really important just to add a small description - something that will take you no more than ten seconds - to the tasks you create, especially Lockdown items. The amount of time, money and heartache that can be saved by doing this is immense. And while I'm on the subject, would it hurt anyone to put in a proper description when they save a change to the configuration? The amount of descriptions I see for configuration changes that are simply the default of "Other" beggars belief.

Computer Startup Actions

I've also seen quite a lot of people trying to do things such as network file copies in the Computer Startup node. I'm not a big fan of using the Computer Startup trigger - especially in PVS or other non-persistent environments - but if you need or want to do so, if there is anything you need to do that requires network connectivity, then the network may not be initalized when the Computer Startup trigger fires. It may be better to use a Computer Process Started trigger of some type to run the Action when the network is ready.

Active Directory lookups

Something you can usually guarantee will be referenced quite a lot in any AppSense configuration is an Active Directory group lookup. When a user logs on, it doesn't make a lot of sense to send every Active Directory lookup to a domain controller - this will drag out the logon time as well as making it impossible to provide any offline support. To make sure these problems don't occur, make sure that every Active Directory lookup uses the local security token instead - identified by the "LSA Supported" suffix shown next to the relevant Condition.


Stop if fails

The Stop If Fails checkbox (you can see it in the image above) ensures that sub-nodes won't run if a Condition is not met. If you structure your configuration intelligently enough, you can use Stop If Fails to ensure that the configuration runs in the minimum possible amount of time for the majority of your users.

Folder Redirection folder creation

A lot of people have a Folder Action running prior to Folder Redirection to create the redirected folder if it doesn't exist. This isn't necessary - the Folder Redirection Action will create the folder if it doesn't exist.

Group Policy and Registry action groupings

This is something I also try to recommend when dealing with standard Group Policy Objects. From a troubleshooting standpoint, it is always simpler to have a rule of "one Action, one setting". With both Group Policy Actions and Registry Actions you can lump together lots of different settings into one Action. Whilst this may seem desirable to save time, when it comes to diagnosing issues with these Actions, it is much easier for support teams to undo specific settings without impacting others when the settings are divided on a one-to-one basis into individual Actions. Specifically for the Group Policy Actions, there is also a performance impact from putting too many settings into a single Action.

Too many Group Policy settings in a single Action

The bcdedit myth

I've seen this pop up in AppSense configurations at more than a few clients and I am sure it was a rumour spread in various forums across the Internet (it's not specifically an AppSense thing - I've seen it done at a multitude of places). Apparently some people think by disabling Data Execution Prevention there is a performance gain on XenApp platforms. If your configuration contains a bcdedit command designed to disable DEP permanently, I wouldn't bother with it. I've brought this up with various people, amongst them a CTP who verified it with a XenApp product architect, and there is no performance gain to be had from implementing this tweak on a XenApp system.

Executing command scripts

Using the "Do not create window (console-based applications)" option is handy for ensuring that your users aren't disturbed by command prompt windows when Execute Actions run.


Group Policy Actions as a Reusable Node

Any Group Policy Action which contains both User and Computer Configuration settings should not be set as a Reusable Node, as it is impossible to determine which one should be applied.

Scripted Actions

AppSense themselves recommend, for support and troubleshooting purposes, to keep the amount of Custom scripted Actions to a minimum (which is kind of ironic when you see the heavy scripting in some of AppSense's own configurations, but maybe those are special cases). Certainly, if there is another way of doing it natively through the console, it's not a good idea to script it. I once saw a Custom Action that called a VBScript to launch Internet Explorer - why that couldn't have been done through a standard Execute Action, I may never know.

Computer Group Conditions

If you need to use Computer Group Conditions, be aware that these can't be used on offline devices. If you do need to do this on offline devices, use the Computer Group Condition to set an environment variable to achieve it.

Printer mappings

Be careful if you are using the "Unmap at logoff" feature with AppSense-delivered printer mappings. If a configuration is deployed mid-session, the user's printers will be unmapped if this option is selected. Another option (although a little convoluted) would be to create explicit printer unmap actions in the Logoff trigger if this issue became badly apparent in your environment.

AppSense are working on fixing the "mid-session deployment" issues - I believe there is a fix for one of them in EM8 FR4 SP1 already, so this point may become redundant eventually.

Active Directory Group Condition in Query mode

Imagine you have a node full of ten or twenty Actions that all have a different AD group lookup associated with them. How could you prevent a user that isn't in any of these groups from running through all ten or twenty of the lookups?

Well, if the AD groups being looked up all had a common link - maybe, just for an example, they all begin with ENG - then you could use an Active Directory Group Condition Query to filter off users that don't match the common part, saving users who don't match the initial query the time of ten or twenty AD group lookups. You implement this with the normal Condition | User | User Group, but change the Condition to Query as below


Summary

So, I think that just about covers all the tips that I can think of offhand with regard to streamlining your Environment Manager configuration. But let's be clear, there's really no substitute for good planning, testing and verifying. You should always be looking to try and make your Environment Manager configuration more effective, because it controls some of the primary areas - such as logon and application launch time - that your end-users will use to gauge the performance of their systems.

Thanks to Richard Thompson for introducing me to more than a few of the performance tweaks I've covered here.

AppSense DesktopNow Environment Manager and Offline Files

$
0
0
I've been quite busy working lately and must apologize about not blogging much. However, I have been through a lot of learning curves recently and over the next couple of weeks I'd like to share a few of my lessons with you all. The major thing I ran into recently was that nemesis of mine, Windows Offline Files. Now I normally advocate using something like AppSense DataNow, Citrix ShareFile or even SkyDrive Pro to address the issues around synchronizing files from local storage to on-premise, but in this case the laptop deployment was already underway and Offline Files was earmarked as the technology to use in this particular environment. However, there are some contingencies about getting Environment Manager and Offline Files to work together that you may need to be aware of.

Let's just be clear here though - this isn't intended to be a definitive guide to getting AppSense Environment Manager delivering Offline Files, just a run-through of some of the issues I've had and discoveries I've made whilst struggling towards getting a working solution together :-)

Why Offline Files?

Why indeed? I've already mentioned above that there are a number of (in my opinion) much more robust alternatives that can operate in a vastly more reliable way and provide fluid synchronization of follow-me data between on-premise storage and local caches. There are way too many to mention in this space, and comparing them is quite out of scope for the purpose of this article, but just off the top of my head there are the likes of DropBox, AppSense DataNow, Citrix ShareFile, Microsoft SkyDrivePro and many others. Some can also (like AppSense DataNow) aggregate files from multiple providers and present them to the user in a way that can provide separation of corporate and personal data, a very important requirement in a lot of regulatory legislation. If anyone has done a "smackdown" comparison of the various enterprise data-synchronization products out there, I'd be very interested in reading it and providing a link to it from this article. Aaron Parker provided a good article on using AppSense's own product DataNow to address the follow-me data issue - http://stealthpuppy.com/replacing-redirected-folders-and-offline-files-with-appsense-datanow/

However - as you can imagine, most of these third-party solutions have a price tag attached that makes the AD-bundled Microsoft offering, Offline Files, much more palatable to a lot of companies out there. (Citrix customers with Enterprise or Platinum licensing can also take advantage of ShareFile at no extra cost, although I'm not clear on the storage model provided) This cost factor is a common element in many companies with Microsoft products and means that for most of us out there, we will encounter Offline Files being used on mobile computing devices sooner or later - if you haven't already done so.

Offline Files and Folder Redirection

Offline Files is designed to work very closely with Microsoft's own GPO implementation of Folder Redirection. When a folder is redirected through the Microsoft Group Policy engine in User Configuration | Policies | Windows Settings | Folder Redirection, the redirected folder is automatically made available offline, if Offline Files is enabled on the device. The folders will then sync in the background, or the synchronization can be triggered manually using the Sync Center area of Control Panel.

The main problem with Offline Files is that the way it works is poorly documented, and even when talking to Microsoft or ex-Microsoft staff, you will rarely encounter a consistent answer around the actual under-the-hood workings of Offline Files.

Rather than spend a lot of time discussing the ins and outs of Offline Files themselves, I will point you in the direction of a really good write-up done by Helge Klein on his blog at http://helgeklein.com/blog/2012/04/windows-7-offline-files-survival-guide/. One of the things in this excellent article I will draw your attention to, however, is that when configuring Offline Files GPOs, most of the Group Policy Objects apply to the older (XP/2003) versions of Offline Files rather than the Windows 7/2008 R2 versions. Of the total policy objects, only 10 of 28 Computer objects and 2 of 15 User objects are actually applicable to Windows 7 or Server 2008 R2.

Another point worth making is the difference between WinXP and Win7 when resetting the Offline Files database (and believe me, you will have to do this at some point). The Registry value to reset this in WinXP was

HKLM\Software\Microsoft\Windows\CurrentVersion\NetCache\FormatDatabase (DWORD 1)

but in Win7, you will need to use

HKLM\System\CurrentControlSet\Services\CSC\Parameters\FormatDatabase (DWORD 1)

An easy way to tell if the reset was successful is to see if this value still exists after a restart. If it doesn't, the reset was successful.

Another thing maybe worth mentioning that isn't covered in Helge's article (at least I didn't notice it, I apologize unreservedly if it is!) is the permissions required for Offline Files to work, which are detailed in this article.

Folder Redirection in AppSense Environment Manager and Offline Availability options

AppSense Environment Manager's own Folder Redirection Actions are slightly more granular than the Group Policy Objects in that Redirected Folders are not automatically available offline. Environment Manager has a check box available in the Folder Redirection Action, allowing you to determine whether the folder should be marked as available offline or not.

AppSense EM Folder Redirection Action with the "offline" flag set

Now if you add the "offline" check box after you have already configured and used the Folder Redirection Action, and you are using local or roaming profiles, you may run into a documented issue. It is covered in https://www.myappsense.com/Knowledgebase/TN-150950.aspx. Basically, if the redirected folder already exists in the Registry, even though the flag has been changed to mark it offline, EM will simply bypass the Action, resulting in no offline flag being set. You can identify this issue in an EMDebug log by looking for a line something like this

L3 T4520 3118381 [CEMFolderRedirectionAction::RedirectFolder] Current and new destinations are the same, nothing to do!!!


The simple way to work around this issue is to set a Registry Action to delete the Folder Redirection key from the Registry before you apply the Folder Redirection Action. For instance, if you encountered this problem with the redirection of Desktop, you'd use a pair of Actions like this


Nesting a Folder Redirection Action under a Registry Delete Action

If the Folder Redirection is successful, and the offline flag is set correctly, you should see a line something like this in your EMDebug logs

Line 19878: L3  T5892 1070993 [CEMFolderRedirectionAction::Vista_RedirectKnownFolder] ENTER, strFolder='F:\Desktop', Flags=128


The Flags=128 entry indicates that the folder has been marked as available offline.

If you're lucky, you may be able to get the Offline availability to work out of the box when done with Environment Manager Folder Redirection. However, in an environment where the base operating system and the Active Directory backbone isn't particularly tidy, you may encounter some issues, and this is where it will start to get a bit more challenging.

Problems with application of Offline Files via Environment Manager

So unfortunately, as we just alluded to, you may well find that there are occasional issues that can pop up around the usage of Environment Manager to mark folders as available offline.

I find it is usually best to either use Group Policy to manage this in its entirety or leverage Environment Manager to do it - but if you start to combine the two, you may encounter even more inconsistencies and errors. The problem around this is Environment Manager can redirect a lot more folders than Group Policy can - think Cookies, Quick Launch, History, etc. - so those who have already used Group Policy may find that they wish to change to Environment Manager to achieve this. However, some Group Policy Objects have a tendency to "tattoo" themselves to the Registry, so if you are changing from using Group Policy to EM to set your offline folders, you may need to explicitly remove some of the GPO-based Offline Files settings before switching over. You can do this by either setting the GPOs to Disabled or by using Environment Manager to delete the actual Registry keys. This document provides a good reference on which GPO settings map to which Registry keys, should you need to do this.

Some of the configured GPOs that can possibly interfere with offline availability in EM are shown below (there may well be more, these are just the ones I discovered)

Computer Configuration | Administrative Templates | Network | Offline Files | Specify administratively assigned Offline Files

User Configuration | Administrative Templates | Network | Offline Files | Specify administratively assigned Offline Files

Computer Configuration | Administrative Templates | Network | Offline Files | Files not cached (I know this apparently applies to Windows XP/2003 only, but I have actually seen this setting, when configured erroneously, stop Offline Files from working on Windows 7, so it just goes to prove how poorly-documented the Offline Files topic really is)

Computer Configuration | Administrative Templates | Network | Offline Files | Turn on economical application of administratively assigned Offline Files

Computer Configuration | Administrative Templates | Network | Offline Files | At logoff, delete local copy of user's offline files (again, allegedly Windows XP/2003 only, but the same applies)

If you're intending to set the GPOs through Environment Manager to control Offline Files, you may want to think about this problem (that exists at time of writing) if you are thinking of using the "Administratively assigned offline files" setting in EM. If you configure this GPO in EM and set it to a network path (you'd be insane if you didn't enter any data in it, to be fair), you will see this error appear...


...and the policy setting will not be saved.

This has been reported to AppSense and listed as a bug, but at current time of writing it is still an issue, so if you're needing to set that particular GPO through EM, you may have to use a Registry Action to set the relevant keys and values instead, at least until it is fixed.

Excluding files from the cache in Windows 7/2008 R2

Another bridge that I had to cross to get Offline Files working correctly through Environment Manager was this one. Obviously you don't want all file types to be cached - think database components and the like - but as seems to be par for the course in Offline Files, discovering what I needed to configure to make this work was much harder than it needed to be. This does start to become a bit of a recurring theme, sadly!

Now, on Windows 7/Server 2008 R2 there is a new Computer GPO that deals with offline file type exclusions, called Exclude Files From Being Cached (see this article for some details around this). In practice, this seems well and good. However, it now starts to get murky. Firstly, this setting doesn't appear to be referenced in the MS Group Policy Settings document I linked to earlier. Also, according to the documentation for the previous setting used on earlier versions, if the policy is Disabled or Not Configured, the system then uses a default list of file extensions. This appears to be the cause of another issue I came across - when users were saving files to a redirected desktop, temporary files - such as those used by Word - appeared to be excluded from the offline cache, and users were receiving a "network or file permission error" when trying to save changes.

After some trial and error, I configured a Registry setting through EM to set the policy Registry values at HKLM\Software\Policies\Microsoft\Windows\NetCache and HKLM\Software\Wow6432Node\Policies\Microsoft\Windows\NetCache to overwrite this policy setting with a "fake" file extension, the intention being to override the defaults, in case they were still in use.


Synchronization

The next problem we hit was initial synchronization. Offline Files is supposed to synchronize when you first logon in the background at some unspecified point, if offline folders are available, but like everything else (this mantra is getting a little old now) finding out how it's exactly supposed to work - and whether it does actually work - is a little difficult.

In the end, we got a bit tired of synchronization randomness and oddities and decided to see if there was a way we could trigger it ourselves. Obviously we only wanted it to run if the user was on a laptop endpoint and connected to the corporate network, so the first thing we configured were a couple of Conditions to check for this particular state of affairs - starting with a bit of PS in a Custom Condition to check for corporate LAN connectivity (obviously changing the domain as required)

$result
= $false;
# Use the NLA COM object to check if any of the connected networks are "domain.com"
[Activator]
::CreateInstance([Type]::GetTypeFromCLSID('DCB00C01-570F-4A9B-8D69-199FDBA5723B')).GetNetworks(1) | %{ if($_.GetName() -eq "domain.com") {$result = $true} };
if
($result)
{
exit 0
}
else

{
exit 1
}


And then a simple check for a laptop, which we have covered in previous posts, to be nested inside the LAN connectivity Condition, which leaves us with these two nested Conditions


Once these two Conditions are satisfied, what we need to do is find a way of triggering an automatic synchronization (we're going to do this in the Logon trigger, but you can change that if required for your specific needs). Surely someone must have done this before?

Thankfully, the answer is yes - there's a nice bit of VB available for download in this Technet article. It requires parameters to be passed to it - which is something you can't do with a Custom Action in EM (feature request!) - so we will need to configure it as an Execute Action instead. I've saved the original script into my netlogon share, so obviously you will also need to store this somewhere you can easily call it from. As it's only running when connected to the corporate network, the netlogon share is a fairly sensible place to call it from, ensuring that it can't run accidentally when not online.


Dependent on how much you're concerned about multiple laptop users launching a synchronization at logon, you could maybe set a flag in the Registry once it has completed to ensure it doesn't execute again.

Resolving sync conflicts

Another problem we encountered was the automatic resolution of synchronization conflicts. End-users don't want to be bothered by technical conundrums like deciding which version to save - most of them would just rather it is done automatically. If you're just synchronizing home drive data, then you can easily get around this using this article from Aaron Parker. If you're synchronizing departmental drives, though, you might want to take a bit more care and thought over it.

We used an EM Computer Startup Action to set this - dependent on your architectural policy or preferences, you could set this in a number of ways. Obviously you will need to decide on the value you want to use for handling the conflicts!


Summary

If there's any chance you can stretch to it, and your requirements allow it, I'd recommend using a third-party tool to do this rather than using Offline Files itself. This is totally based on my own difficult experiences, though, and I am more than willing to admit that most of the issues I've faced have been caused by the untidy infrastructure that I was trying to implement Offline Files into. However, I am willing to bet that a third-party tool would have installed without issue onto even badly-maintained infrastructure, so I am going to stand by my stance that I'd rather use another option than Offline Files, if I had one.

If you do have to use Offline Files - and I can say now that I know plenty of people who have no major issues with them, especially after the improvements in Windows 7/2008 R2 - then it pays to tidy up the underlying AD infrastructure first, ensuring that old GPOs are not only unlinked, but the settings are removed. Sadly in a lot of environments this isn't an option however, especially where support teams are compartmentalized and change control is rigorous.

When choosing between the native GPO method and the AppSense EM method, ensure that you make a decision and stick to it. Mixing and matching will only cause more problems, especially with all the different features EM brings.

And finally - expect to have a lot of fun trying to find information about Offline Files and how it works. I wholeheartedly agree with Helge Klein's comment on his article about Offline Files - that "from my experience there is nobody, even at Microsoft, who fully understands Offline Files". I have to concede that it seems like this is absolutely true - and it doesn't seem to have gotten any better in Windows 8/Server 2012.

Configuring Citrix NetScalers for load balancing and HA on AppSense Management/Personalization Servers - RELOADED

$
0
0
It was a very long time ago when I rehashed an article on the actual configuration of NetScalers for use with AppSense servers, but having done this myself recently, it is clear to me that some updating is required, as there's a lot more to it than simply configuring the NetScaler correctly! So as happens with some articles from time to time, let's tidy it up and add in all of the extra details we've discovered.

It's worth noting at first that your NetScaler (or other device, F5 also springs to mind as a popular choice) doesn't specifically need to be configured for load balancing - they can also simply be configured for HA and failover.

NetScaler configuration

First you will need to configure the NetScaler device itself (whether this is a hardware appliance or the NetScaler VPX, the steps should be the same).

Virtual server (vserver). A vserver is an entity that is represented using an IP address, a port, and protocol. The VIP is the vserver IP address. This is what your agents will connect to and is usually attached to an FQDN in DNS. The client sends connection requests to this IP address. The vserver represents a collection of AppSense Management Servers.

Service. The service is a group of AppSense Management Servers represented using IP addresses, a port, and protocol. The services are bound to the vservers.

Server Object. A server object is an individual AppSense Management Server.

Monitor. A monitor is an entity that tracks the health of the services. The system periodically probes the servers using the monitor bound to each service. If a server does not respond within a configured response timeout, and the configured number of probes fail, the service is marked down. The system then performs load balancing among the remaining services.

Persistence. You can specify persistence for a group of vservers, this will ensure that a client is always directed to the same AppSense Management Server. When the configured time for persistence elapses, any vserver in the group is selected for the incoming client requests.

To configure Load Balancing of AppSense Management Servers, you must first create the servers and services. Then, you must create vservers and bind the services to the vservers.

To configure a Citrix NetScaler to load balance multiple AppSense Management Center servers you must follow the steps below (replace the IP addresses with ones appropriate to your organization):

1. Create a monitor
    add lb mon monitor-ams-1 HTTP
 
2. Create servers
    add server AMS-1 10.20.30.11
    add server AMS-2 10.20.30.12
 
3. Create services
    add service Service-AMS-HTTP-1 AMS-1 HTTP 80
    add service Service-AMS-HTTP-2 AMS-2 HTTP 80
 
4. Bind the monitor to the services
    bind mon monitor-ams-1 Service-AMS-HTTP-1
    bind mon monitor-ams-1 Service-AMS-HTTP-2
 
5. Create virtual server
    add lb vserver Vserver-AMS HTTP 10.20.30.10 80
 
6. Bind the services to the virtual server
    bind lb vserver Vserver-AMS Service-AMS-HTTP-1
    bind lb vserver Vserver-AMS Service-AMS-HTTP-2
 
7. Select persistency for the virtual server
    set lb vserver Vserver-AMS -persistenceType COOKIEINSERT

DNS Configuration

You will need to ensure that the appropriate URLs are set up in DNS to point to the NetScaler VIPs, as in the example below

AppSensePersonalizationServer.jrr.test.local 10.100.10.1
AppSenseManagementServer.jrr.test.local 10.100.10.2


Service Account Configuration

Best practice dictates that we should have an AppSense Load Balancing service account as well as a CCA account, a Configuration account and a base Service account.

The AppSense Load Balancing account will need to be trusted for delegation to any service, but first you will need to set a Service Principal Name (SPN). You can do this with the following command from an elevated command prompt (obviously changing your account names and web addresses as necessary)

setspn -s http/AppSenseManagementServer.jrr.test.local JRR\-service-appsenselb

which should show an output something like this


Now, if you look in the Attribute Editor tab (assuming your AD is at the required functional level to have this feature, otherwise you may need to fire up adsiedit.msc) you should see the SPN set


and once you have set the SPN, you can now access the Delegation tab for the user account, and you can trust it for delegation to any service as below


Management Server/Personalization Server Configuration

To configure the Management Server or Personalization Server itself for NetScaler integration, check the following option:-

(Note - there are some slight differences between the Management Server and Personalization Server, notably the names of the application pools. For the purposes of this document, I've assumed that the system is a dual Management Server/Personalization Server. If you have the roles separated, you will need to repeat the steps on each but bear in mind that some may be slightly different dependent on the role)

Check that the service account that will run your Management/Personalization Server application pools is a member of the following groups locally on the Management/Personalization Server(s)

Administrators
IIS_IUSRS (Server 2008+)
IIS_WPG (Server 2003)

Register the application pool service account credentials with ASP.NET using aspnet_regiis by running the following commands (assuming 4.0.30319 is the latest installed .NET version)

c:\windows\Microsoft.NET\Framework\v4.0.30319\aspnet_regiis.exe -pa AppSenseMasterKey domain\username

c:\windows\Microsoft.NET\Framework64\v4.0.30319\aspnet_regiis.exe -pa AppSenseMasterKey domain\username


which should provide output something like this


Check that the application pools are set to use the correct service account by running IIS Management | ServerName | Application Pools

Right-click on all of the required application pools (DeploymentPool, DownloadsPool, ManagementServerPool, PersonalizationServerPool, EMBrowserInterfaceTool (if installed), EMBrowserServicePool (if installed) and choose Advanced Settings


Find the Identity tab under Process Model


Click on the Browse button, and switch the options to Custom Account, before clicking the Set button and filling in the required account details for your chosen service account


Repeat this for all of the Deployment Pools required.

Open the Management Server/Personalization Server/EMBrowserInterface website(s) (as required) in IIS Management and double-click on Configuration Editor under Management


Under the Section drop-down box, select System.webServer | Security | Authentication | windowsAuthentication


Change the useAppPoolCredentials setting to True


Click Apply in the top right of the IIS Management window to save the changes made. Repeat this for each website that will be accessed through the NetScaler.

Occasionally you may need to go a step further with this bit and manually edit the web.config files in

    C:\program files\appsense\environment manager\personalization server\web.config

        C:\program files\appsense\management center\server\Web Site\web.config

Within each file locate the security section:


Add the following Registry keys, modified as appropriate for your environment, where

server1.jrr.test.local = name of primary server (Management or Personalization, or dual-role)
10.100.1.11 = IP address of primary server
server2.jrr.test.local = name of secondary server (Management or Personalization, or dual-role)
10.100.1.12 = IP address of secondary server
virtual.jrr.test.local = load balancer name
10.100.1.10 = IP address of load balancer

Add a REG_MULTI_SZ value called BackConnectionHostNames to HKLM\System\CurrentControlSet\Control\LSA\MSV1_0 with the following values on your primary server


Add the same value to the same key on your secondary server with the following values


It is about now you should recycle all the IIS services using iisreset - however I find it is usually better, if possible, to do a full restart of all the Management/Personalization Servers at this point.

And finally, on the Management Server side (if separate), run this command

sc sdset "AppSense Deployment Service" D:(A;;LCLO;;;<SID>)(A;;CCLCSWRPWPDTLOCRRC;;;SY)(A;;CCDCLCSWRPWPDTLOCRSDRCWDWO;;;BA)(A;;CCLCSWLOCRRC;;;IU)(A;;CCLCSWLOCRRC;;;SU)S:(AU;FA;CCDCLCSWRPWPDTLOCRSDRCWDWO;;;WD)

where <SID> is the SID of your required service account

Verification

You should be able to verify your Management Server is working OK through the NetScaler by browsing to the following web address

http://AppSenseManagementServer.jrr.test.local/managementserver/deployment/manifest.aspx

which should show you a screen like this


the equivalent test address for Personalization Server is normally

http://AppSensePersonalizationServer.jrr.test.local/PersonalizationServer/status.aspx

which would show you a screen like this


Of course, the real test is to open the Management Server Console or the AppSense Environment Manager Console and try and connect to the Management Server or Personalization Server using the NetScaler DNS address for the relevant service and see if it works OK.


If you can connect to the NetScaler DNS address and the required consoles all work OK - congratulations, you should have correctly set up your NetScaler to work with AppSense!

If you're still having issues at this point, sometimes it can help to run the AppSense Management Server Configuration Tool or the equivalent tool for Personalization Server and/or the EM Browser Interface - these tools can fix things that may have gone wrong during the process, such as incorrect IIS permissions or the like.

Also, don't forget you may need to add the sites to Local Intranet in Internet Explorer settings to get the status pages to avoid the logon prompt.


Obviously, from here it might pay to do some further testing, such as shutting down various servers and services and running load tests, in order to ensure that the load balancing and failover is working precisely as you require. Hopefully, though, this set of points should allow you to get it up and running with significantly less pain than normal!

Credits

I put this post together because I had to do a bit of Google-searching and document reference to get my NetScaler implementation working and thought I'd pull a guide together from that experience...however one of the documents that I actually asked if I could use a screenshot from (and was given permission) turned out to actually be a bit of a cut and paste job from a document written by Richard Thompson of AppSense, rather embarrassingly, especially when Richard occasionally takes the time to read this blog :-0

Actually Richard wrote a very good article on the subject which is available on the Best Practice Library on MyAppSense.com, which to be fair, if I'd known about at the time, I probably wouldn't have bothered writing this post.

Anyway, this guide was cobbled together from the aforementioned Best Practice document by Richard (available here), an existing AppSense TechNote dealing with the NetScaler config part (which I did credit in my original piece on NetScalers but then totally forgot to replicate in this newer version), some tips from Mark Schill's article on the same subject, and lastly some help from the AppSense support guys who pointed out details such as the IE security zones.

Hope that keeps things right.

Use of AppSense DesktopNow with Citrix User Profile Management

$
0
0
I'm sure that title has you wondering...why on earth would you use AppSense DesktopNow alongside Citrix User Profile Management (UPM, from hereon in)? Surely these two products are competitors, rather than in any way complimentary?

UPM and AppSense DesktopNow together?

Well, contrary to what you may believe or be led to believe, they can sit nicely together and get along. :-) Let's not forget that AppSense is used in a lot of different organizations with wide-ranging sets of enterprise software and user requirements. But one fairly common factor is the presence of Citrix platforms....and if you have the right level of licensing (Enterprise or Platinum, last time I checked), you will get UPM thrown in at no extra cost.

The Citrix Profile Management on a per-edition basis

But if you've already purchased DesktopNow as well as Citrix XenApp or XenDesktop, why would you use UPM instead of the Personalization Server aspect of Environment Manager?

There are a few answers to this. One of the more common ones is that for all its power, Personalization Server isn't always a good fit for every organization. It relies on SQL Server to function. It also involves a lot of extra complexity and invested time to get it up and running properly - and if you misconfigure it, trimming the data down can be a gargantuan task in itself. If you want full redundancy, there may be a significant infrastructure investment required if you don't have it already available. While I'm a big fan of Personalization Server, I can readily concede that these considerations often make a difference to whether an enterprise chooses to deploy it or not.

UPM, on the other hand, is quite ridiculously easy to set up, and because it runs through the Group Policy engine, you should already have a fully-redundant infrastructure to support it (assuming your Active Directory is set up correctly). UPM runs as a service on your Windows machines, the settings of which are then controlled by a Group Policy Object. Even though you purchase UPM as part of Citrix XenApp or XenDesktop, there isn't any need to run it specifically on XenApp or XenDesktop systems - it will quite happily work on RDS and indeed any other Windows platform. I'm not sure how that ties in with Citrix's licensing model, however, so I'd be interested to hear whether there is any official line on that - but suffice to say there is no actual technical barrier to installing it on non-Xen systems.

As it's a standard installer, you can use SCCM, AD, a script, or your deployment mechanism of choice to distribute UPM to your endpoints. From then you simply need to configure it using the ADM file supplied with the setup files - there's an ADMX file available as well, since the advent of version 5.0, if that's the format you prefer. You can even import these files quite happily into Environment Manager, allowing you to take advantage of AppSense's awesome library of Conditions for deploying UPM settings. This combination of AppSense power and UPM simplicity allows you to extend the capabilities of the base UPM product, which is good news all round.

Using AppSense EM to deploy UPM settings based around several Conditions

Normally people redirect the actual UPM profile data into a subfolder of the user's home drive (assuming the home drive is networked). I usually go for %HOMEDRIVE%\Citrix\UPM - this is configured using the "Path to user store" policy.

Policy setting that defines the path to where the profile data is stored

Folder Redirection

Now, if you're intending to use UPM to manage your user data, then Folder Redirection will become intimately familiar to you. The key to keeping your UPM profile data as lean and mean as possible is to redirect as much as you can.

An aggressive Folder Redirection strategy - necessary with UPM

Now I know putting %AppData% in there is opening a huge can of worms, and the likes of Aaron Parker, Helge Klein and Shawn Bass are always very keen to debate heavily the issues around redirection of %AppData%. I've run through this in the next section, as it is best kept separate.

Folder Exclusions

Once you've set up the Folder Redirection, you need to configure the UPM policies so that the Redirected folders are excluded from being saved into your UPM profile. Specifying the name of a folder like "Desktop" in here will do it relevant to the user profile - i.e. that will exclude %userprofile%\Desktop

NOTE - I've also included a default set of folders here that come from Dan Allen's superb article on setting up UPM. You should definitely reference this if you are going to be using UPM and DesktopNow side by side - there are also two more parts to the article that deal with setting up your file services correctly.

Exclusion list that includes all of the Redirected folders
Folder Inclusions

Any application that writes to folders outside of the expected locations will need to be added in as Inclusions rather than Exclusions. As Dan's article also points out, two possible areas a lot of people may come across are PKI certificates and Microsoft Office toolbars. The links are in his article dealing with these, but they're also included below


Redirection of AppData?

This is a heated subject - a lot of people believe that redirection of AppData can cause poor performance of applications, usually based around network IO. On the flip side, some people believe that it isn't so much of an issue, mainly because in modern deployments, particularly SBC and VDI, most of the "local" storage is effectively network-based anyway. I'm definitely not weighing in to this argument - you can read plenty about the subject on the Internet - but I will make a few points that you may want to take in.

If you want to do this *perfectly*, you should exclude the entire AppData folder and not redirect it, in my opinion...then do detailed application analysis and find out exactly what you need to synchronize, before adding these folders into the Folder Synchronization on an individual basis. In this way, you're only saving exactly what each application needs to function. Of course, the problem with this is that there's a lot of time and testing involved in getting it up and running, and usually one of the drivers for using UPM is that it is simple and quick to deploy. So if you did it this way, you'd probably be defeating one of the objects of the exercise anyway...but if you can, this would definitely be the best way to do it, IMHO.

If you do redirect AppData, I would definitely recommend redirecting AppData to a different area than you redirect My Documents, Desktop, Pictures, etc. to. If you do this, you will keep any application activity separate from user file-related activity.

On a similar line, try not to redirect all AppData to the same file server or NAS area. Spreading the load across distributed servers, whether using DFS or another mechanism, will also help mitigate against any possible issues.

Really the only way to be sure is to ensure that you've architected your file services correctly, and that you test all of your applications thoroughly, before deciding whether AppData redirection is going to be right for your environment.


Cookie handling

One of the best things I like about UPM is the cookie handling. It's actually really clever how it is done, and this is one thing that I don't believe AppSense EM can handle natively. Basically the UPM process leaves cookie handling late enough in the logon process so that the index.dat file is released, which allows you to get rid of stale cookies (reducing profile bloat) and removing the chance of losing cookie information because the index.dat gets out of sync with the cookies themselves. Nifty!

You configure this by using the "Process internet cookies at logoff" part of the UPM policy object


and also by configuring a "Folder mirroring" action in the UPM policy object. You could do this with native EM Actions, but I'd leave it in the UPM object for posterity


This handling of cookies is a feature that I haven't noticed in any other UEM products - if there's a way anyone knows of to do it in EM natively, I'd definitely be very interested in hearing about it!

Base profile

UPM also allows you to specify a template profile for new users logging on to the system, which functions in a slightly similar way to a mandatory profile. The beauty of this option is it can be excluded from local Administrators by configuring the Process Local Administrators option along with the Path To User Store option, and just apply the base profile to new users. This gives it an advantage over deploying mandatory profiles via standard GPO - as the GPO is a Computer setting, it also applies to local Administrators and can be quite annoying.

Summary

There aren't a huge amount of features that UPM and Environment Manager clash over - as long as you are talking about the Policy features of EM, rather than the Personalization aspect. Inclusions of files and folders or Registry keys in UPM probably comes quite close to AppSense's Registry Hiving and File/Folder Actions, but aside from that there's not much that they you'll have to make a decision about where to configure things.

When I've done UPM-EM deployments I always try to keep the Folder Redirection and the actual deployment of the UPM settings in the EM console itself - that makes it feel more like they're part of the same solution rather than two different solutions stuck together.

If the UPM side is configured correctly you can definitely have very quick logons and small profile sizes, and if you then leverage the multi-threaded, multi-triggered model of AppSense EM to deploy your policy settings you can certainly make sure that the session is always as streamlined as possible.

I thought I'd put this quick post together because there is a perception that AppSense is complicated, bloated and requires a significant infrastructure investment to get it working correctly - and also that you have to use Personalization Server, which then necessitates a dependence on SQL Server. These things simply aren't true - you can quite easily combine DesktopNow with technologies like UPM to produce a simpler, leaner implementation in which the two products are quite complimentary to each other. Hopefully this quick skim over UPM should allow you to see that there are other hybrid options available to people looking to deploy user virtualization technologies.

Performing background gathering of PersInfo logs from AppSense Personalization Server

$
0
0
A few weeks ago (or maybe more), I was having some discussions with Richard Thompson around the fact that I'd covered a subject on my blog that he had already done lots of documentation on. I did mention at this time that I would instead concentrate on my document regarding PersInfo, one of the most useful tools available for the AppSense administrators out there. Unfortunately, he promptly sent me a link to a post he'd already done on PersInfo - a good read and covering most of the stuff I'd intended to! So instead of discussing the ins and outs of the tool like Richard already has done (it was also covered by Mark Schill), I will concentrate more on how you can use PersInfo to silently gather logs on Personalization activity to help you address issues a user may report.

If you're familiar with it or you've read either Richard or Mark's articles, you will know how much value PersInfo can bring. Being able to view the realtime activity of Personalization Server is invaluable when you are having problems. You can download PersInfo from the AppSense Exchange and it really should ship as a standard part of the software, in my opinion, or at the very least as part of the Environment Manager Tools. It is, unfortunately, unsupported by AppSense, but whenever it has thrown an error I wasn't familiar with it always turns out to be a mistake on my part. For instance, if the .Net Framework isn't installed it won't run, and if your license has expired, you may get an error saying "User Virtualization Agent is not installed". Apart from these sorts of things, it seems to run without any issues.


PersInfo doing its stuff
Having said that, the first thing you will notice about PersInfo is that it is intrusive (and it's meant to be, obviously). Normally you would run this when testing or when you know there is a problem, and the constant pop-ups allow you to see exactly what is going on. But recently, I ran into a case where users were having Personalization issues, but because of time-zone differences, I wasn't able to troubleshoot it in realtime. So I was left with a requirement to gather PersInfo logs in the background without popping up the activity balloons, so that the user wasn't disturbed by the application.

Naturally, if you dig through the PersInfo context menu settings, you will see that there are various configurable settings you can change

The PersInfo preferences menu

What I wanted to do was disable the application framing and all of the alerts, whilst at the same time writing the logs to a network location and preserving them for analysis. So I changed the settings to those below

PersInfo preferences modified to save logs silently

Naturally, I was hoping that these settings mapped directly to Registry keys, because then I would be able to use AppSense Environment Manager to deploy them to the users as they launched their session. Thankfully, they write quite predictably to HKEY_CURRENT_USER\Software\AppSense\PersInfo. Don't you just love it when settings are that easy to prognosticate? :-)

PersInfo Registry values

In case you didn't know, you can simply export a Registry key directly from regedit.exe and then import it into AppSense Environment Manager for processing. First of all export the Registry key in the normal fashion by right-clicking the target key and choosing Export. This will create a file with the familiar .reg extension.

PersInfo registry export file

Now, we can open Environment Manager and set these values up as Registry Actions. First, however, we need to ensure that PersInfo is started every time the user logs in. We can easily achieve this with an Execute Action in the Logon trigger, provided naturally that we've downloaded and extracted PersInfo to a place the user can access!

An EM Execute Action to launch PersInfo at user logon

Now, we can add a Process Started Action for persinfo.exe to apply the required Registry entries. You could put this in the Logon trigger after the Execute Action, but by using the Process Started trigger we can make sure the Registry entries are there even if the PersInfo application is closed or crashes and needs to be relaunched mid-session in some way.

Process Started trigger node for PersInfo

You import a Registry file by using Actions | Registry | Import A Registry File. This will open up a window from which you can use the Import File button to select the .reg file you exported earlier.

The EM Registry Import window

This window is a little unintuitive as you only check the boxes if you want to delete the Registry keys, rather than Set them. It would be nice in a later version if this allowed you to maybe select Set or Delete from a drop-down box instead. So in this case, to Set the values, simply leave the boxes unchecked and click OK.

Now you will see that the relevant Registry Actions (both for creating the keys and the values too) have been imported into your configuration.


Now, naturally, is the time to save and deploy your configuration. Once this is done, we can log on to the endpoint and see if PersInfo is running silently and writing logs to the required location. Indeed it is - we can see the little green icon at the bottom, and read our logs from the network location. Excellent!

PersInfo running in silent mode

Now obviously there are caveats to this - especially the fact that running PersInfo in this way means there will be an extra process running for every user. If you didn't want that, you could simply provide a shortcut to PersInfo for the user to run as directed, and then import the Registry settings as required at Process Start. There's also the possible issue you could eat up lots of disk space if you run this constantly, so some sort of management of the log files is probably required - deleting logs over a certain age would be a good idea.

But anyway, I found this to be a good way to maintain visibility of any possible Personalization issues - hope some of you may find it useful!

Bootnote

Can I just say a quick thankyou to the people who emailed or Tweeted messages of support whilst my missus was in hospital with sepsis last week? It wasn't a very pleasant experience and I am glad to be back to the normality of technical stuff :-) Thanks again.

Case study - ensuring user doesn't have multiple AD group memberships using AppSense Environment Manager

$
0
0
Recently I was giving a presentation with some AppSense pre-sales guys regarding desktop challenges and AppSense DesktopNow. Probably the most rewarding part about using AppSense software is overcoming the challenges that you see in particular enterprises by leveraging it. What makes the DesktopNow suite so good at this, and this was something I mentioned in my presentation, is the native integration with VBScript and PowerShell that allows you to extend the possibilities of what you can do with it. So when I came across another interesting problem this week, I thought I would do a quick blog post on it to show how you can use DesktopNow to overcome these challenges.

The issue I was confronted with in this case was a client with a single-image desktop who wanted to deploy three distinct departmental desktops from the same image. All of the applications would be installed into the base image or packaged through App-V, and then made available to the user based around their Active Directory security group membership. For instance, call centre users would receive a locked-down desktop with access provided to their required applications and nothing else, but the same desktop image would also provide back-office users with a completely different set of applications and a much more relaxed set of restrictions. Obviously this was a job for Environment Manager and Application Manager combined - Environment Manager to provide access to the required applications and lock down parts of the user interface through Group Policy, and Application Manager to secure the other applications should the users be able to break through the sandbox.

The particular challenge, though, centred around the fact that access to the specific desktops was provided by AD security group. Personally, I'd have preferred this to be done by OU membership, as a user can only be a member of one OU at a time, and therefore couldn't inadvertently be in two of the OUs and have two sets of desktop settings pushed down to them. However, because the AD OU structure was undergoing a refresh, this wasn't what the client wanted to do. Also, there is the consideration that an OU lookup requires communication with a domain controller - whereas AD security group membership can be done "offline" using the local security token, a feature which is essential to AppSense EM working quickly.

A User Group Condition showing the "LSA Supported" suffix, indicating that offline checking is available

Conversely, the User OU Condition has no offline checking

So we were left with the situation that we wanted to make sure a user, at logon time, was not a member of more than one of the "desktop groups" set up in AD. If they were a member of multiple groups, two sets of policy and configuration settings would be effectively merged into each other, resulting in at best, a messy-looking desktop, and at worst, allowing users access to applications and files that they shouldn't be allowed to.

What we decided to do was implement a check at logon for the group memberships, and if a user was a member of more than one of the groups, to pop up a message advising them to contact technical support, and then log the user out.

Checking for multiple group memberships

This sounds like it should be easy enough using the User Group Condition, yes? Fortunately it is...you just need to do a bit of nesting to ensure that the user matches several Conditions rather than just one.

First of all it would make sense to check if the user is a member of the target group, so that you won't be doing any unnecessary Condition checking


Then, if the check passes for Application_Group_1, we need to nest some more Conditions inside this one, but this time checking if the user isn't a member of the other groups


Just so you're clear on what I'm getting at, these Conditions should be nested like this so that all of them need to be satisfied


Once we've established that the user is a member of the first group and not a member of the second and third ones, we then need to set some sort of flag to mark the user as such. I'm going to use a Registry value for this - whatever flag you choose is up to you. Nest the Action for the flag under the last Condition so that it is only set when all of the nested Conditions match


Now for the fiddly bit - recreating the above for the other two groups. A bit of cut and paste might help you out, along with a bit of quick editing :-) The finished section should look like this


The only thing you will have to remember to add is a Logoff Action to remove the Registry flag (if it's a Registry flag you're using). You don't have to worry about this for Session Disconnects because a user won't update their security groups if they disconnect and reconnect their session, it is only at logon that the security groups could change, so if the flag is there, it only needs to be removed at logoff.

Popping up a warning message

I'd love it if Environment Manager had some sort of Message Box functionality - but at the moment it doesn't (feature request!). So we're going to use a scripted Action. Now, normally I prefer to use PowerShell over VBScript wherever possible, but after a bit of digging, it seemed that the msgbox function in VB was vastly more straightforward than anything available in PS. However, as I am determined to better myself, PowerShell-wise, I doggedly stuck with it and eventually came up with something that worked.

At logon, we will use a Registry Condition to check if the flag exists


and if it doesn't, which would indicate that a user is a member of more than one of the groups (or none of the groups - which would again be a cause for concern and remediation), then we need to call a Custom Action to pop up a message logging them out.

The PowerShell I found that worked for me was this

$a=new-object -comobject wscript.shell
$b=$a.popup(“Your user account appears to be a member of multiple desktop groups. This will result in the provision of incorrect settings and unreliable application availability. Please contact Technical Support on x0000 to rectify this problem and quote the error 'MULTIPLE DESKTOP GROUPS'. This session will now be logged out.”,0,”Duplicate AD group memberships detected!”,0)

This isn't the native way to do it, though. Thanks to Michael B Smith (@essentialexch) for the education below

[Reflection.Assembly]::LoadWithPartialName( 'Microsoft.VisualBasic' ) | Out-Null

function InputBox( [string]$prompt, [string]$title, [string]$default )
{
     ( [string] ( [Microsoft.VisualBasic.Interaction]::InputBox( $prompt, $title, $default ) ) ).Trim()
}

function MsgBox( [string]$prompt, [string]$title, [int]$buttons )
{
     [int]([Microsoft.VisualBasic.Interaction]::MsgBox( $prompt, $buttons, $title ) )
}

$vbOK                  = 1
$vbCancel              = 2
$vbAbort               = 3
$vbRetry               = 4
$vbIgnore              = 5
$vbYes                 = 6
$vbNo                  = 7

$vbOKOnly              = 0
$vbOKCancel            = 1
$vbAbortRetryIgnore    = 2
$vbYesNoCancel         = 3
$vbYesNo               = 4
$vbRetryCancel         = 5

$vbCritical            = 16
$vbQuestion            = 32
$vbExclamation         = 48
$vbInformation         = 64

$vbError               = ( $vbOKOnly + $vbCritical ) ## this is mine and mine alone (not a standard value)

$vbDefaultButton1      = 0
$vbDefaultButton2      = 256
$vbDefaultButton3      = 512

$vbApplicationModal    = 0
$vbSystemModal         = 4096

$vbMsgBoxSetForeground = 65536
$vbMsgBoxRight         = 524288
$vbMsgBoxRtlReading    = 1048576

So, with that learning curve out of the way, we should now have a Custom Action that presents the user with a message to respond 'OK' to.

Logging the user out

I was going to call this from PowerShell too, but then realized I was falling into one of the traps I spend a lot of time railing against - overcomplication! Why call a logoff routine from PowerShell when I can do it natively from Environment Manager?

Indeed, the simplest thing to do is simply use the logoff.exe command, handily able to be called directly from Environment Manager


So now the set of Actions that check the user's group memberships and respond (if necessary) should look like this (notice I've used a Reusable Node, but unless you need to call this in multiple locations a standard node should do)


Testing!

All that's left to do now is check that this behaves as expected. First I log a user in that is a member of one desktop group, and everything works normally. Next I add the user to a secondary desktop group, and this time when I log in I see this


As soon as I click 'OK', a logoff initiates. I'm a bit narked that the desktop (extremely briefly) shows before the logoff kicks in, but this is something I can live with - there is no way the user can interrupt the logoff process, so that's a result all round.

Summary

The point of this post is not to provide a solution to a common problem. It's to demonstrate that AppSense DesktopNow can easily come up with a solution to whatever problems you may encounter in your particular environment.

Especially, the key part here is the integration between native and custom (scripted) EM Actions. Before EM supported PowerShell, I frequently found myself calling out to external files that then had to be maintained and updated, giving myself a solution that didn't feel self-contained. Now that the console supports PS directly, you can easily customize solutions to specific problems that the native Actions can't fully achieve themselves.

Anyway, I hope this little walkthrough is useful to some of you out there!

AppSense Application Manager 8 FR 7 allows deployment of configurations through Group Policy

$
0
0
AppSense seem to be trying to highlight and enhance the flexibility of their product lines at the moment, and this is something I am all for. You don't have to necessarily perceive the DesktopNow suite as a direct competitor or alternative to other technologies - as most of you are aware, the answers for many enterprises lie in using various complementary technologies together to produce the right solution for your needs. I blogged recently about integrating AppSense Environment Manager with Citrix UPM - today, we will see that AppSense has given us the capability to deploy Application Manager configurations from within Microsoft's own Group Policy Objects, allowing you to roll out AM configurations in the same way you would Software Restriction Policies or AppLocker settings. In short, we leverage the power of Group Policy to take advantage of the extra features of Application Manager.

Why would you do it this way?

That's as good a question as any to start with. Well, using Group Policy to deploy AM configurations removes the dependence on a deployment infrastructure. So you wouldn't need to use the Management Center, or SCCM, to handle the distribution of the configuration to your endpoints - you'd simply offload it into Active Directory itself. This significantly reduces the complexity of your AM deployment, and also allows you to use the same console as you would do for your other Group Policy Objects. Even if you're just licensed for Application Manager, this still entitles you to use the Management Center feature of DesktopNow, but that necessitates a separate security model and a second console. If you want to tie the deployment of AM configurations directly into your existing Group Policy infrastructure, this is a very neat way to do it and streamlines the solution by a sizeable chunk.

I'd also steer clear of labelling this as an "SME-only" kind of solution - I've seen larger enterprises where this could certainly be a value add as well. In some cases, Application Manager is used exclusively for management of device-based licensing, and having to use the Management Console certainly adds to the unwieldiness of narrow-scope deployments such as this. Direct GPO integration would be a good idea in these cases too.

Installing the new features

In order to take advantage of this feature you will have to download and install the new 8 FR 7 Application Manager software (while you're on, you might as well take advantage of the upgrade to Management Center 8 FR 5 as well).

Application Manager doesn't have any back-end components, so to upgrade the AM instance, you simply need to do the following:-

  • Download the new software from MyAppSense.com
  • Install the upgraded Application Manager Console in all necessary locations


  • Install the upgraded Application Manager Documentation in all necessary locations


  • Load the upgraded Application Manager Agents into the Management Center using the Package Library Add Package function


  • Open your existing 8.x configurations in the upgraded Application Manager Console, and save them under a new name to make them 8 FR 7 configurations
  • Assign the new agents and configurations to your Deployment Groups


Did I just say simple? Maybe that's not strictly true :-)

NOTE - if you upgrade the Management Center to 8 FR 5 while doing this, don't forget there is a Management Server database update required also. So when you've run the installers on each Management Server, don't forget to run the Management Server Configuration Tool on one of them to perform the schema updates


Working with the console

Now, when you open the Application Manager 8 FR 7 Console, you will notice a few new features. Such as this


Yes, that's a long overdue Sort feature for the Group Rules. Not particularly broad in scope, but still. Can we have a Search feature now please, like Environment Manager has Find and Replace?

There's also a much fuller Regular Expression support, which is good news for those randomized filenames I always tend to find myself dealing with.

Also I noticed on the ribbon menu, there is now a Preferences button (which may have been introduced earlier, but I've only just noticed it) which has this option


which should be good news for those of you who use App-V, ThinApp or other packaging methods to provide your consoles to your administrators, as you can now deselect the splash screen and save valuable app launch time.

Anyway - I am digressing a bit here. What we are interested in is the capability to save within Group Policy. Now, to do this, you will need the Remote Server Administration Tools installed on the endpoint you are running the Application Manager Console on (here's a link to the Windows 7 version). If you're running on Windows XP x64 or Server 2003 x64, apparently this is not supported, so I wouldn't recommend running them from there, but x86 XP and Server 2003 should be fine as long as .Net 1.1 and GPMC are installed. If you're an idiot, like me, you can spend ages searching for the Windows Server 2008 R2 RSAT, and then remember that you simply add it as a Feature from within Server Manager :-0


Once you've installed the Remote Server Administration Tools or added the GPMC as a feature, you can open a configuration up and observe that we now have an additional Save As function


followed by a domain selection dialog


Naturally it goes without saying that you will need the necessary rights to create, edit and save GPOs into your AD. Any user account that already deals with GPOs should be sufficient to use this function.

The console is a little unintuitive here as it seems to be initially suggesting that you need to save the configuration into a pre-existing GPO (in which case I would wonder if it would append to the existing GPO or overwrite all of the settings), but luckily right-clicking on your target OU gives you the option to create and link a new one


Then you simply need to give it a name


and it's at this stage you will find out if your account has the required rights or not :-)


Once we've rectified that error, it will Save without issue, and you can now open a configuration from Group Policy using the same dialog


Sweet! Now our configuration will exist as a GPO in the location of \\<Domain Controller>\SysVol\<domain.fqdn>\Policies\<guid for GPO>\Machine\AppSense. Don't forget that you will be subject to the usual replication period, so don't expect it to appear instantly if you have a large or sub-optimal AD setup.

Processing, processing order and merging

The AM configuration GPO will only apply to Computer objects within the target GPO. The usual processing order applies, but if you have multiple AM configuration objects applying to a single object, the Endpoint Configuration Merging feature will take effect. I've yet to put together a post on this (my apologies), but for now, you can read about it in the AppSense documentation.

If you look in the GPMC directly, I would recommend changing the settings for this GPO to User Configuration Settings Disabled, if the GPO only contains AppSense AM settings, because they are Computer settings only


This will speed up the processing time slightly.

You can't edit the GPO directly from GPMC though, you will need to ensure that you use the Application Manager Console for this. The GPMC would need to have access to the ADM files required, and you will see the error below trying to view the settings


I haven't tried to edit the configuration directly to see what might happen if you do it through the GPMC rather than the Application Manager Console, but given the amount of corrupted GPOs I've seen in my time, I can probably hazard a guess as to the worst possible outcome. Suffice to say you may want to tie down the GPO access through the GPMC to limit it to people who can also access the configuration via the Application Manager Console.

Summary

So, what we have here is a nifty little new feature in Application Manager that opens up the scope even further for deployment options. In my world, I can see this as an ideal way to put Application Manager configurations out on a live environment in audit mode, so I can gather information whilst still creating the AppSense infrastructure. But that's just the first use case I can come up with - I've got no doubt this has got quite a bit of mileage for lots of different situations. Application Manager, despite being a part of the DesktopNow suite I've got a lot of time for, still has a lot of niggles in the console that annoy me - having to specify hundreds of devices by name for Device Rules still narks the hell out of me, even though there are a few VBScripts kicking about to address this - but this addition makes me hope that there is going to be a lot of change for the better in AM in the very near future. Let's hope these new features are just the start.

Using AppSense DesktopNow to set permissions (Registry and filesystem)

$
0
0
Let's go back to basics a bit today....I still get a lot of email complaining about various limitations in the AppSense DesktopNow products, emails that to be fair would be much better directed at the Feature Request section of MyAppSense.com, given that I am not a product developer or in any way affiliated with the company :-) Anyway, one that crops up occasionally is people complaining about the fact that they can not set permissions from within AppSense Environment Manager, either on a filesystem or Registry level. You can do it by invoking the legacy binaries or PowerShell, so to save myself sending the same email out again next time I get a query along these lines, I have opted to knock together a (very) quick blog article.

EM versus Group Policy

Microsoft fanbois tend to quite quickly jump on the "you can do it in Group Policy" bandwagon - a bit too quickly, in my opinion. Sure, you can do it in Group Policy, but it's part of the "old" area of Group Policy, in Policies | Windows Settings | Security Settings, and everything in here tends to feel a bit creaky and inflexible. But the very fact that you can do it in here is why I think it would be better done in EM natively - because then you'd be able to take advantage of Conditions and Triggers to set them. In Group Policy land, this isn't even part of Group Policy Preferences, so you don't get Item-Level Targeting on your side.

Setting Registry permissions in GPMC - feels very Windows 2000

Of course, the advantage EM has if that you need to go to a scripted solution, you can call the script natively from within the console and also use Conditions and Triggers to fire it only in specific circumstances. Once you get around to scripting it via Group Policy, you are more or less restricted to calling external scripts from your Logon/Logoff and Startup/Shutdown trigger points provided by the Policies | Windows Settings | Scripts part of GP. There aren't any conditional options available here either - so you're left to build the conditions into the external scripts as well, increasing time and resource needed to put it together.

However, don't think I'm a rabid anti-GPO fanatic - I use Group Policy all of the time and I'm a big fan of it. I just think EM has a couple of advantages over it.

So first we will take a look at the "legacy binary" approach

Legacy binaries - in or out?

A while ago - once even on this blog - I was an unwitting advocate of calling legacy binaries from external scripts in AppSense Environment Manager. Obviously when I realized the error of my ways, I was quite annoyed. Suffice to say, if you're going to go the legacy binaries route, it's more sensible to call them directly from AppSense EM Execute Actions rather than write a batch file, maintain it externally and call out to it from EM.

Pick your tool

Microsoft have given us a few tools down the years for managing permissions - remember cacls.exe and xcacls.exe - and also for Registry permissions - regini.exe being the one most referenced. However, with the advent of Windows Server 2008 onwards we now have the much-improved icacls.exe for filesystem permissions. On a Registry level, the legacy binary I've always preferred is subinacl.exe, although annoyingly it doesn't ship as part of Windows. If you can't drop it into your base image, then you may need to use some sort of function to get it onto your endpoints.

Annoyingly, this is an area where Group Policy seems a lot more robust than AppSense. When performing a Computer Startup Action to do a File or FolderCopy, AppSense EM can be a little flaky, especially when said files are coming from the network. You can use a "Wait for network" Condition such as referenced here to get around this (unless your problems are permissions-related), but it doesn't alter the fact that when you set this sort of file copy up in Group Policy Preferences, it works straight away without any fuss. I guess it's another demonstration of the idea that you should use GP for managing devices and EM for managing the user - but I just think it's a bit vexatious that the functionality for this is in Environment Manager, but just doesn't seem to work to its full capability.

Group Policy Preferences showing EM how to do a machine-level file copy without any drama

Create the Actions

Anyway - once you've got the tools available on your endpoint, it's now time to start altering the permissions using them. The key to this is using Execute Actions using the Parameters section to specify the switches you would normally use on the command line, as shown below

Running icacls.exe from AppSense EM

Subinacl.exe, the swiss army knife of permissions binaries, running from EM

You can alter your permissions in any Trigger or from any Condition you desire, which is the whole beauty of EM. Obviously, though, a native File Permission or Registry Permission Action would be much appreciated!

So next let's quickly look at the scripted options, for those who want to be cool and hip :-)

PowerShell Registry permissions

The PowerShell to set Registry permissions is quite straightforward, so you can import this straight into a Custom Action of type PowerShell

$acl = Get-Acl HKLM:\SOFTWARE\AppSense
$rule = New-Object System.Security.AccessControl.RegistryAccessRule ("JRR\jrrtest","FullControl","Allow")
$acl.SetAccessRule($rule)
$acl |Set-Acl -Path HKLM:\SOFTWARE\AppSense

Which works beautifully first time out!

PowerShell file permissions

And doing the file permissions is just as straightforward(ish)

New-Item -type directory -path C:\Test
$Acl = Get-Acl"C:\Test"
$Obj = New-Object system.security.accesscontrol.filesystemaccessrule("JRR\jrrtest","FullControl","Allow")
$Acl.SetAccessRule($Obj)
Set-Acl"C:\Test"$Acl

Use this or similar in a Custom Action of type PowerShell, and you should be good to go.

Summary

So, if you want to do file or Registry permissions from inside of Environment Manager, you can do it either of these two ways. Until AppSense decide to give us a native Action for both of them, which I am hoping they may have on their radar. But don't feel shy about going and filling in a feature request on MyAppSense to give them a bit of incentive to do it.

How to use AppSense Environment Manager to reverse user restrictions for support purposes...and to generate executables to use as Triggers....and to make a shortcut run only with elevated rights

$
0
0
That's a hell of a title right there...but this little problem I've just been trying to rectify sent me down a path that I've wanted to cover for some time. Namely, how to create yourself "empty" executables that you can use as Process Started triggers - whether initiated post-logon, or even by user interaction. If you haven't come across this requirement yet, I will try and explain why it is a good idea, but first, let's look at the actual client issue that set me off down this route - and that also, like some sort of bonus feature, introduced a way to "force" shortcuts to run with elevated rights.

Supporting users mid-session

Most of you will be familiar with using Group Policy Objects (within Environment Manager, or without) to secure and tie down the applications and interface in your enterprise. However, one PITA part of this is trying to support logged-in users with the restrictions in place. I can remember this conundrum when I worked in support, and I bet most readers out there are familiar with it. How do you, as a support person, access the C: drive, for instance, when the user is restricted from getting into it via a GPO?

You could just get them to log out and log in as yourself, if the problem is specific to the machine, but sometimes the user might be midway through running some vital report, or it may just be too time-consuming to actually wait for them to log off or reboot - and you might just need to recreate and/or test the problem/solution as the user themselves, rather than running as an admin. What I used to do, back in my support days, was actually connect remotely to the Registry and delete the offending GPO entries, do my support work, and then run a gpupdate. However, this relies on a few things - a) the Remote Registry service, b) being sad enough to remember where the GPOs reside in the Registry, c) not coming across the GPO "tattooing" issue, and d) the assumption that a gpupdate would be enough to reinstate those restrictions (if you're deploying GPOs in EM, gpupdate won't help you put them back).


No local drives available - a real pain for a remote support person trying to troubleshoot a user session

The idea we had seemed elegant and easy enough to begin with - simply provide a shortcut that the user can initiate which allows the connecting administrator to reverse the restrictions in question. Simple?

Triggers, triggers, triggers

This is where it starts getting a bit interesting. As we all should know by now, AppSense Environment Manager has a wide variety of Triggers - Logon, Logoff, Process Started, Process Stopped, Network Connected/Disconnected, Session Locked/Unlocked, etc. and I even hear rumours there may be some additions to this in the future. If we are going to set up some sort of user- or admin-initiated Trigger for custom use, it appears quite clear that the most suitable one for usage is Process Started.


Process Started nodes - always handy

Now herein lies the issue. You could just use something extraneous like WordPad, but that has an associated user interface so would look pretty unprofessional and rubbish - even if you used EM to terminate it straight after launching. You could pick something from the OS that doesn't get used much and that won't display an interface (not for long, anyway) - maybe something legacy like nltest.exe - and use that, but that throws up some other problems. For starters, you'd have to whitelist the application through Application Manager (or other product), and do you really want users possibly inadvertently trying to reset secure channels, whether it is secured by privilege or not - and anyways, would your security team sit for it? And if Microsoft suddenly decided to deprecate nltest.exe, you'd end up back at square one anyway. You could maybe use a script and match the parameters for your Process Started node - but again, this feels messy and open to abuse. What we want is something that is smooth and compliant, and none of the above ideas really feels anything like this. Something that, maybe, generates a custom executable on the AppSense-enabled endpoint that doesn't actually do anything (besides compile and pause for a second or two), which we can then use as a Process Started Trigger?

Compiling executables on-the-fly?

Some of you out there are probably thinking that you've seen a solution like this in action from AppSense Professional Services, and you'd be right. In fact, without seeing this myself, I never would have thought of this as a solution, and would have ended up using some dire fudge like the methods I just discussed, so deserved credit has to go to the AppSense technical teams for bringing this concept to the table. The APS guys have some excellent code written by Jorrit van Eijk which does this job perfectly through PowerShell, no less, but that's his own work and I'm not going to stand on the shoulders of giants by stealing it - but big credit is due to him for coming up with this idea and successfully implementing it, so thanks for the inspiration Jorrit :-)

So, the idea is, we will create two custom executables on the endpoint that we can leverage in for support purposes. Why two? Well, once a support person has accessed the user endpoint, remotely or locally, they will launch one executable to instigate "admin mode", and a second to put the user restrictions back once finished. But obviously, before we can do this, we need to generate the two executables themselves, so that when we create shortcuts to them, the shortcuts will be valid.

Sidebar - other uses of this concept

Just taking a lateral step for a second, another excellent use of this concept is as a "Post-logon offload trigger". Sometimes you have Nodes within your Environment Manager configuration that take a long time to process, and you want these Actions processed at logon time - but they slow the logon down too much so it is unacceptable to the user. By creating a blank executable in this way, and putting a link to it in HKCU\Software\Microsoft\Windows\CurrentVersion\Run, you can then use a Process Stopped trigger to run the slow-processing Actions "after" logon has finished, as far as the user is concerned (i.e. after the icons have appeared), but still as part of the entire logon process. As we've already crammed three subjects into the title for this post, I will visit this concept in a later article, because as it stands I think I'm putting too much information into this one for starters :-)

Creating the blank executables

This is the really challenging bit! I'm no coder, not by a long stretch of the imagination, but this is where the power of community really comes to the fore. I will have to say thanks to Michael B Smith, Ken Schaefer, Manuel Santos and Aakash Shah over on the MyITForumNTSysAdm mailing list for the pointers and help they provided in this section.

Now, I had various suggestions about how to do this, but the most promising seemed to be to use either VBC.exe or CSC.exe (either the Visual Basic or C# .NET compilers), mostly because they seemed the simplest. I then made the informed choice to use C# because I was under the impression Visual Basic died years ago :-) So what I now required was a C# source file to go with the compiler, which could then spawn an executable onto the endpoint.

However, my idea with this was to make it have no dependence on the copying across of network-based files, so that it would be equally at home on a remote endpoint with the required configuration on it. At this point, though, I really need to point out that I've only tested this on x64 Windows 7 and Windows 2008 R2, so if you're trying to put this out to endpoints beyond that scope you will need to check and test thoroughly. And naturally, you should be checking and testing thoroughly in any case - I'm not going to be responsible for any screw-ups as a result of this and you can be sure ignoring due diligence will get you a frosty response from support, should you break something severely enough to invoke them. There, disclaimers are done, let's crack on ;-)

What we need to do is create a node to run at Computer Startup that will create the source file and then compile the executable. So, to begin, we will create a Node in this Trigger and perform a simple File Condition check - that is, to see if the file already exists or not


If it doesn't, what we need to do now is create the C# source file locally to the endpoint. How can we do this? Well, essentially the source file is a text file, and we need it to contain the following text, so that our executable simply pauses (for two seconds, but you can configure longer or shorter as necessary) and then exits

class rte
{
   static void Main() {
System.Threading.Thread.Sleep(2000);
   }
}

The trick is, creating the source file with the correct formatting - text is easy, and could have been done with some simple command echoing. But as is becoming something of a motif lately on this blog, it's PowerShell to the rescue. I've sometimes despaired of the decisions Microsoft make with regard to their products, but PowerShell brought some much-needed standardization and unification to command-line management of a vast array of software. We're going to leverage it again here, creating a Custom Action to create the source file for us (.cs extension) - note the text below has wrapped for readability, and the text after "$env:programfiles" is an entire line (see the image underneath if you don't understand what I mean)

$ProgramFilesPath = $env:programfiles
"class rte`r`n{`r`n`tstatic void Main() {`r`n`t`tSystem.Threading.Thread.Sleep(2000);`r`n`t}`r`n}" | Out-File$ProgramFilesPath\LaunchSupport.cs”

Or, alternatively, for those of you who like this less complex than I originally have put it together, you could use this bit of code from Michael B Smith, who has simplified this part quite a bit

$ProgramFilesPath = $env:programfiles
@”
class rte
{
                static void Main() {
                                System.Threading.Thread.Sleep(2000);
                }
}
”@ | Out-File"$ProgramFilesPath\LaunchSupport.cs"

Here's the screenshot, just to keep you right if you're using my first script


Also note that you will need to set the Options for the Custom Action as so


and also don't forget as we are writing to %ProgramFiles% which is a high-privilege operation, you will need to set the context to SYSTEM for the Action to execute in


So, now you have an Action that creates the source file, so now we need to call another Action - an Execute Action this time - that compiles the executable from the source file. Obviously, this will be dependent on the source file, so it should be nested inside the preceding Custom Action. The full path we are using is

%SystemRoot%\Microsoft.NET\Framework64\v4.0.30319\csc.exe /out:"%ProgramFiles%\AppSense\LaunchSupport.exe" /t:winexe "%ProgramFiles%\launchsupport.cs"

This may need changing slightly on different systems, but you get the gist, you call CSC from the .NET folders as relevant for your OS. You could stick it into the PATH variable if you want it to be really slick, but we haven't bothered to move it.


Note the parameters we are using for the Execute Action - /out tells us where to put the file, /t:winexe creates a Windows executable rather than a console executable, and the final one specifies the source file. Again, you will need to ensure that the Run As is set to SYSTEM


There's one final thing to do after this to tidy up, and that would be to remove the source file from the endpoint, keeping things neat and simple. Again, this Action should be nested under the preceding one to create a dependency


This would be as good a time as any to do a bit of testing, so we will save the configuration, deploy it to a test endpoint and then restart the machine (because we need to invoke the Computer Startup trigger)

And hey presto! We now have a new program in the AppSense folder. Just to note, there is a reason why I've chosen to dump these files in the %ProgramFiles%\AppSense folder, and that's because that location is allowed by default in Application Manager configurations, meaning there are no whitelist updates required.


Now, we did say we needed two executables - so let's repeat this process to create EndSupport.exe as well. Note that this is the same executable, it runs for two seconds then exits, just we are creating it with a different name.


Phew....that's this bit done then, the executables are created on-the-fly on our AppSense-enabled endpoints when they start up, there is no dependency on maintaining files in a file share anywhere, and they are allowed to execute by Application Manager without issue. What's next?

Creating shortcuts to the files (and making one Run As Admin)

Now for a much easier bit...creating shortcuts to these files for the user. Really I should have left this bit blank as an admin exercise for all of you out there ;-)

So some nice familiar Action creation, very straightforward - or is it?

Actually no. What we want is to create a shortcut, first of all, to turn on our "admin mode". But if this admin mode lets GPO restrictions be reversed, then surely we need some sort of protection to stop the user invoking it unsupervised? Kind of like - well, UAC. In fact that's exactly what we'll use.

If you're not using UAC, you will have to think of another way around this, but I simply can't see any reason not to use it these days, even on shared platforms. I often turn off the elevation for printer drivers, but that's about it - I think User Account Control is a great feature.

There are options for Run As Administrator on shortcut Properties, both on the Shortcut | Advanced tab and Compatibility tab


but there is a problem with this...they affect only the shortcut, leaving the underlying application free to be abused. What we need to do is adjust the program itself so that it always runs with UAC elevation on. The way to do this is through the Registry

First we create the shortcut itself on the Support Tools area of the Start Menu


and then we set a Registry value to ensure it always runs with the UAC elevation prompt


Note that this value is for Windows 7/2008 R2 only - on Windows 8 the value is now ~RUNASADMIN (thanks to Harry Mavromatidis for that tip)

We don't need UAC for the "End admin mode" shortcut, so we can create that normally


Reversing the restrictions

Next we need to use a Process Started trigger to reverse the restrictions that we've put in place. For purposes of this demonstration, we are reversing only a single Group Policy Object - the restriction on the C: drive (User Configuration | Admin Templates | Windows Components | Windows Explorer | Hide these specified drives in My Computer). However, in the real world, you will need to reverse each policy object that restricts your administrators. You can make this simpler by keeping all your applied GPOs in one node and then copy them to another, before editing them all to do the opposite of what you originally intended.

First we set up the Process Started node


And then simply create a dependent Action that reverses our target Group Policy Object


After this Action, we will need to "refresh" the desktop to force the new Group Policy settings to apply to the shell process. There's probably a better, more subtle way of doing this in code - please can someone point it out to me - but for the moment, I've resorted to using taskkill.exe to terminate and restart the explorer.exe process. This will necessitate two Actions (one to terminate, one to restart) and they need to be nested. Also, the Execute Action that runs taskkill.exe (the first one below) will need to Run As SYSTEM.


You will also need to whitelist taskkill.exe for your users from within Application Manager, if you're using it, after setting this up.

Also, MAKE SURE the second Execute Action (the one that relaunches Explorer) DOESN'T have "Do not execute children of this action until the process has exited" selected. This smells slightly bug-like, but if you select that I found that a Windows 7 machine wouldn't log off until I killed the process, so handle it with care.

After these Actions are set up, our whole configuration example should now look something like this


Are any of you wondering, as I was, whether the fact that the executable will be initially launched as a different user will affect how the Group Policy is applied in the first child Action? After all, the Group Policy object refers to an HKEY_CURRENT_USER setting, doesn't it? Well, I thought it might, but my testing reveals that the ADMX Action applies in the context of the logged-on user, so all is well and good. Whether this is a feature of Environment Manager or Group Policy or even UAC, it's certainly handy - I was envisaging having to drop a shortcut onto the Public desktop area, lock it down with NTFS, and then reverse the NTFS permissions to allow the user to see it. However, as it works in the current configuration, I can swiftly move on :-) (although if anyone from AppSense can explain why this behaviour is so, I'd certainly like to know)

Reinstating the restrictions

When the support person has finished doing whatever they need to do to support the user, obviously these restrictions need to go back. So we will need to create another Process Started node, this time pointing to our second executable that we dropped on the endpoint


Then we create a dependent Action that puts our original Group Policy Object(s) back


And then we do the same trick with explorer.exe to terminate it, which I won't bother showing the screenshots for, given that they are identical to the example in "Reversing the restrictions" above. But don't forget to run the first taskkill.exe Action as SYSTEM.

And now the configuration example should look like this


Now a few may have had the thought that these sets of Actions - "reverse restrictions" and "apply restrictions" - might be good to put in Reusable Nodes, so you don't have to keep calling them....but hold that thought. It's OK to do it like that - as long as you don't mix Computer and User Configuration settings in the same Reusable Node. I know this specifically deals with User settings - but I just thought I'd mention that in case anyone trips themselves up with it.

So let's recap what we've done so far. We've created our "empty" executables at Startup, we've created shortcuts on the Start Menu for them at logon time, set the first one to run with UAC elevation only, and then we have set up Process Started triggers for both of them to reverse and reinstate the restrictions of our GPOs when run (although this doesn't specifically have to be restricted to GPOs - you can override any settings, including permissions and Lockdown, with this method). Time to test?

Testing time!

Let's take the AppSense Bigot blog up a notch - let's do some video and bring ourselves with a bang into the 21st century :-) Actually this is just a quick and dirty video without commentary, but it's better than screenshots (at least it would be, if I could get my passwords right first time). Basically it demonstrates a user logging on to an RDS server who can't access the C: drive through My Computer - but then we reverse and then reinstate the C: drive restriction using our shortcuts and executables we covered above.


As you can (hopefully) see, it works a treat - although the termination of Explorer makes it a little choppy, but that's something a support user can easily put up with.

Summary

Wow....a lot of information covered in this post. Maybe a little too much...but I just wanted to get these interesting functions out there.

I will do a follow-up article - hopefully by next week - on the Post-logon Trigger I talked about, as that's a really useful function with quite a bit of mileage that a lot of you may find useful.

So, I hope you've learned some handy tricks here. Certainly forcing a shortcut to run UAC elevated and creating your own executables to use as Process Started/Stopped Triggers are two highly useful things. As to reversing the GPO restrictions - it was certainly a requirement at my current project but I'm not sure whether it will have a great amount of application at other places. However, it's another good demonstration of how to overcome specific client requirements using AppSense DesktopNow.

Credits

As I mentioned in the body of the post, massive credit has to go to Jorrit van Eijk of AppSense for coming up with the idea of spawning the blank executables, and for having code to do it that it is vastly better than my cack-handed implementation :-) And thanks to Michael B Smith, Ken Schaefer, Aakash Shah and Manuel Santos for offering me help with this whole solution and helping me with my rudimentary PowerShell!

Creating a "Post-Logon Trigger" in AppSense DesktopNow Environment Manager

$
0
0
In my previous article to this, we discussed the creation of "empty" executables that do nothing but pause for a specified number of seconds. I also mentioned a technique I use quite a lot, the "post-logon offload trigger", to create a custom trigger point that can be executed at logon time, but which gives the user the impression that the logon has actually finished before this trigger point is reached. Obviously this technique is best used on desktops (physical, virtual, or published through RDS or XenApp) - applying this to published applications doesn't really have a lot of relevance, although you could use it if you had something that needed to kick in after the application was already launched.

Application of this concept

First let's run through some possible use-case scenarios. This technique is all about bringing down the logon time, and logon time (along with application launch time and application responsiveness) is one of the metrics your average user uses to determine how good his session is.

Imagine you've got a complicated routine running in Environment Manager that involves a lot of processing. A common one is printer mappings. If, like many enterprises out there, you have complicated subnet-based printer mappings, you may be doing a lot of Condition and/or Group checking at logon time. You can use the Query function or some expanding of the various Conditions to narrow it down a bit, but you can't get away from the fact that a lot of Condition checking takes up a lot of processing time in the wider scope of things.

An example of a complicated printer mapping node that performs a lot of subnet Condition checking

For the purposes of this example, let's assume we want to move a complicated printer mapping section - such as that shown above - into a Post-Logon Offload Trigger (you can call it a PLOT, if you like acronyms). It certainly should be acceptable - after all, generally a user has to open an application to print something, even if they do it from the Explorer right-click menu, which opens the relevant application and then closes it. This gives us plenty of time to map the printers in the background (relatively speaking), so that we can remove the printer processing from what is perceived to be the actual "logon" routine, yet still perform it as the user logs in.

Creating the trigger executable

This process was covered quite adequately in my previous post, but we will run through it again here to ensure this article is self-contained. Basically, we are going to compile an executable on the endpoint that we will then run using an auto-start entry, and then use the Process Stopped Trigger to initiate our new, custom Trigger.

We're going to use the C# .NET compiler to create our executable, which on a machine with the latest .NET installed (at time of writing, October 2013) should be located in this path

%windir%\Microsoft.NET\Framework\v4.0.30319\csc.exe

But before we can compile an executable, we need the source file to provide the code for the compiler.

Creating the source file

The creation of the source file can be done via your Computer Startup Trigger, or alternatively you could simply drop the source file into your gold or master image if you're using something like Provisioning Services or Machine Creation Services (or any one of a number of other technologies, in case anyone thinks I'm being a Citrix bigot - that moniker belongs to Carl Webster, and was, incidentally, the source of my name for this blog)

If you're going to do it through AppSense - which would be the best way, because it completely removes the requirement to maintain the source file on your endpoints - you would do it like so

Create a new node with an appropriate name in the Computer Startup trigger


First we're going to insert a Condition from Condition | File & Folder | File Exists to ensure that the file doesn't already exist. After all, continually re-compiling it at every restart would be a waste of processing time, and the whole thrust of this post is about cutting processing time down :-)


Let's switch the Condition to "Does Not Exist" and insert the path for our source file also


Now, we need to add an Action that will create the source file for us if it doesn't already exist, so use Actions | Custom & Execute | Custom Action to nest an Action inside the Condition we just created


Set the Run As tab to execute as SYSTEM, as this is a high-privilege operation because of the file destination we are going to choose


The code that we need to put into our source file is this


class rte
{
   static void Main() {
System.Threading.Thread.Sleep(2000);
   }
}

The key here is to change the Sleep(xxx) value to however long you want your executable to wait for after the user thinks the logon has "finished". 2000 equals 2 seconds - you can set it shorter or longer as required. Obviously, the maximum value you can use is the amount of time you think will elapse before the user could conceivably need to use any of the functions you provide in this custom Trigger, minus the amount of time it takes the Actions in the custom Trigger to run.

To get mathematical

x = y - z

where x is the maximum amount of time you can allow your executable to run for
and y is the time before the user may need any of the functions provided in the new Trigger
and z is the amount of time it takes the Actions in the new Trigger to process :-)

So we will use a bit of PowerShell provided by Aakash Shah and tidied up by Michael B Smith to insert this text into our source file with the correct formatting

$ProgramFilesPath = $env:programfiles
@”
class rte
{
                static void Main() {
                                System.Threading.Thread.Sleep(2000);
                }
}
”@ | Out-File "$ProgramFilesPath\PostLogonTrigger.cs"

which should leave our Action looking like this


Compiling the executable

The next step is to create a child Action of the Custom Action above which compiles the executable. This will need to be an Execute Action, as we are calling an existing binary, so you will need Action | Custom & Execute | Execute


The details of the Execute Action then need to be provided to match the path we mentioned earlier (unless this path has changed, best to check where your latest csc.exe resides!), but also adding various parameters

/out:"%ProgramFiles%\AppSense\PostLogonTrigger.exe" - to tell it where, and in what name, to drop the executable

/t:winexe - to create a Windows executable rather than a console one

"%ProgramFiles%\PostLogonTrigger.cs" - to specify the input source file

The "do not execute children" option also needs to be set, so your Execute Action should look like this


and you also need to ensure this Action is also set to Run As SYSTEM


Tidying up the source file

Once we've done this, the source file we've created will be redundant, so we can add another child Action to remove it by using Action | File & Folder | Delete File


set the options as so


and once again, ensure that this Action runs as SYSTEM, because removing files from %ProgramFiles% is a high-privilege operation


Now your entire node should look like this


And that's the first part finished!

Running the custom executable at logon time

The next thing to do is introduce a setting that will ensure that the executable we are creating in the Startup trigger actually runs as the user logs on, but as late as possible.

The place I've had most success with is the HKEY_CURRENT_USER\Microsoft\Windows\CurrentVersion\Run key. The Startup part of the Start Menu seems to execute later than this, but then there's the problem users may actually click on the link and initiate the whole set of Actions again, which isn't ideal.

So what we need to do is create a Node in the User Logon Trigger and name it as appropriate


And then create an Action from Action | Registry | Set Value


with the settings as shown below


This is all that's required to set this part up - this will be processed as the user logs in and execute once the shell successfully starts.

Initiating our custom Trigger

So now, when the user logs in, PostLogonTrigger.exe will run for the length of time you specified in the source file, and then exit. What we need to do is use a Process Stopped Trigger so that when it exits, our "offloaded" Actions then begin.

First create a new Process Stopped node and specify the executable path


You will then have to rename the Node to something intuitive - such as "[Post-logon offload trigger]" - as the dopey AppSense Environment Manager Console gives it a default name of "node", which is a bug they still haven't ironed out


Now you've got the Trigger prepared, you can add as many Actions as you want as children of the Process Stopped Condition. Anything that the user needs to be set at logon, but doesn't need to use immediately and/or slows your logon down, you can dump in here for processing after they think the logon has already finished!

Summary

This is a really nifty way of getting problematic Actions out of what your users perceive to be the "logon" process yet still initiated ready for the users to utilize them from their applications. Anything specifically application-dependent should obviously use the relevant Process Started trigger where possible, but I've had great success using this method to reduce logon time, especially in places where the Environment Manager configuration is badly put together, but the client are reluctant to change too much of it.

Hopefully this can really help out some people out there who aren't having much joy with their logon times. Essentially, this just delays the slow-processing Actions, but by moving it to a time where the user doesn't perceive this drag as part of the logon, it will allow users to feel their experience has improved. However, in the long run, you should really try and iron out the problem areas in your logon process rather than just hiding them behind this custom Trigger!


Credits

As mentioned in the previous article, Jorrit van Eijk of AppSense deserves great credit for the initial implementation of this that encouraged me to find my own way of doing it. And also thanks to the guys over on NTSysAdm for help with my terrible scripting skills :-)

Mitigating against threats such as CryptoLocker with AppSense DesktopNow Application Manager

$
0
0
A little bit of a change of tack today...I used to wear a security hat many years ago, so some recent news items got me thinking about some good uses of the DesktopNow software.

I assume a lot of you out there have heard of CryptoLocker - it's the ransomware from hell, because the malware writers have finally learned how to implement encryption properly. It's a choice between paying up, restoring from offsite "cold" backups (if you have them - many don't) or facing possible total loss of all your data. It's also an excellent discussion point for the merits of application whitelisting technologies - of which Application Manager is one of the market leaders, IMO.

CryptoLocker

If you haven't heard of CryptoLocker, then here are some useful links discussing this evil beastie:-


The key about it is the successful implementation of serious public key encryption - without the key, you're more or less screwed. And if the encryption spreads into your networked and backed-up files, because you're not using cold backups and/or maintaining multiple copies, then you may find yourself backed into a very nasty corner.

Of course, you could just pay the bad guys what they want - reportedly 13% of users infected are actually doing so - but I'm hoping people aren't serious about this as a recovery method. Aside from the obvious fact you're encouraging these sophisticated criminals to come up with more innovations that can cause this level of damage, how do you know they won't add your details to a list of "marks that paid up" to more precisely target these kind of things in future?

Reactive AV

Although the major AV vendors are (now) doing good detection for stuff like this, there are a couple of issues with this "blacklist" approach.

a)  You may have remote endpoints with network-connected files that haven't received the latest AV updates, for whatever reason

b)  Reactive AV is precisely that, and when new strains of the ransomware are evolving, there is a "window" during which you are vulnerable, because the new version has to be identified and added to detection

User rights management

Ensuring your users aren't administrators won't help you here - CryptoLocker doesn't need admin rights to do its thing. Any files that a user has Modify access to are potentially vulnerable once it executes.

This is a good time to start thinking about monitoring your NTFS permissions too, because if an infected user has Write access to stuff they shouldn't have, CryptoLocker may well spread to those files.

Backups

Even if you're doing your backups properly (and you need to test your restore process too!), this means that you're still vulnerable, to a degree. If the worst happens, you're going to need to do a restore - and suffer from potential loss of data, even though it won't be total.

Application whitelisting

The only way to be sure of stopping this Satanic creation is to prevent the damn thing from executing in the first place. Application whitelisting technologies - such as Microsoft's SRPs, AppLocker, or Application Manager - are what is used to achieve this. However, the traditional implementations of this, particularly the Microsoft flavours, are not popular tools in business because they are inflexible and need regular maintenance.

AppSense Application Manager is ideal for this situation because it uses Trusted Ownership to remove some of the overheads associated with maintaining Software Restriction Policies - discussed originally here, and then in slightly more detail here.

Implementing the blacklist

According to the documented process of how CryptoLocker functions, it arrives either as an email attachment with an infected link, or alternatively via a botnet mechanism (spread by the Zeus trojan). Once in, it drops an executable with a random name into the root of the user's %AppData% folder, creates a Run entry in the Registry to ensure persistence, and then searches a list of pre-programmed C&C servers till it can find one to connect to. After connection, it generates a public-private key pair and sends the public part back to the infected host.

To halt this thing in its tracks we're going to function on preventing the execution of the random executable, as without this, the rest of the nefarious deeds can't go ahead.

Application Manager should, if it is turned on with the default options, block CryptoLocker "out-of-the-box". By default options I mean Trusted Ownership and Application Access Control turned on....


....and you need to make sure that the Everyone group is running in Restricted mode, as well as not inheriting any other execution mode from other Group Rules. For instance, if you put the Everyone group down as Restricted and the OTHER group as Unrestricted, a user who is in the OTHER group will inherit the Unrestricted setting, as the least restrictive set of permissions applies in AM.


Now, the user's %AppData% folder should normally have permissions like these, where ownership is set to the current user...


...and where those permissions are inherited by subfolders...


....and if this is correct (which it will be, unless you've messed with the normal user profile settings), this is all you need to get Application Manager up and running. With SRPs, you need to explicitly disallow execution from the target folders to cover yourself (unless you've set the "only allow specified executables" policy, and that's a nightmare to administer, believe me), but with Application Manager, you can activate the protection fully with a minimum of fuss. If a user drops the CryptoLocker executable in the %AppData% folder, Trusted Ownership will block it from executing.

Ensuring existing applications can work

Of course, this is all in an ideal world, where your applications don't ever need to execute anything from folders outside of the normal scopes (%ProgramFiles%, %windir%, %systemroot%\system32, etc.). If you haven't done the required discovery process, how can we make sure we just deploy an Application Manager configuration that can mitigate against this and similar malware, just until we have time to deploy AM correctly?

In this case, we'd need to turn off Trusted Ownership. This is not recommended in general, it's specifically for a use-case scenario where you wish to mitigate against CryptoLocker quickly using AM without doing any application discovery or analysis. If you do take this approach, I highly recommend starting the application discovery and analysis phase so that you can take advantage of the advanced features of AM and provide yourself with a much more secure environment.


Next we need to configure some global Prohibited Items for the Everyone group. (NOTE - if your users are Administrators, you will need to configure this for the BUILTIN\Administrators group also, and switch the BUILTIN\Administrators group to Restricted. Really, though, if your users are local admins, you've got bigger problems that AM needs to be used to solve.)


The base settings to stop CryptoLocker in its tracks

The settings above should also cover execution from the Outlook Temp Folder - but I've known people who actually redirect the Outlook Temp Folder, by modifying the  OutlookSecureTempFolder REG_SZ Registry value, which is to be found at HKEY_CURRENT_USER\Software\Microsoft\Office\version\Outlook\Security, so if yours is redirected, you may want to prohibit execution from the redirected area too.

Note that preventing execution from these areas will also stop users running stuff like GoToMeeting and other content that they may actually need to execute to get things done. Luckily, in this case Application Manager will log up an alert to the Management Console and to the local event log telling you exactly what was blocked


This means that if you wish to allow this executable to run but prohibit all others from the same folder, you can add an Accessible Item to the relevant Group Rule to allow it


However, if you're concerned that malware like CryptoLocker may imitate software like GoToMeeting by mimicking the file name, you can secure yourself further by using other features of Application Manager to allow it to run, such as Trusted Vendors or Web Installations, but that's a bit of a bridge too far for this particular post.

A quick demo

Now we'll do some testing just to make sure that we've done everything right. Let's make a very quick video, where we will create an executable in the %AppData% folder, execute it, and then turn Application Manager on, and see what sort of difference it makes. We've already configured the Application Manager configuration as described above, and deployed it to our endpoints - I've just disabled the actual Application Manager Agent service for the start of the demo.


As we can see, execution is prohibited for the files dropped in the %AppData% folder, keeping users secure from any possible CryptoLocker infection - and more importantly, your business data!

Summary

The very basic CryptoLocker-stopping configuration is available for download here should you want to use it. Bear in mind this has most of the other security features turned off as it was intended for environments where Application Manager has not been previously used, and therefore which haven't done any analysis. If you're serious about getting value from Application Manager, you will need to do your analysis and bump up the security level. I will cover some helpful tricks to accelerate your analysis in a later post.

If you've already got AM deployed and working successfully with the default options, then you don't need to do anything - Trusted Ownership alone will have protected you from the depradations of CryptoLocker.

Application Manager is a massive help in these sorts of situations because it allows you to provide mitigation with minimum fuss and management overhead, when compared to similar software. It should also, when configured correctly, allow you to stop just about all external threats. And you should take these threats seriously, because scammers and spammers are finally starting to get slick and polished. I'm not just referring to the implementation of encryption in this case - take a look at this email-borne malware that was unearthed recently. Would your users click on it? Would you? Application Manager gives you a fine-grained, lower-admin way of stopping this sort of stuff before it can cause problems. I consider an application whitelisting tool the most vital part of any defense-in-depth strategy, because it can head so many issues off without having to rely on signature updates and the like.

And finally - things like this piece of malware should remind us that security of your enterprise is a never-ending battle. Just when you think you're on top of it, something like this has a tendency to evolve, and if you let your guard slip, it could certainly bite you where it really hurts. Application management is only one part of the whole security landscape - don't neglect any of the others!
Viewing all 178 articles
Browse latest View live


Latest Images